
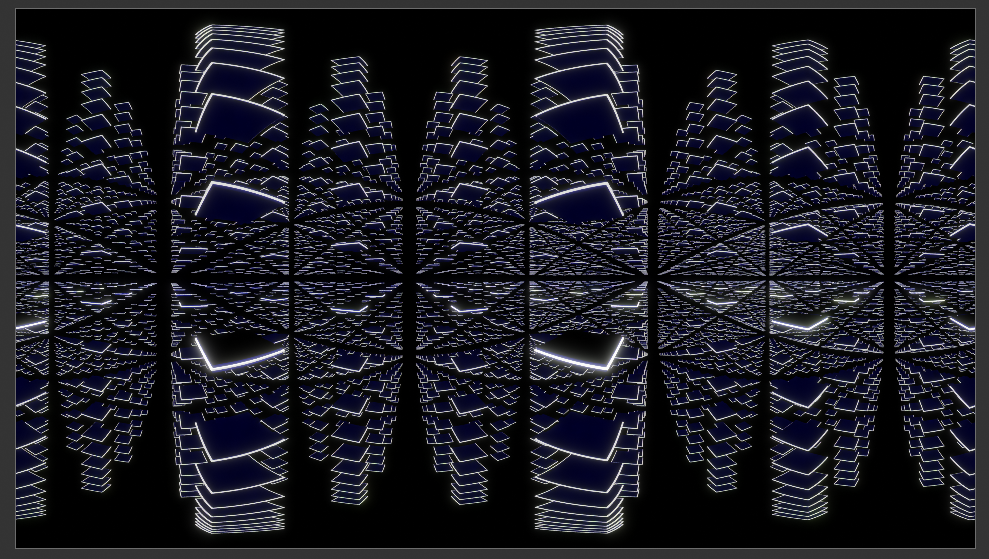
This is workflow to create a scene in Coraulis. It is done in Blender, but can be realised any similar 3D software. The first step consists in creating a “landscape”. We used the Geometry Nodes to create it, but can be done the usual way or with another software equivalently. It is then lit which can also be done anywhere else. Then the camera is animated along a path. The rendering process uses the Equirectangular 360 Camera which is built in Blender. But we can find the same camera in Cinema 4D, 3DsMax or Twinmotion. The 360 film is then recut to fit Coraulis requirements. Step by step with Blender, C4D or Max, we can create an amazing experience with plying with the context, the movements or the light.
Geometry
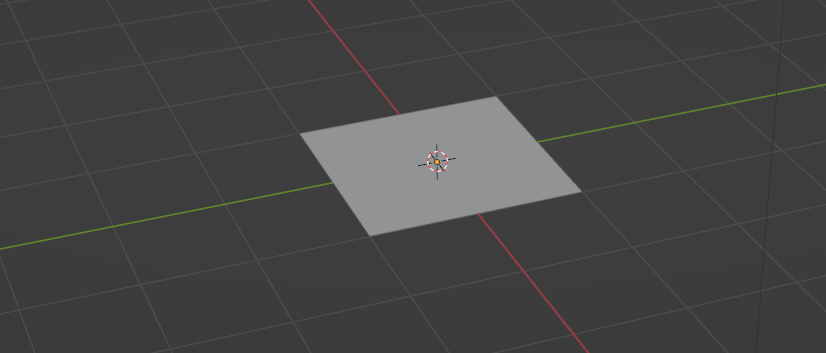
Start with the plane
Add/Mesh/Plane
Add Modifier / Geometry Nodes
Open the Geometry Nodes Window
New Geometry Node, name whatever you want, here it’s Galaxy. We’ve got two nodes.
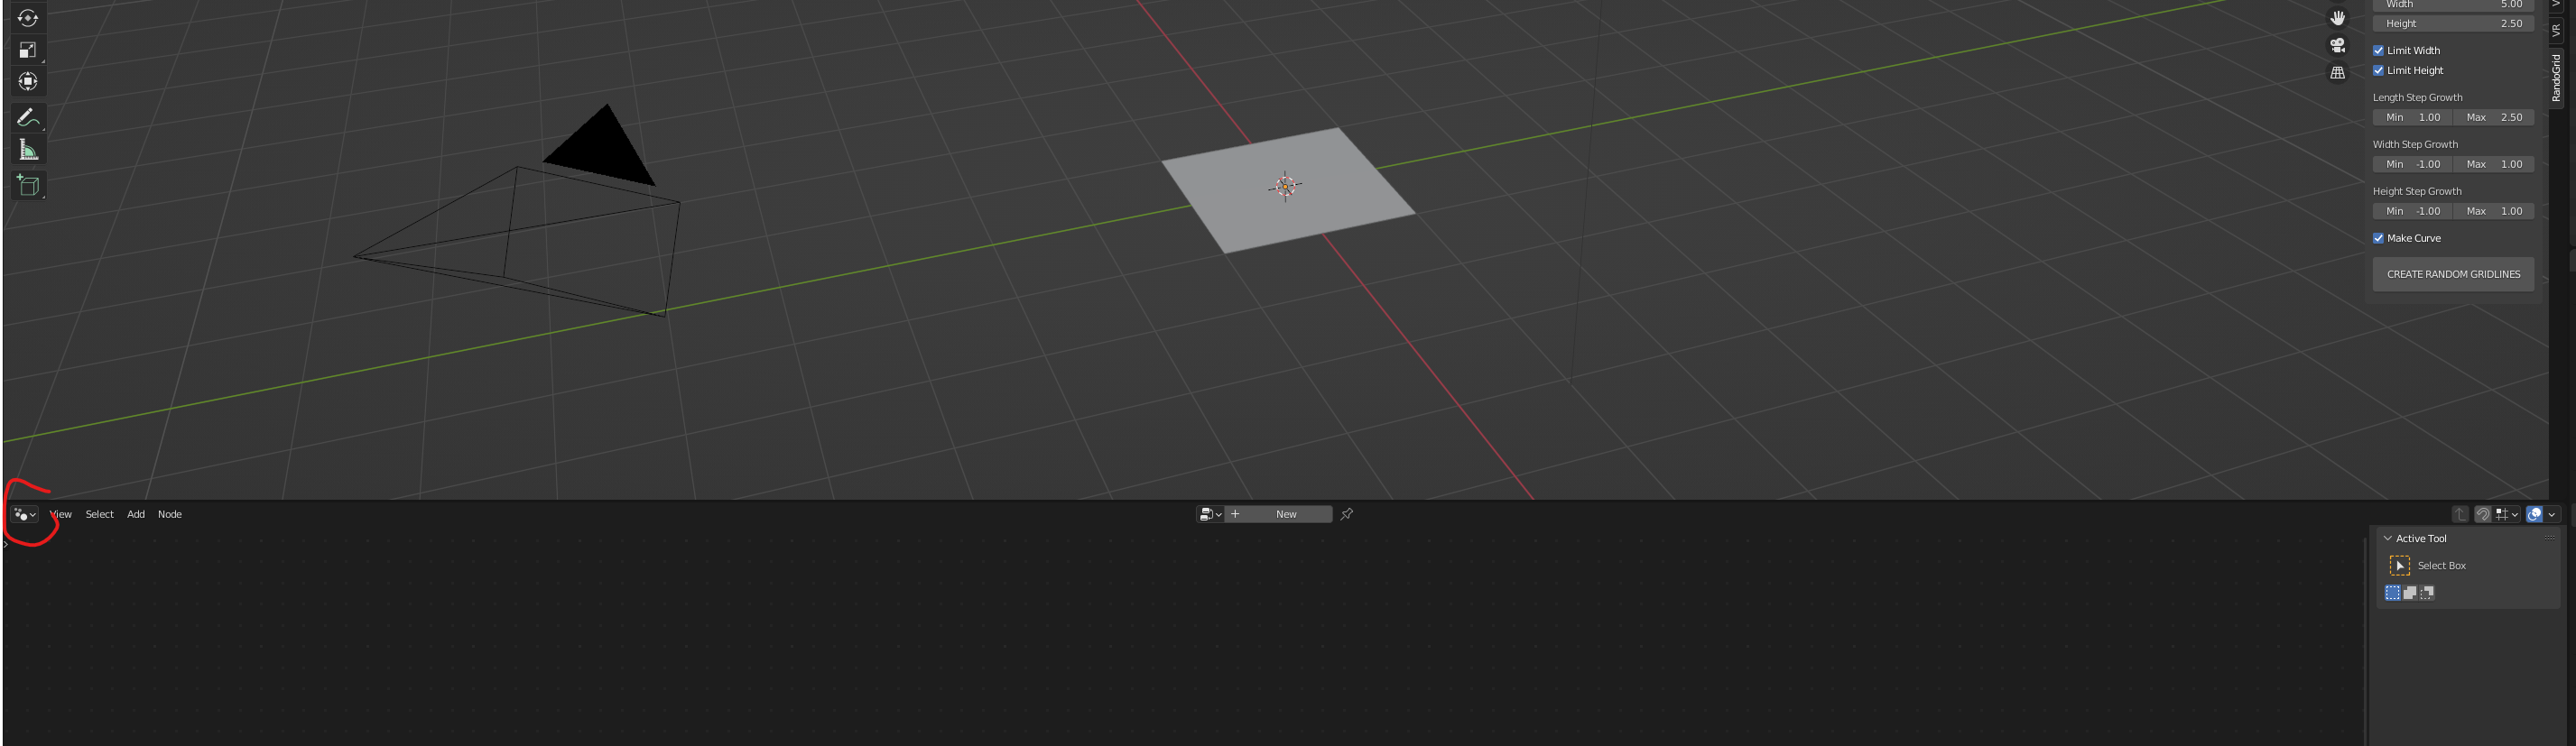
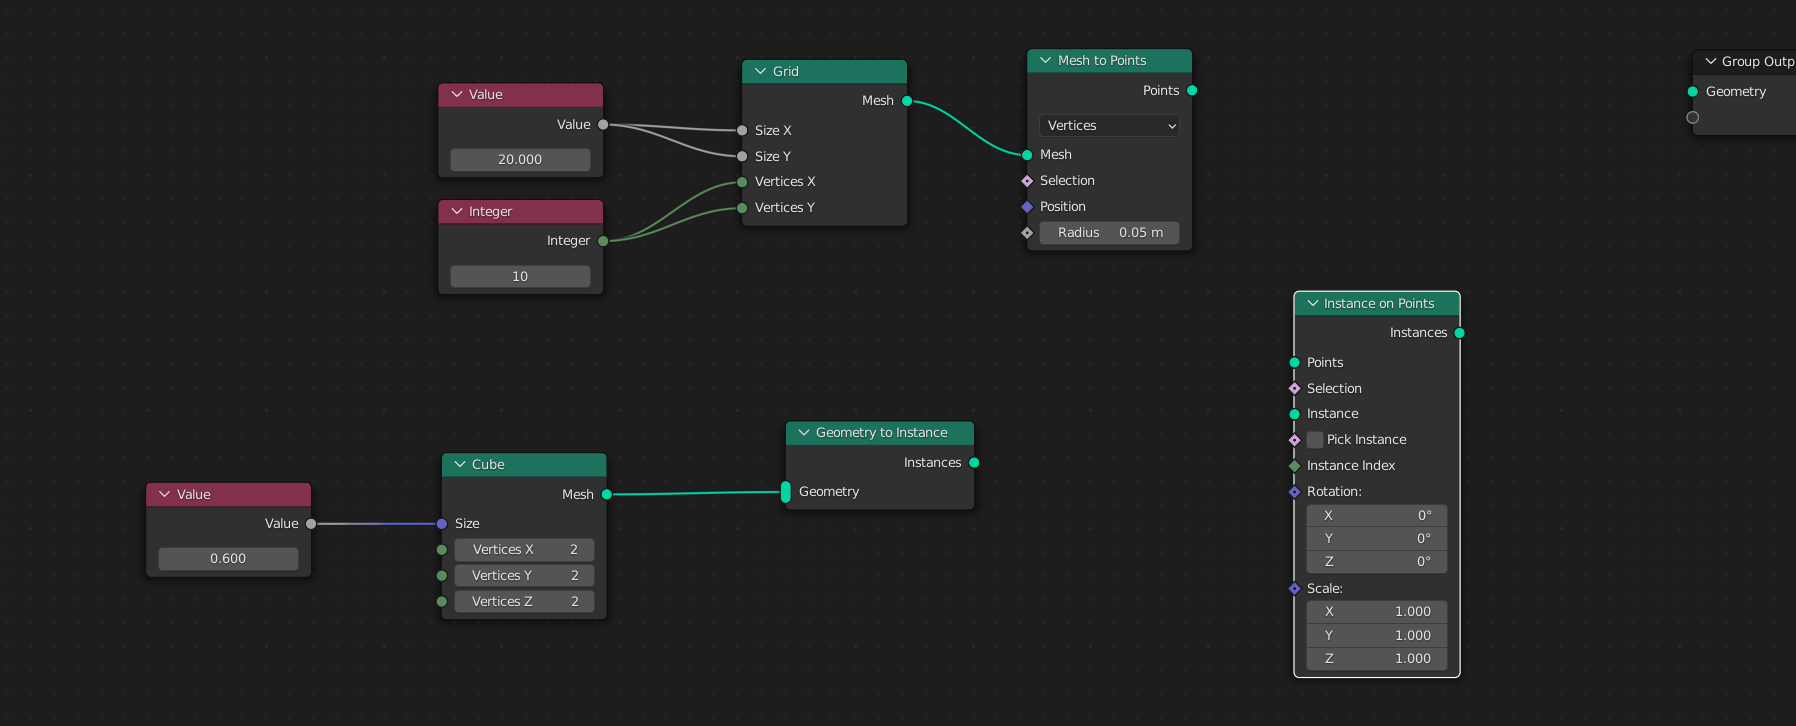
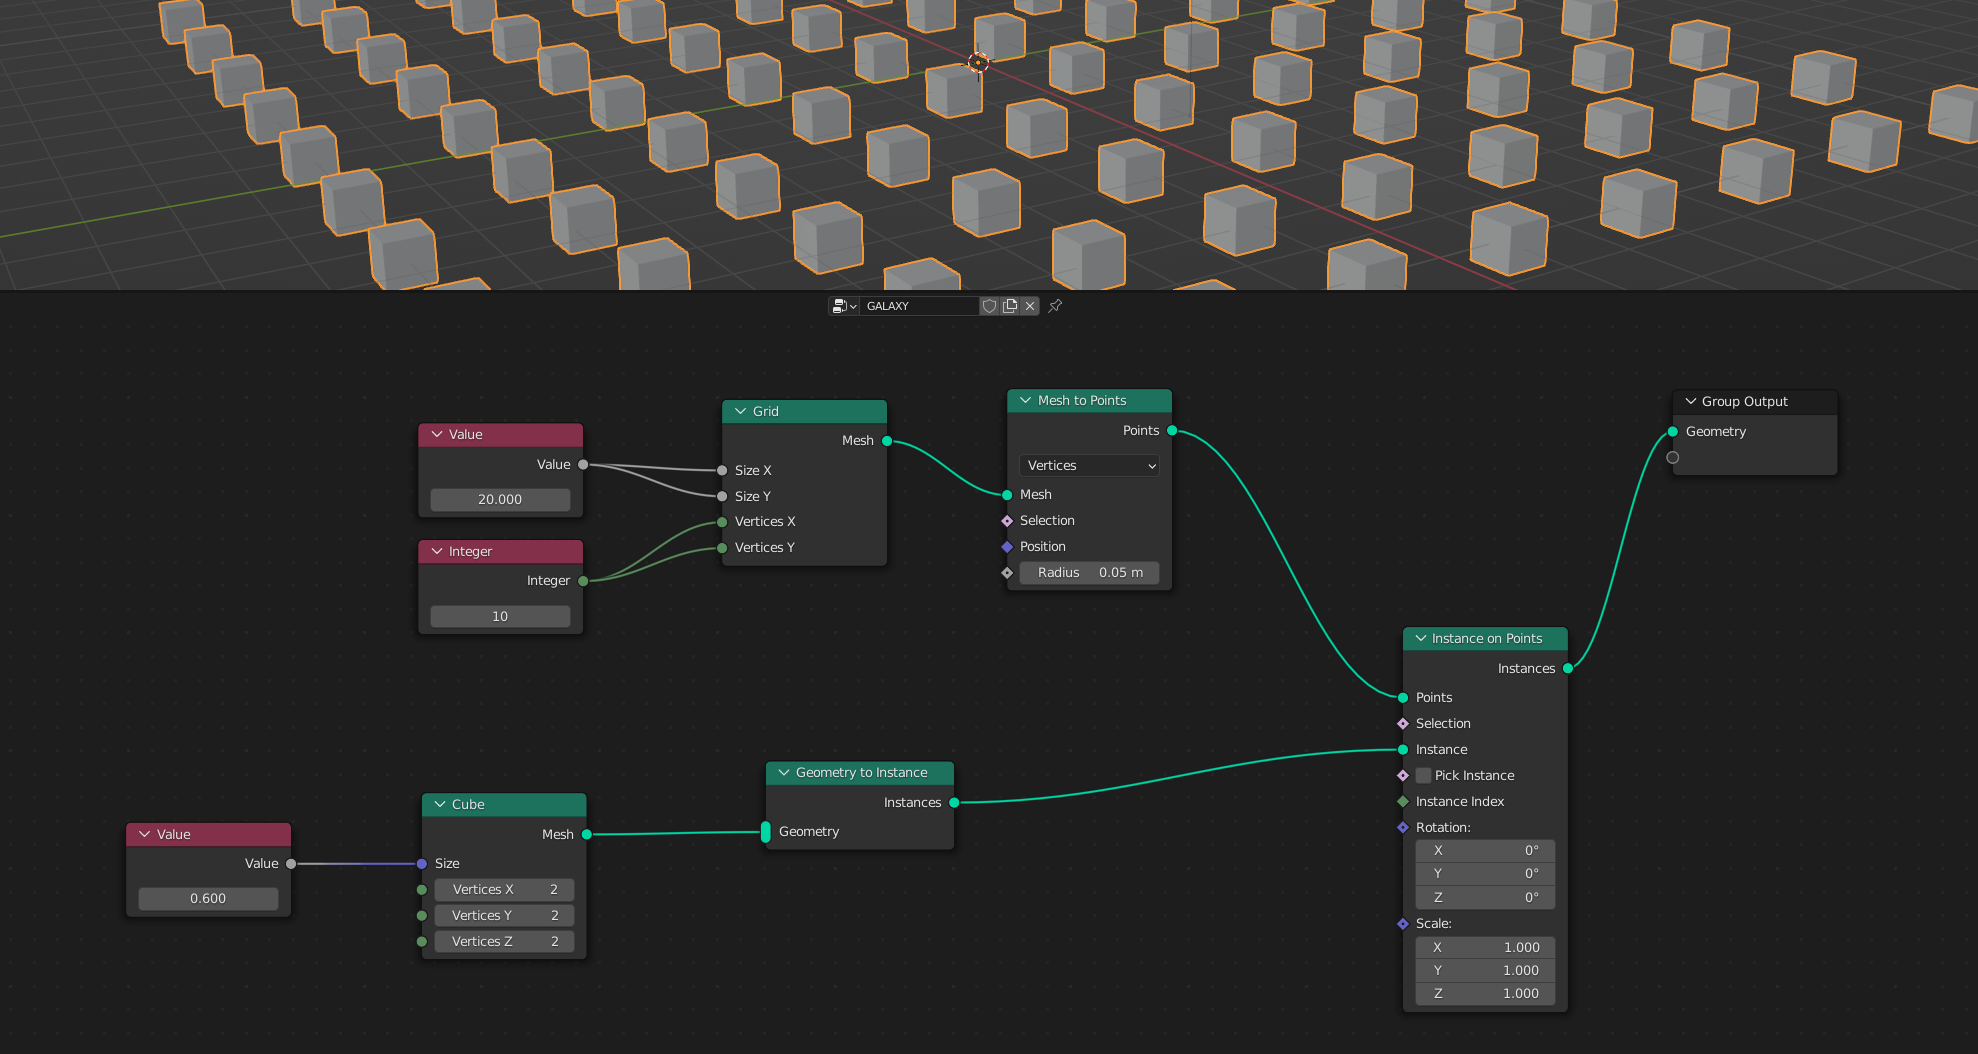
The idea will be to use a grid and then distribute objects on this grid. This is an easy way to create arrays and in our case, a kind of geometrical spatial landscape.
Go to Add ![]() / Objects primitive / Grid.; We can remove the Group Input and connect the Grid
/ Objects primitive / Grid.; We can remove the Group Input and connect the Grid
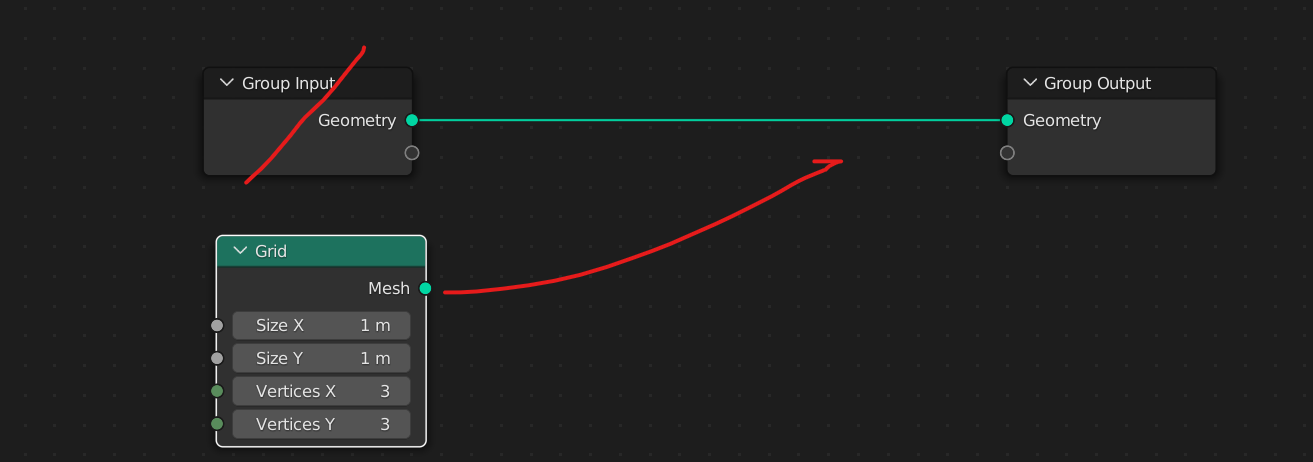
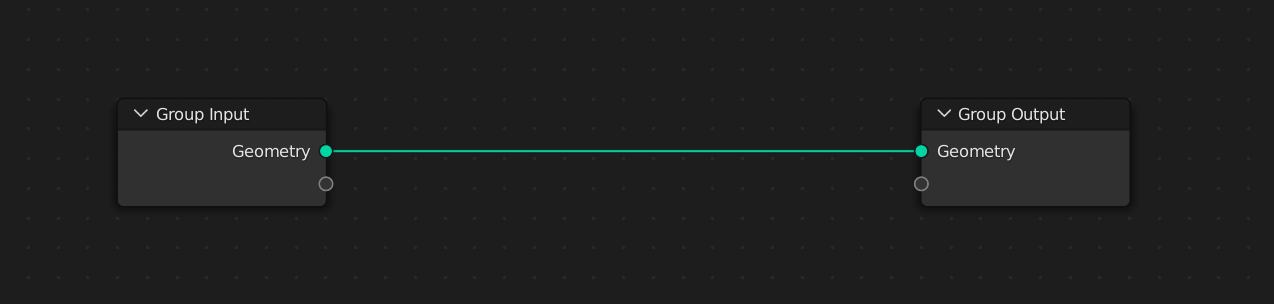
Group Output allows to visualise the result. If nothing is connect, nothing will be visible. Note that the first plane has disappeared. It is just there to hold the script.
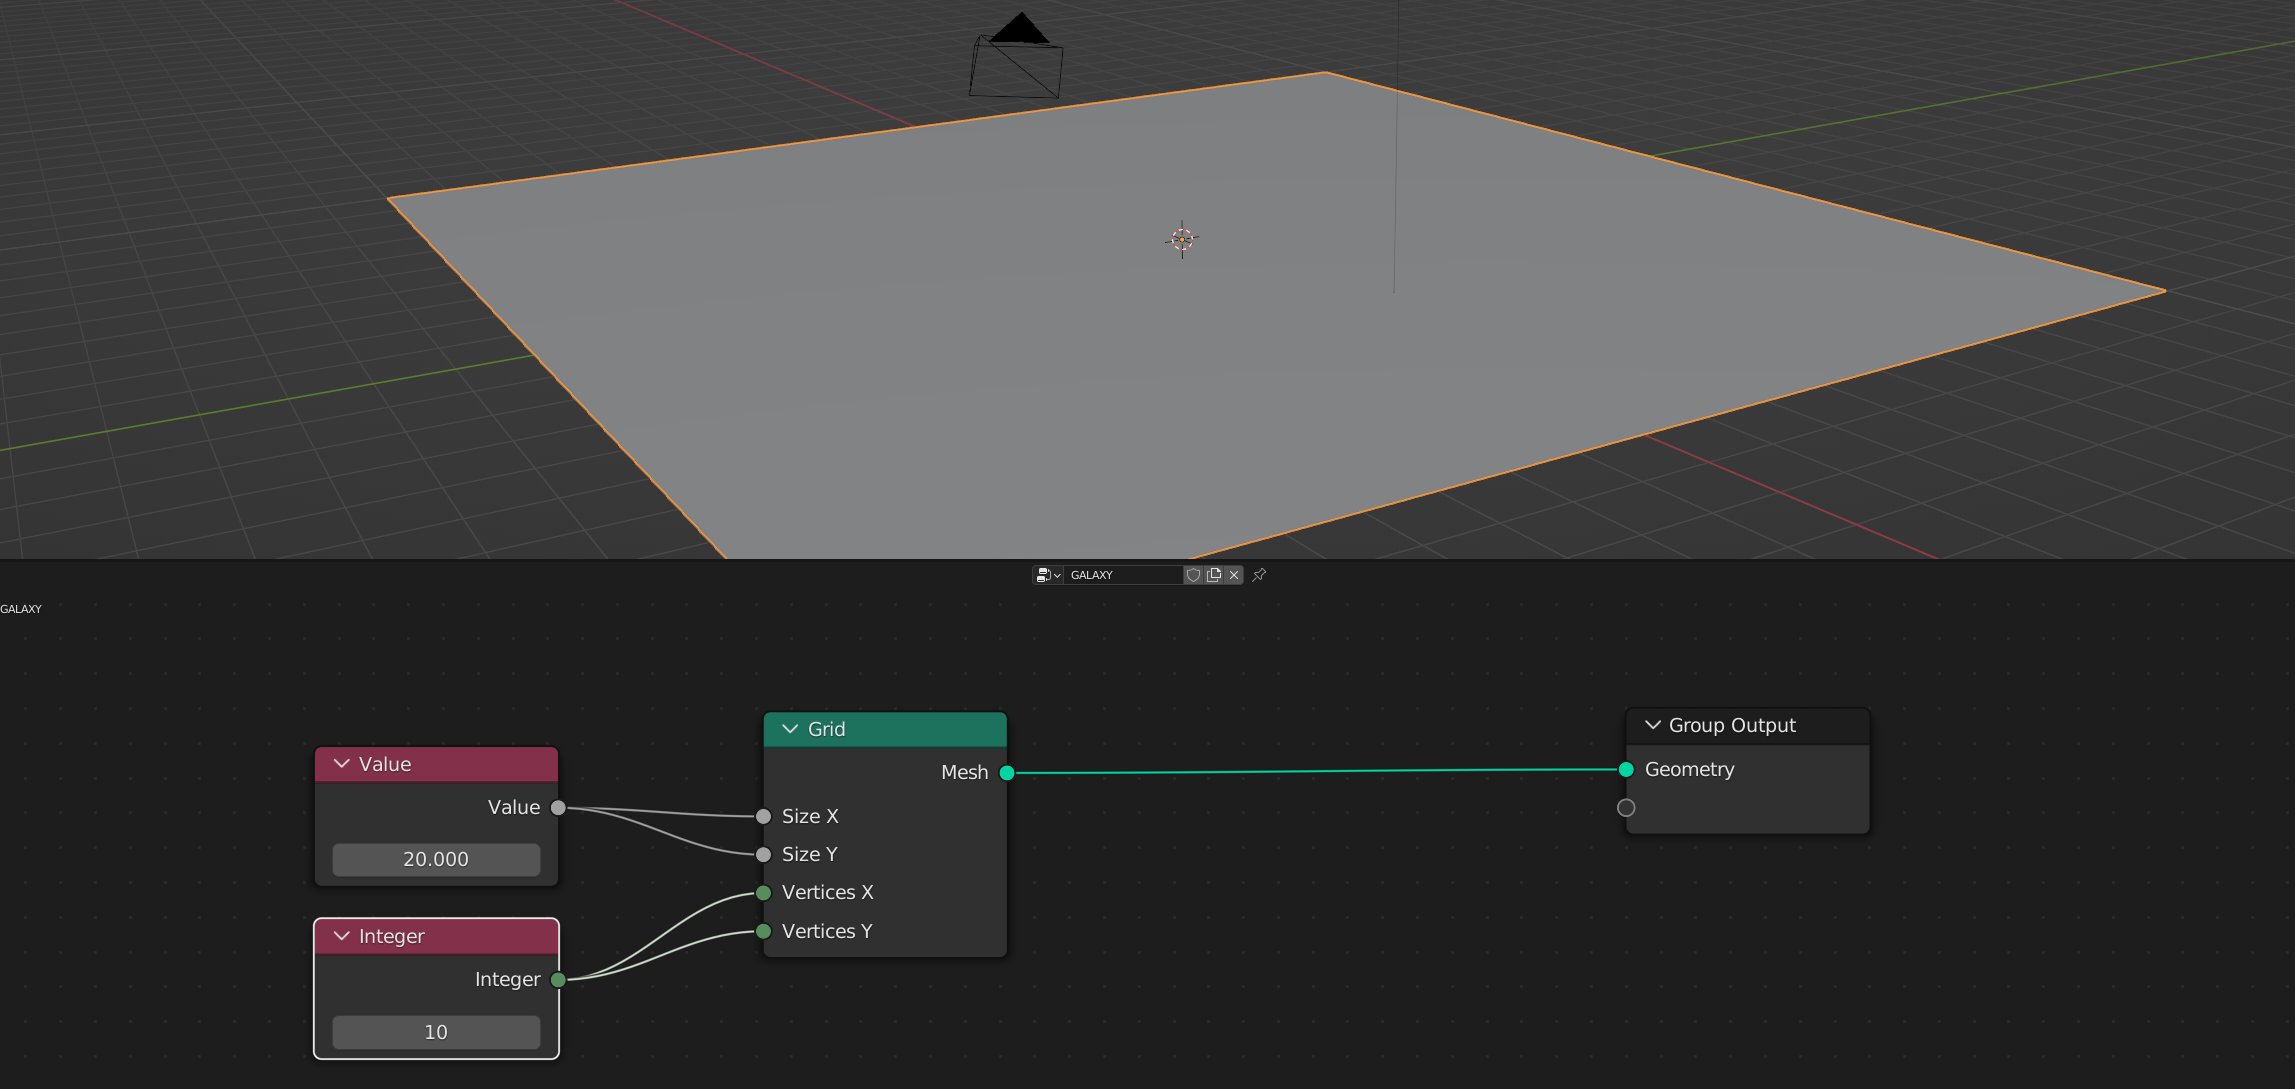
Let’s change the values of our grid. It can be done directly in the tabs or by adding a Value Box or/ and an Integer Box. Add/Imput/Value , Add/Imput/integer
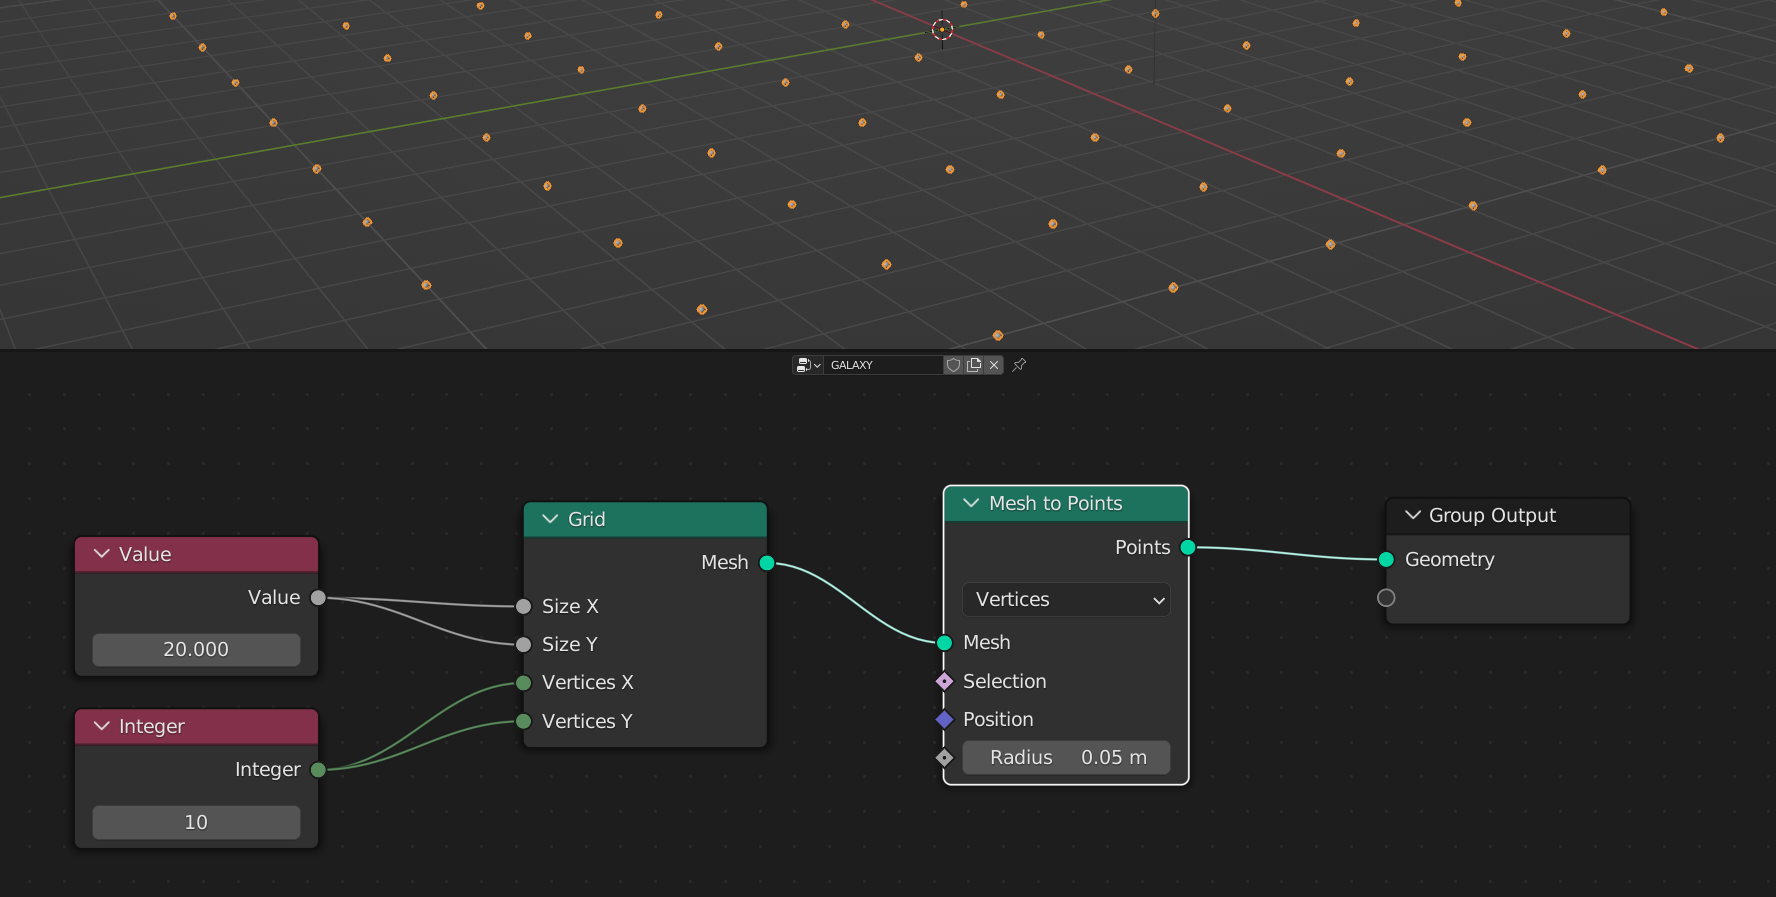
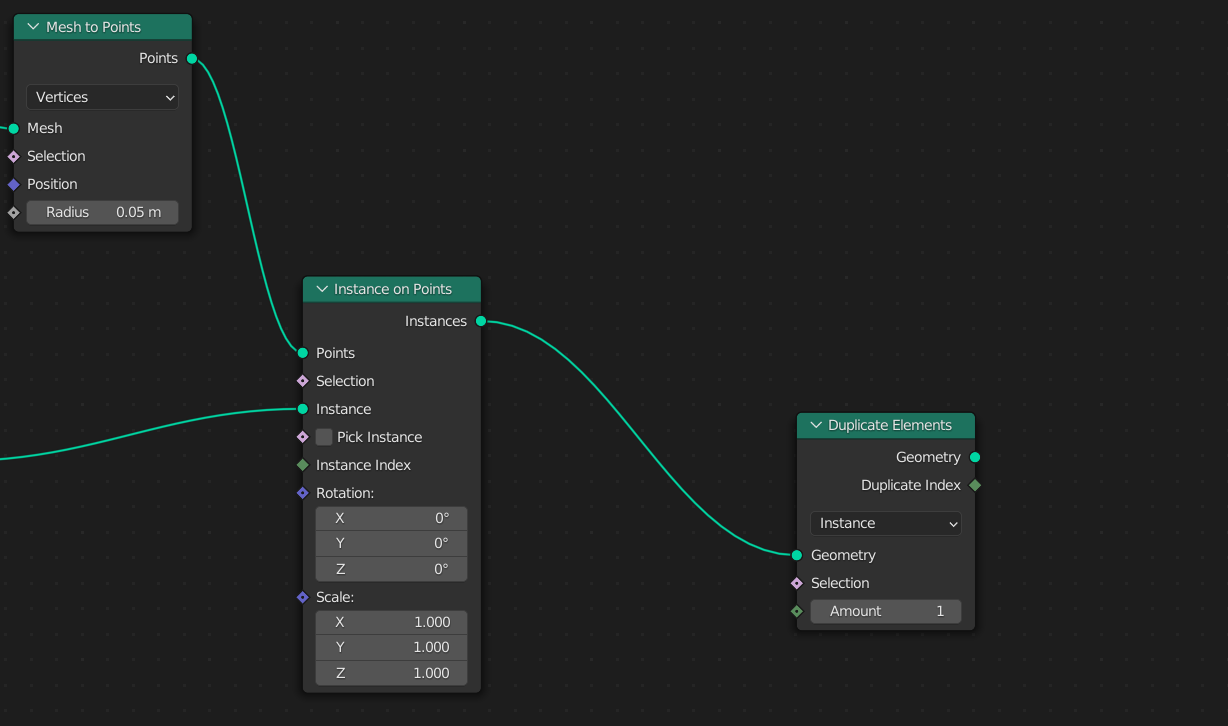
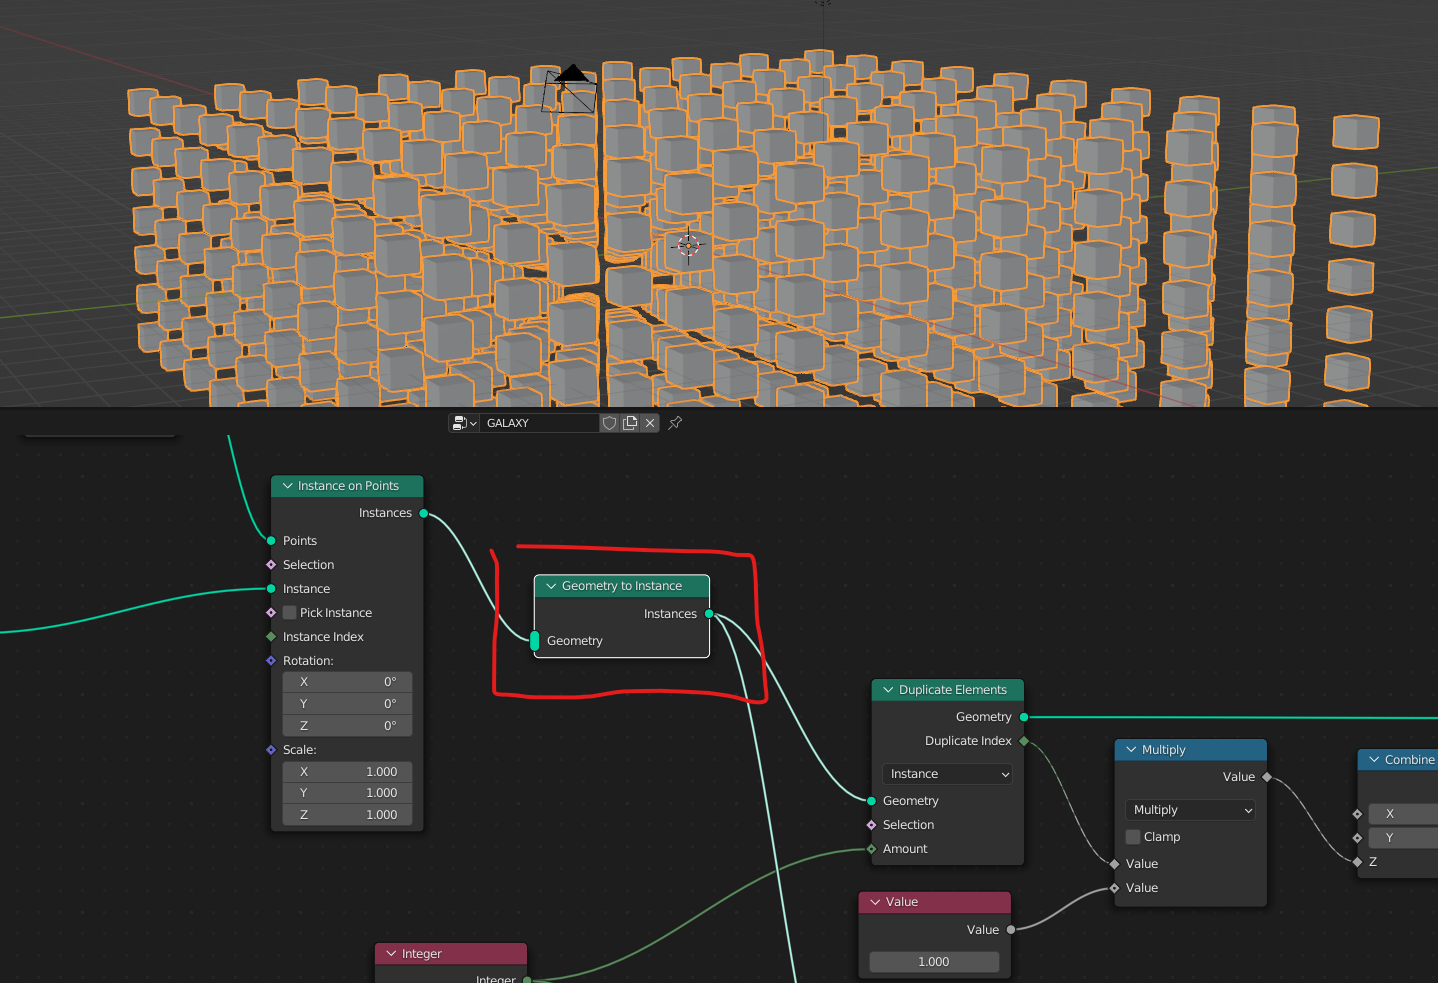
Now we want to put an instanced geometry at each point of the grid. Add a Mesh to Points dialog box. By just dropping the dialog box on the cable, Blender makes the connexion.
Now, we will hang a cube to each point of the grid. We first create a Cube, define size.
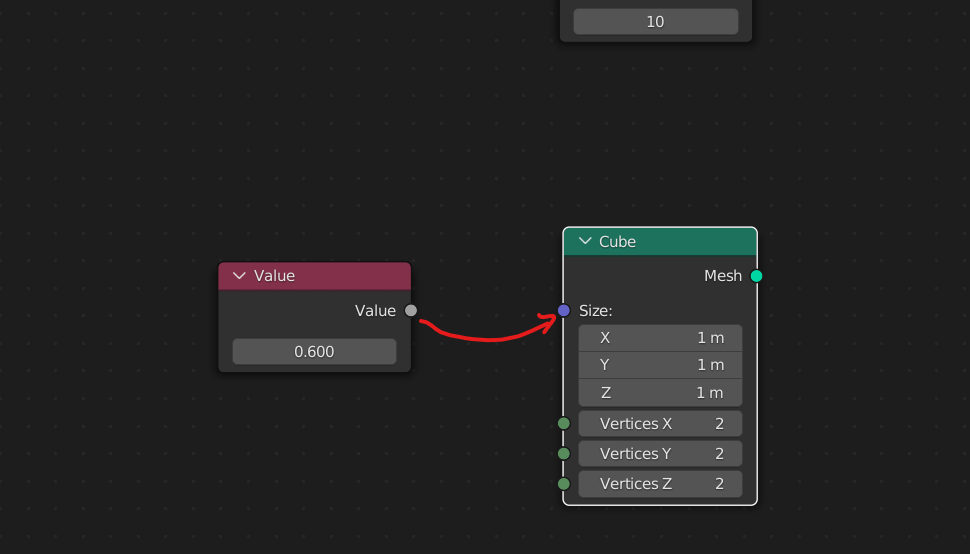
As, the cube is not connected to the output geometry, it remains not visible.
We add Instance on Points, so the geometry, our cube, will be instanced on each point. But first our cube has so be converted into an instance.
Create the box Geometry to Instance and then Instance on Points (it’s easier to use the search box and just type the name of the box)
Connexions (to disconnect CTRL+mouse move)
Now we want to duplicate up and down
We add a duplicate box (Blender has no 3D array (🤔))
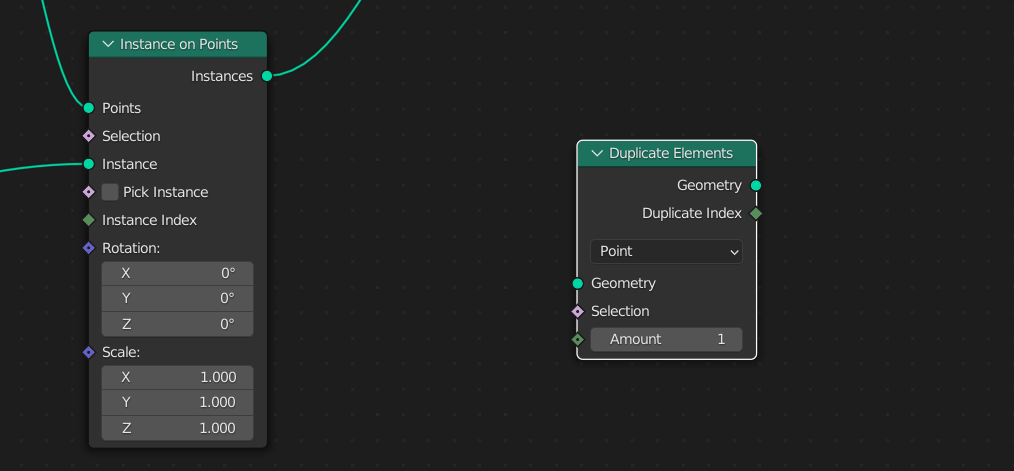
Point will be change to Instance. We can then connect
Now we’ve got to indicate the amount of copies, direction and distance between each copy.
Go to add/Utilities/Math to add a Math Box, then a Combine XYZ
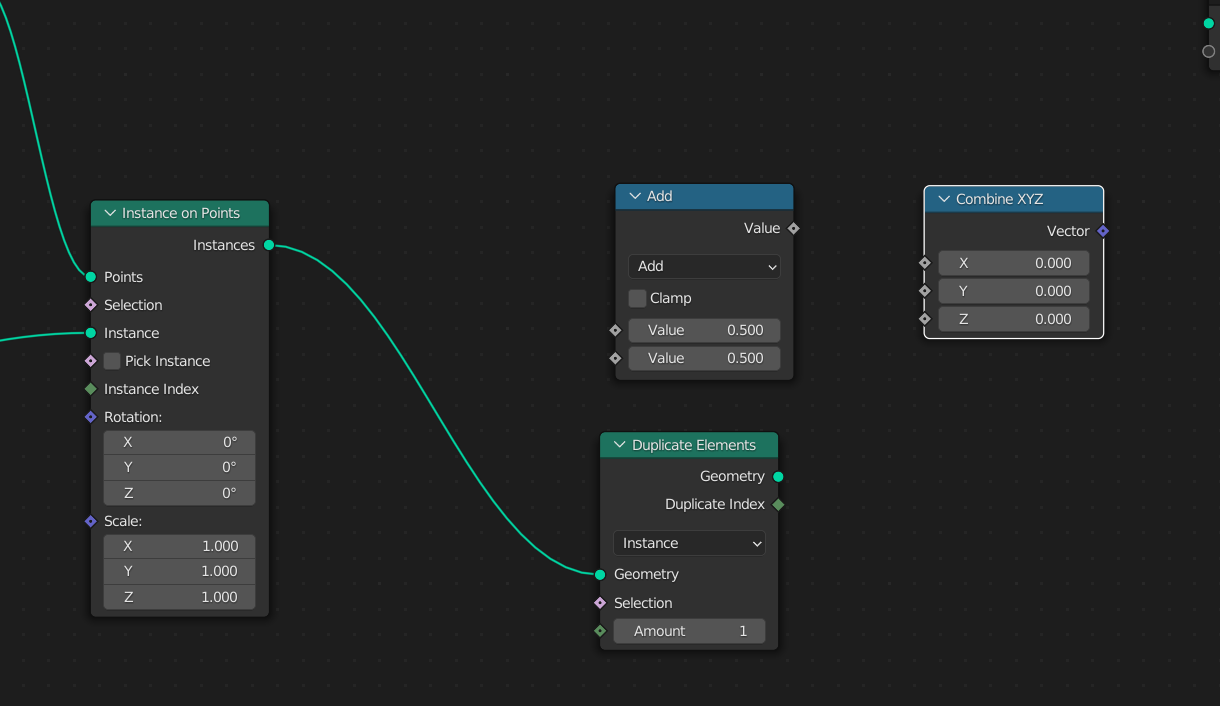
In the Math box, we change Add to Multiply and make the connections as followed
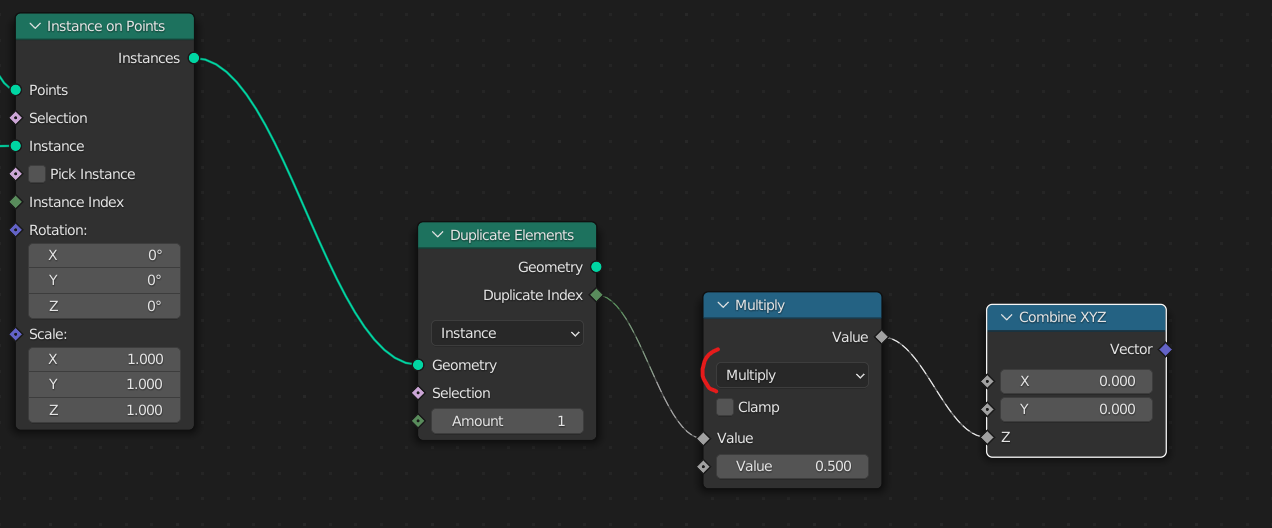
Now we add a Set Position to realise the copies. And a Value and an Integer to change the values fast
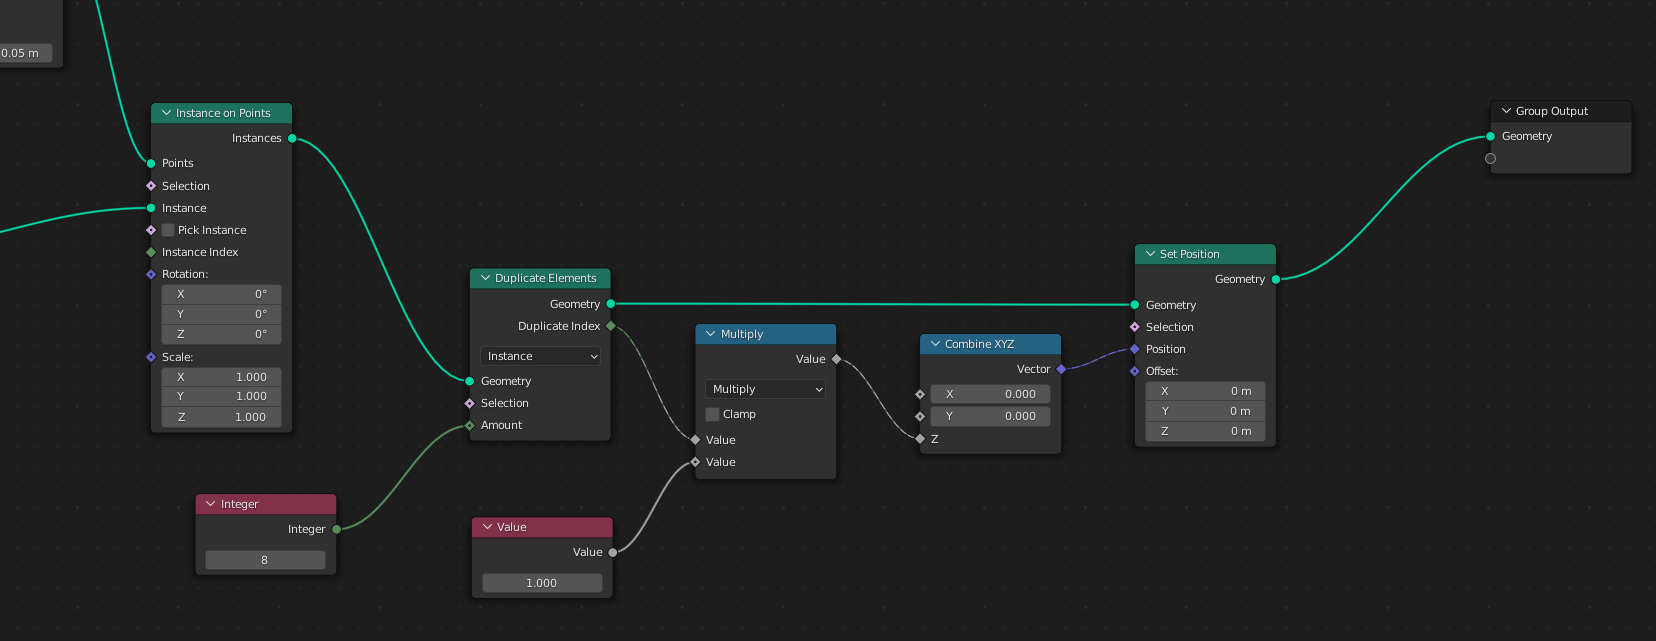
We duplicate the Duplicate group to duplicate in –Z (down, instead of up)
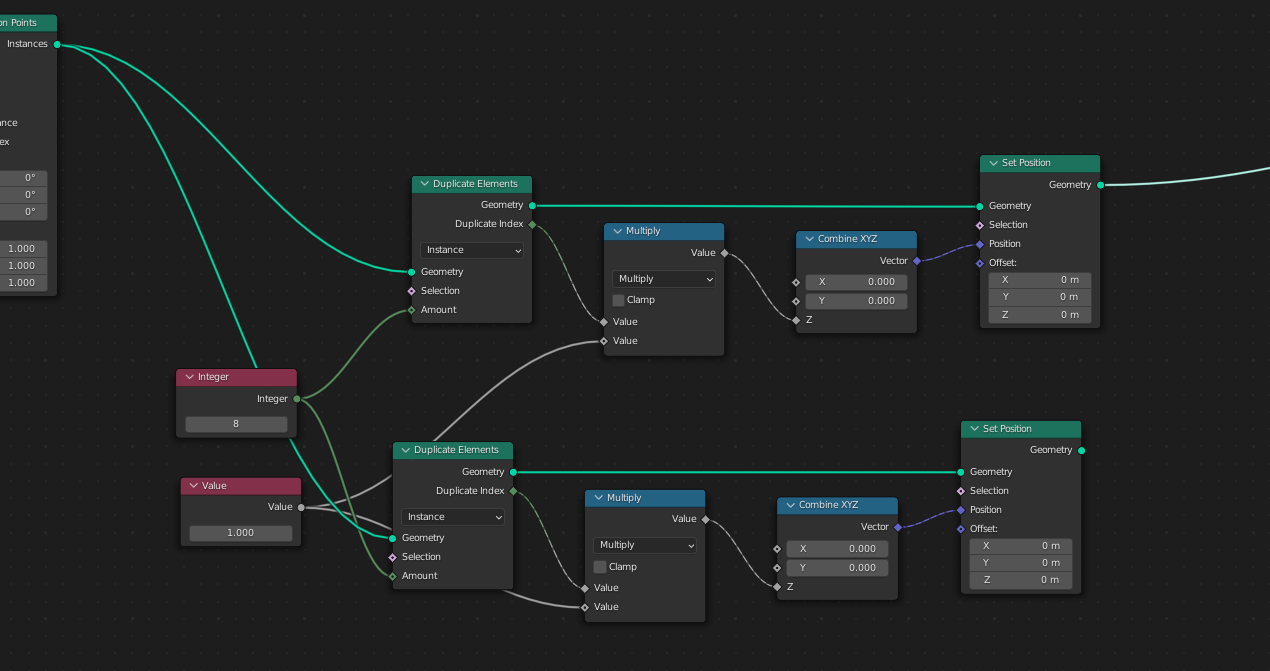
The copy goes Up and Down. One Value is positive, the other one Negative.
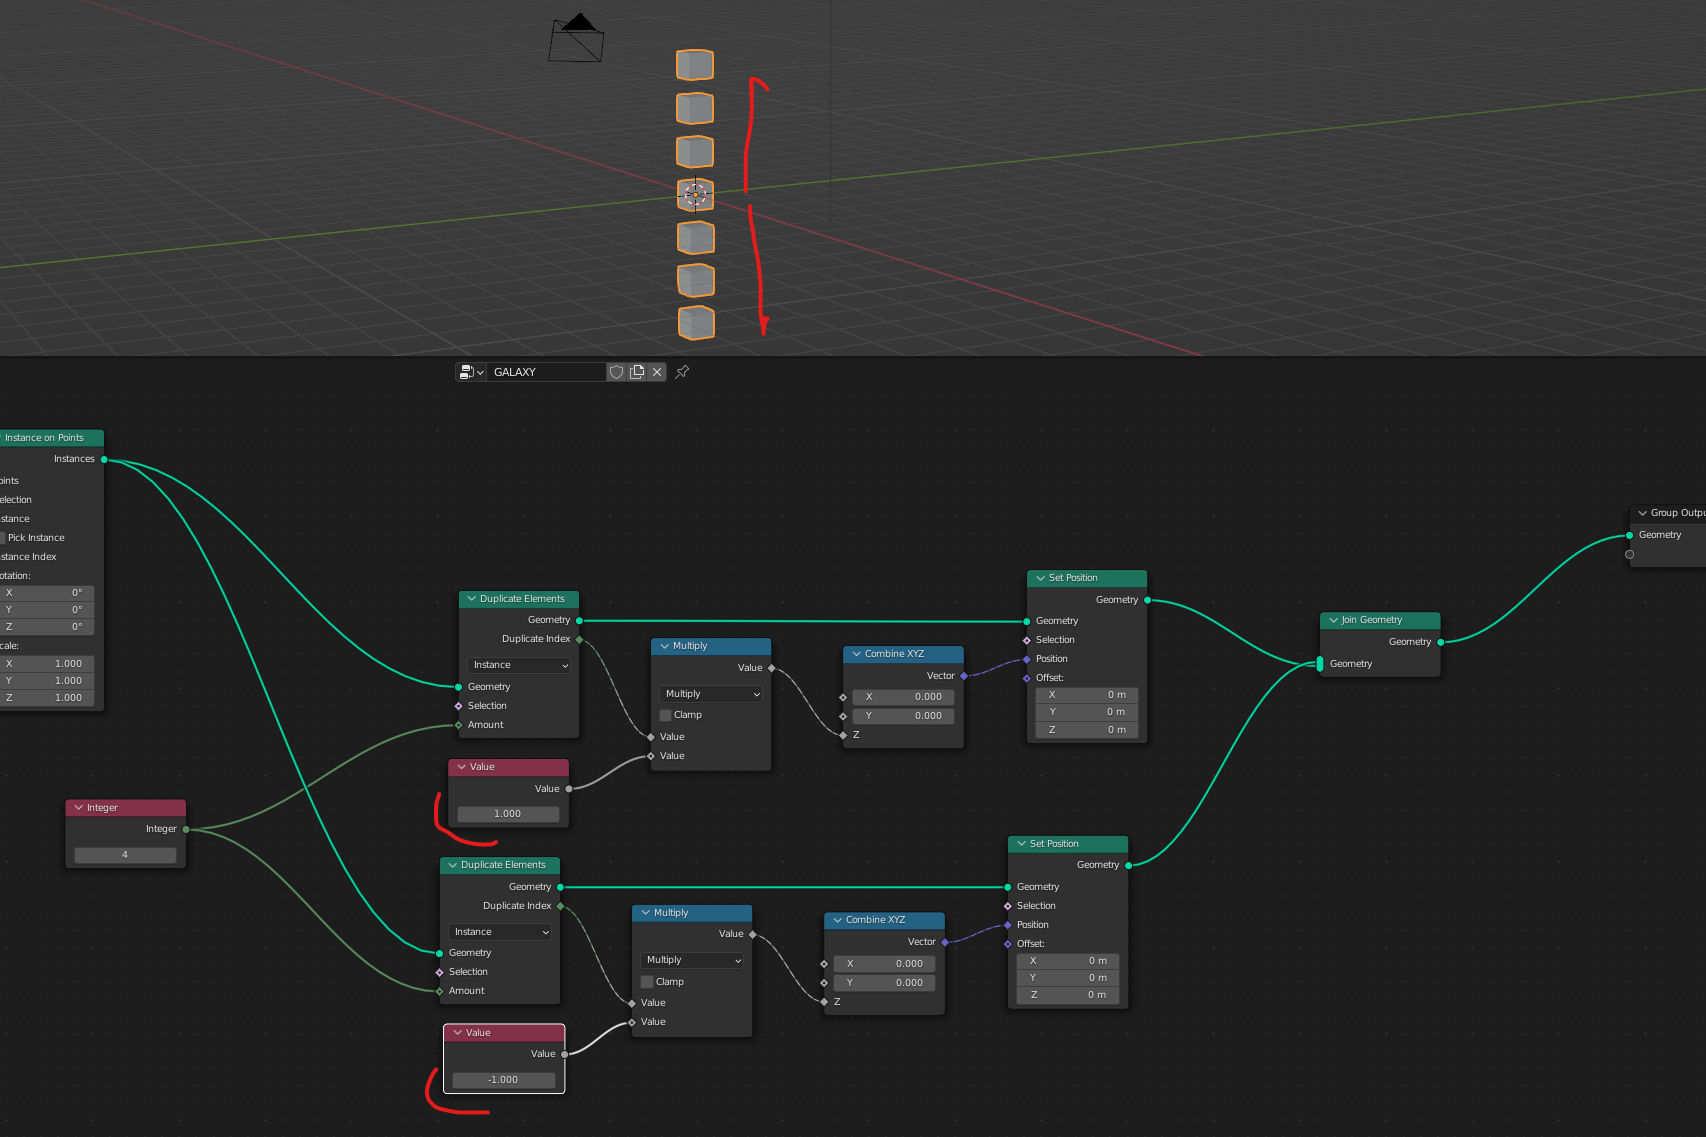
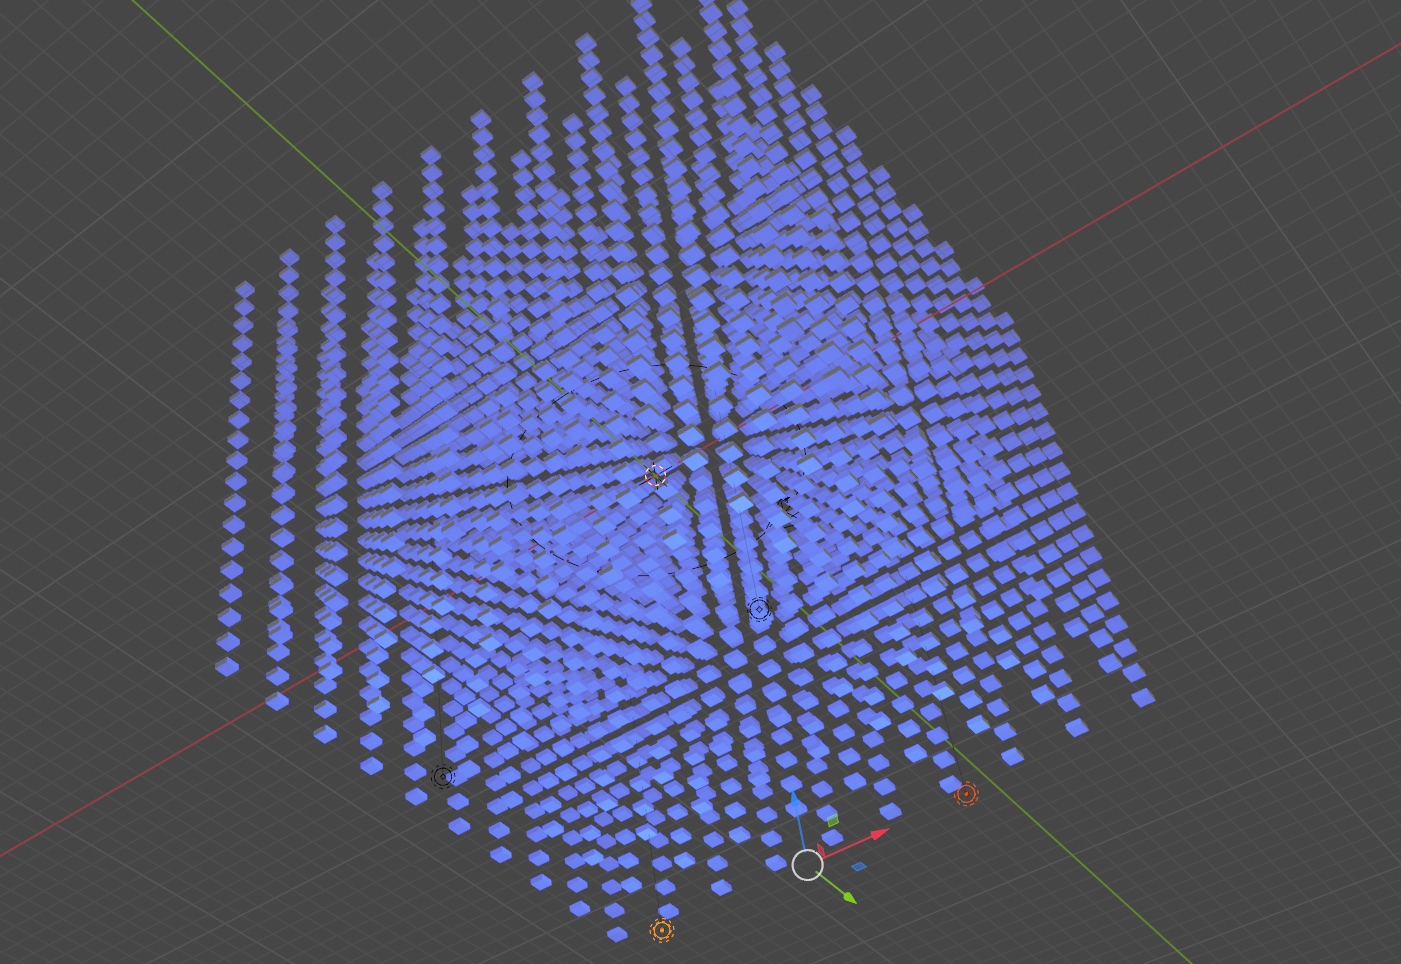
Problem is, it is just one cube, not all of them from the grid. To solve that, we convert the instances into geometry.
Now it works
Camera animation
We hide the geometry to prepare the camera path
Create a circle and a camera, scale up the circle and set the camera coordinates to 0,0,0
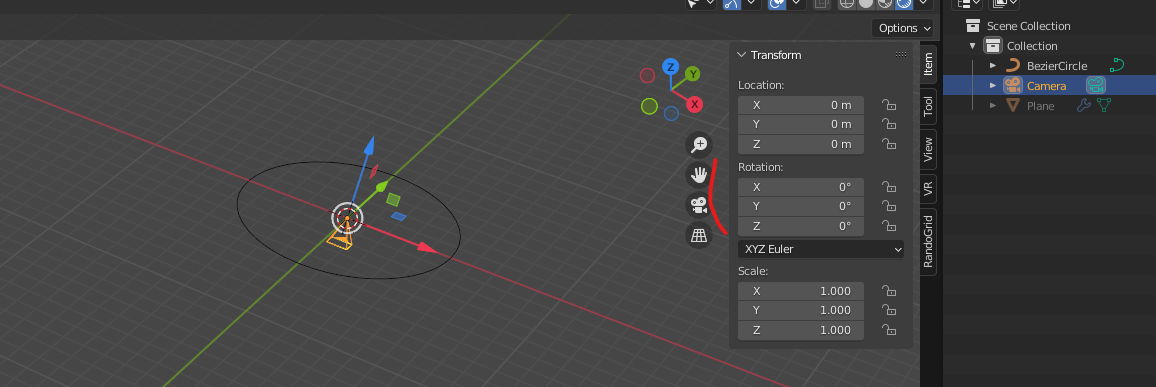
Convert the circle into a Curve,
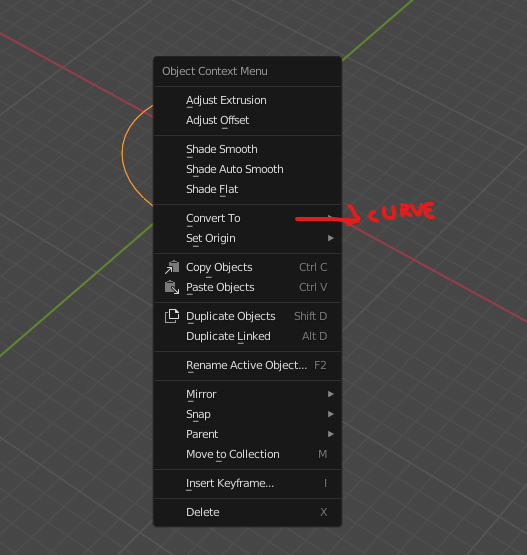
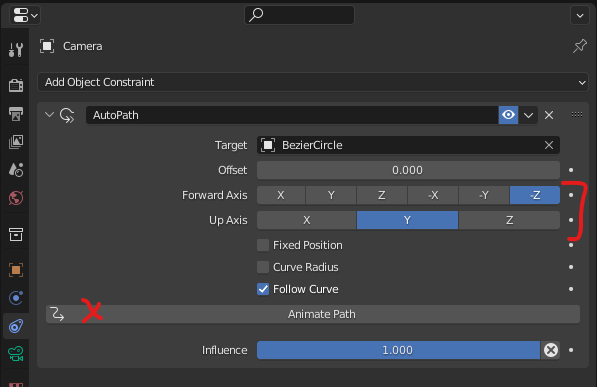
Select the camera, then the curve and press CTRL+P and choose Path Constraint
Click on the camera and go to Objects Contraints Properties and check Forward Axis, Up Axis and click on animate Path. Test with Space bar.
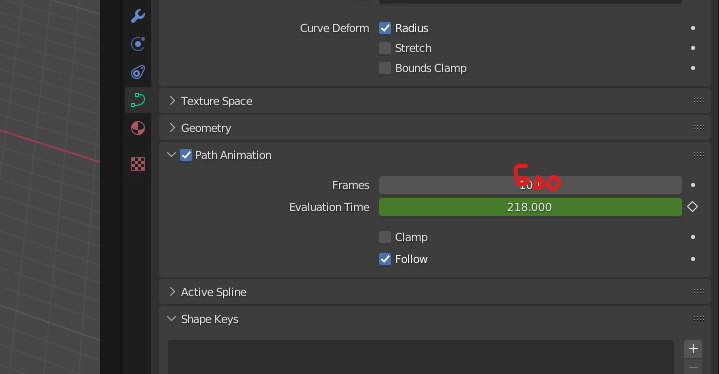
Ok, that’s set. It’s now possible de change the shape of the curve, the animation will follow. To speed up or slow the animation, increase the number of frames, in the animation tab:

And in the Curve animation
Lighting
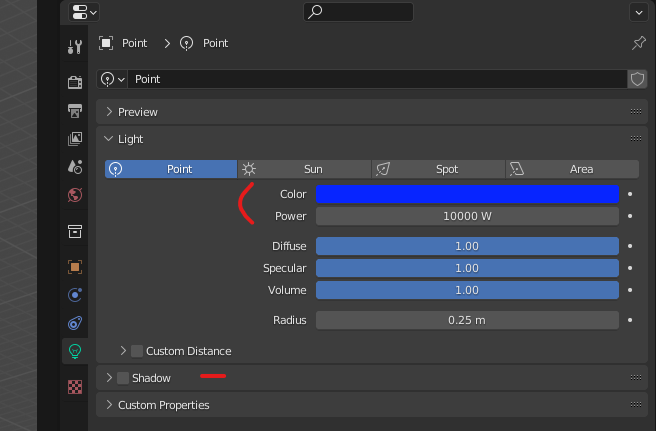
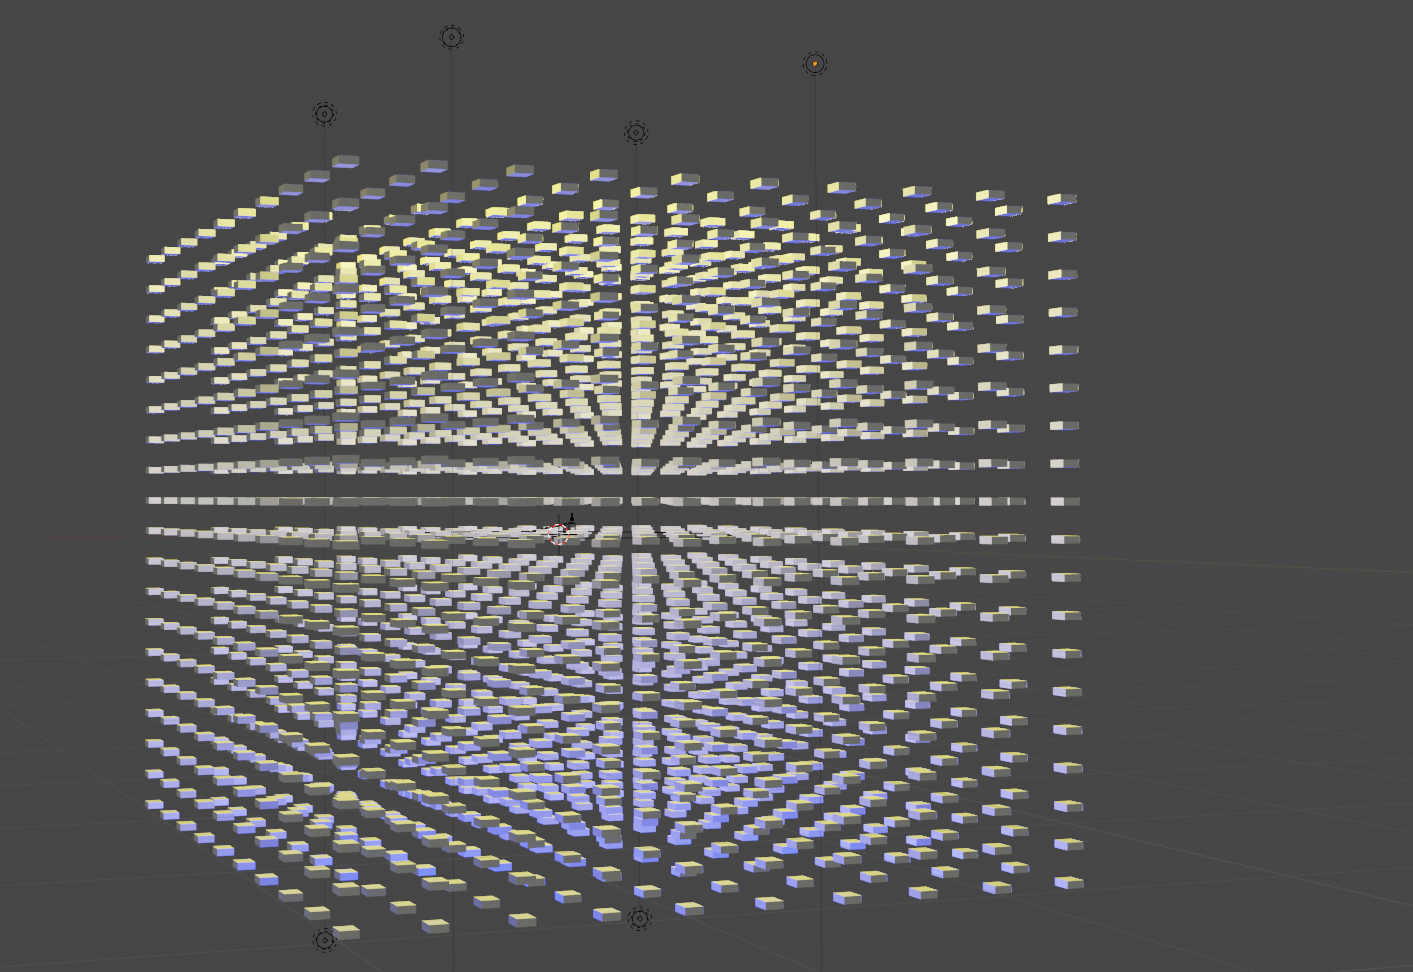
We add 4 points lights under the objects and 4 more over. For the bottom light, the colour is turned to blue
We duplicate the lights
Now same thing with the high light coloured in yellow
Camera
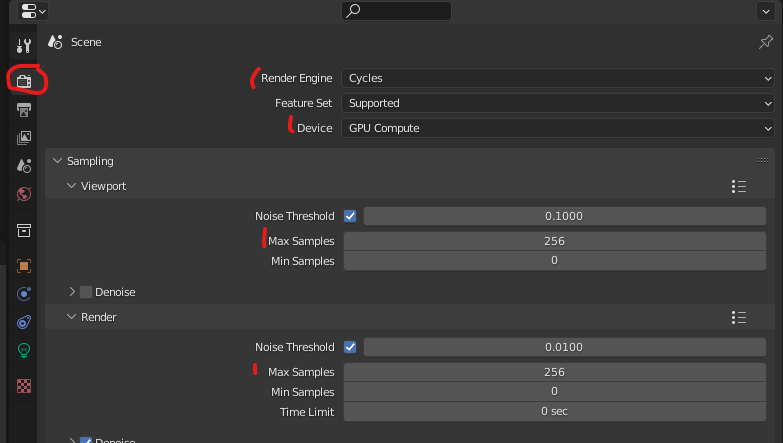
Don’t forget to be in Cycle Render.
The render Engine should be Cycle, with GPU if the graphic card is powerful enough. We can reduce the render quality to speed up the rendering.
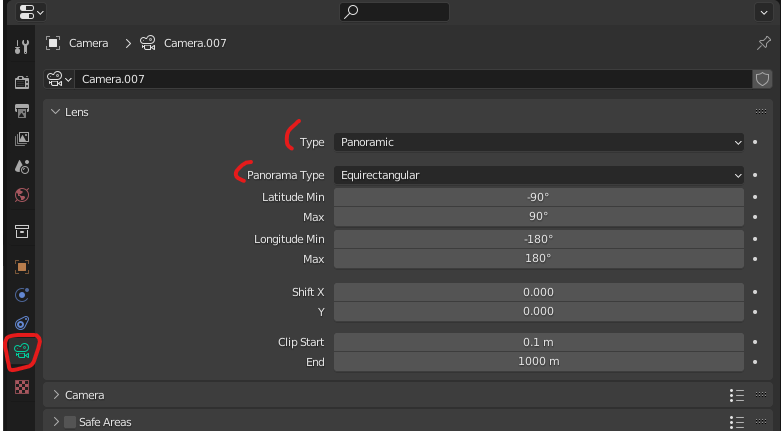
The camera should be panoramic Equirectangular, click on the camera to see the menu
The size should be 9000 x 5062, but it can be divided by 2 if it’s too long to process.
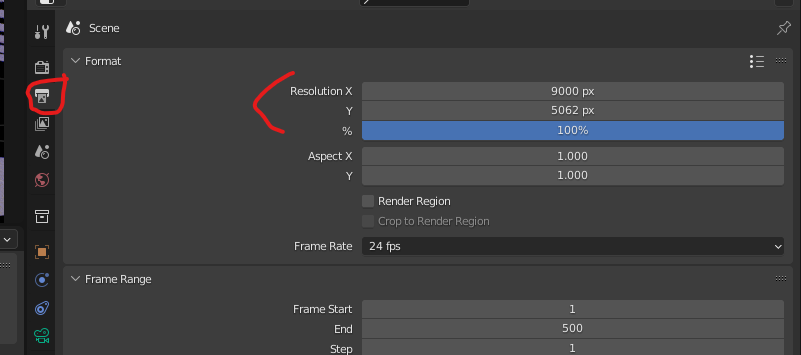
Choose your output path and the file format. It’s more secure to export jpg files that could be reassembled. In case of crash, the process is not to be redone.
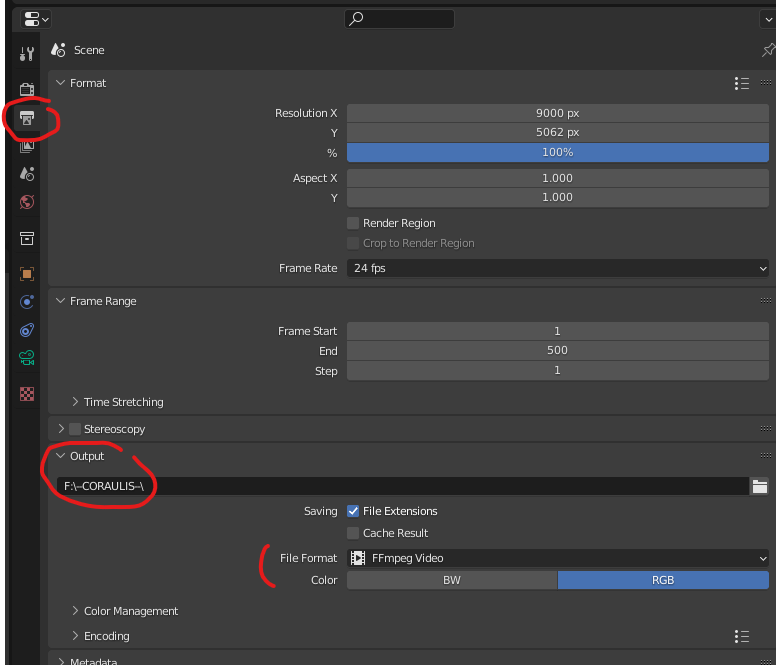
And then go to Render Animation
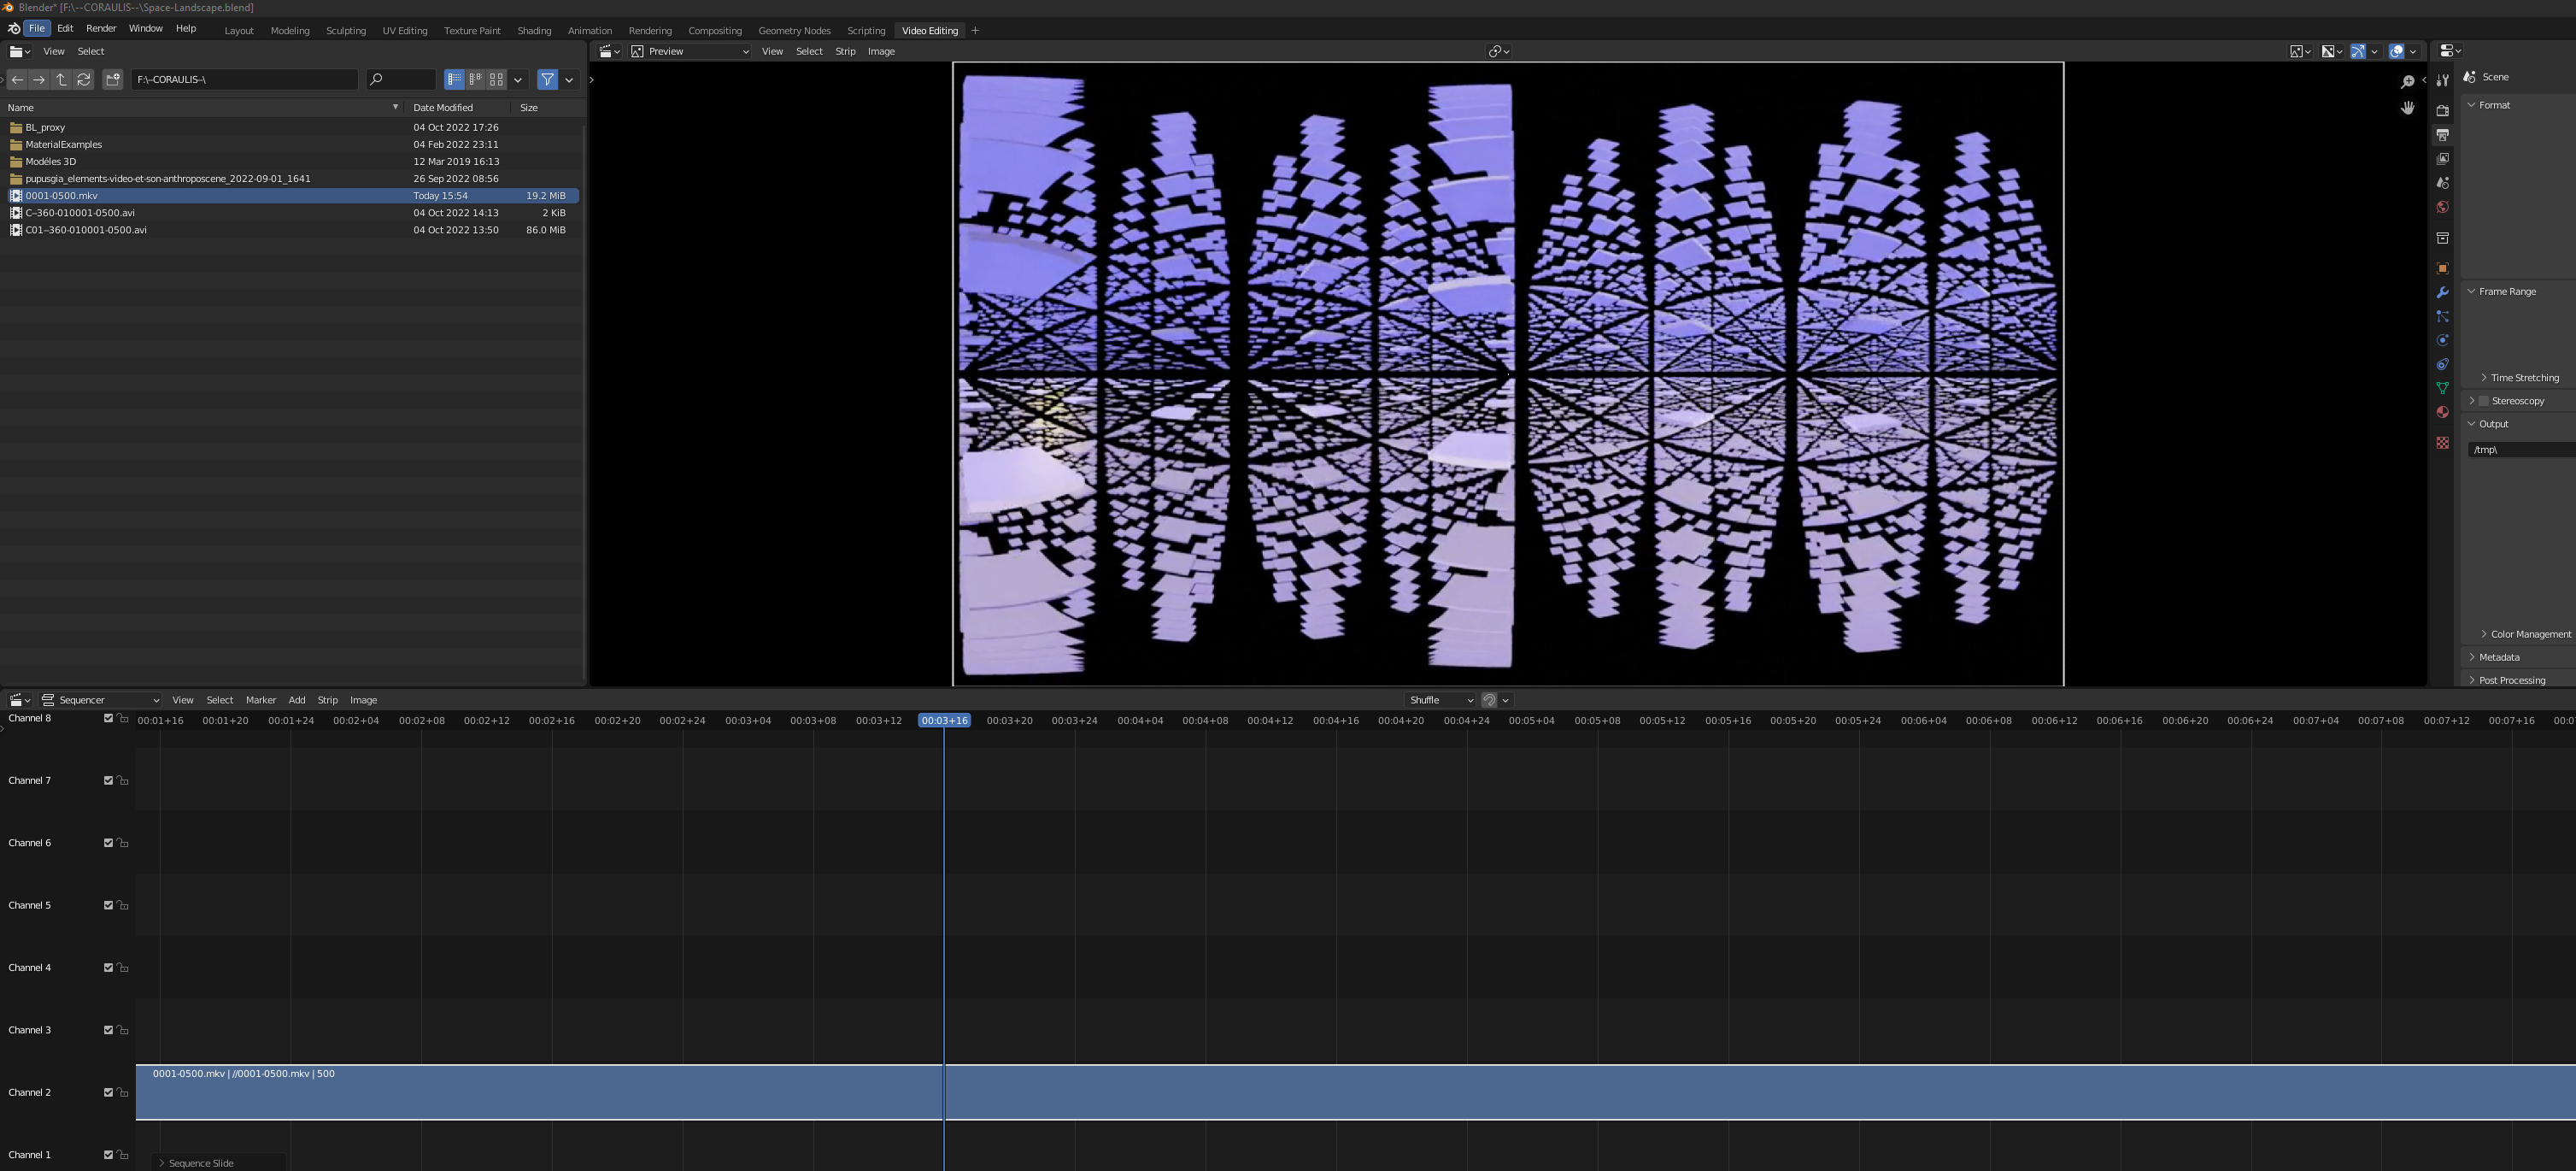
Reframing
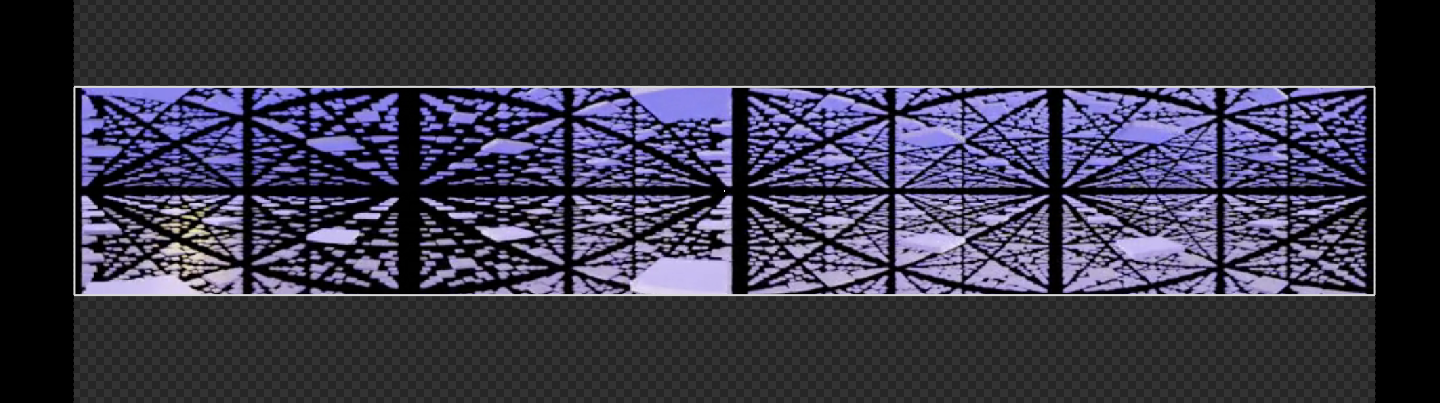
Then the frame will have to be recut to the Coraulis proportions, for this explanation, we used a smaller file, but the process remains the same.
Open the Video Editing Menu

We load the film and drop it in a Channel and test it.
We will crop with the right proportions which are 9000/1440 meaning removing 5062-1440=3622 px, devided by 2, 1811 up and down 1811

It is cropped
We render animation without forgetting to change the name…
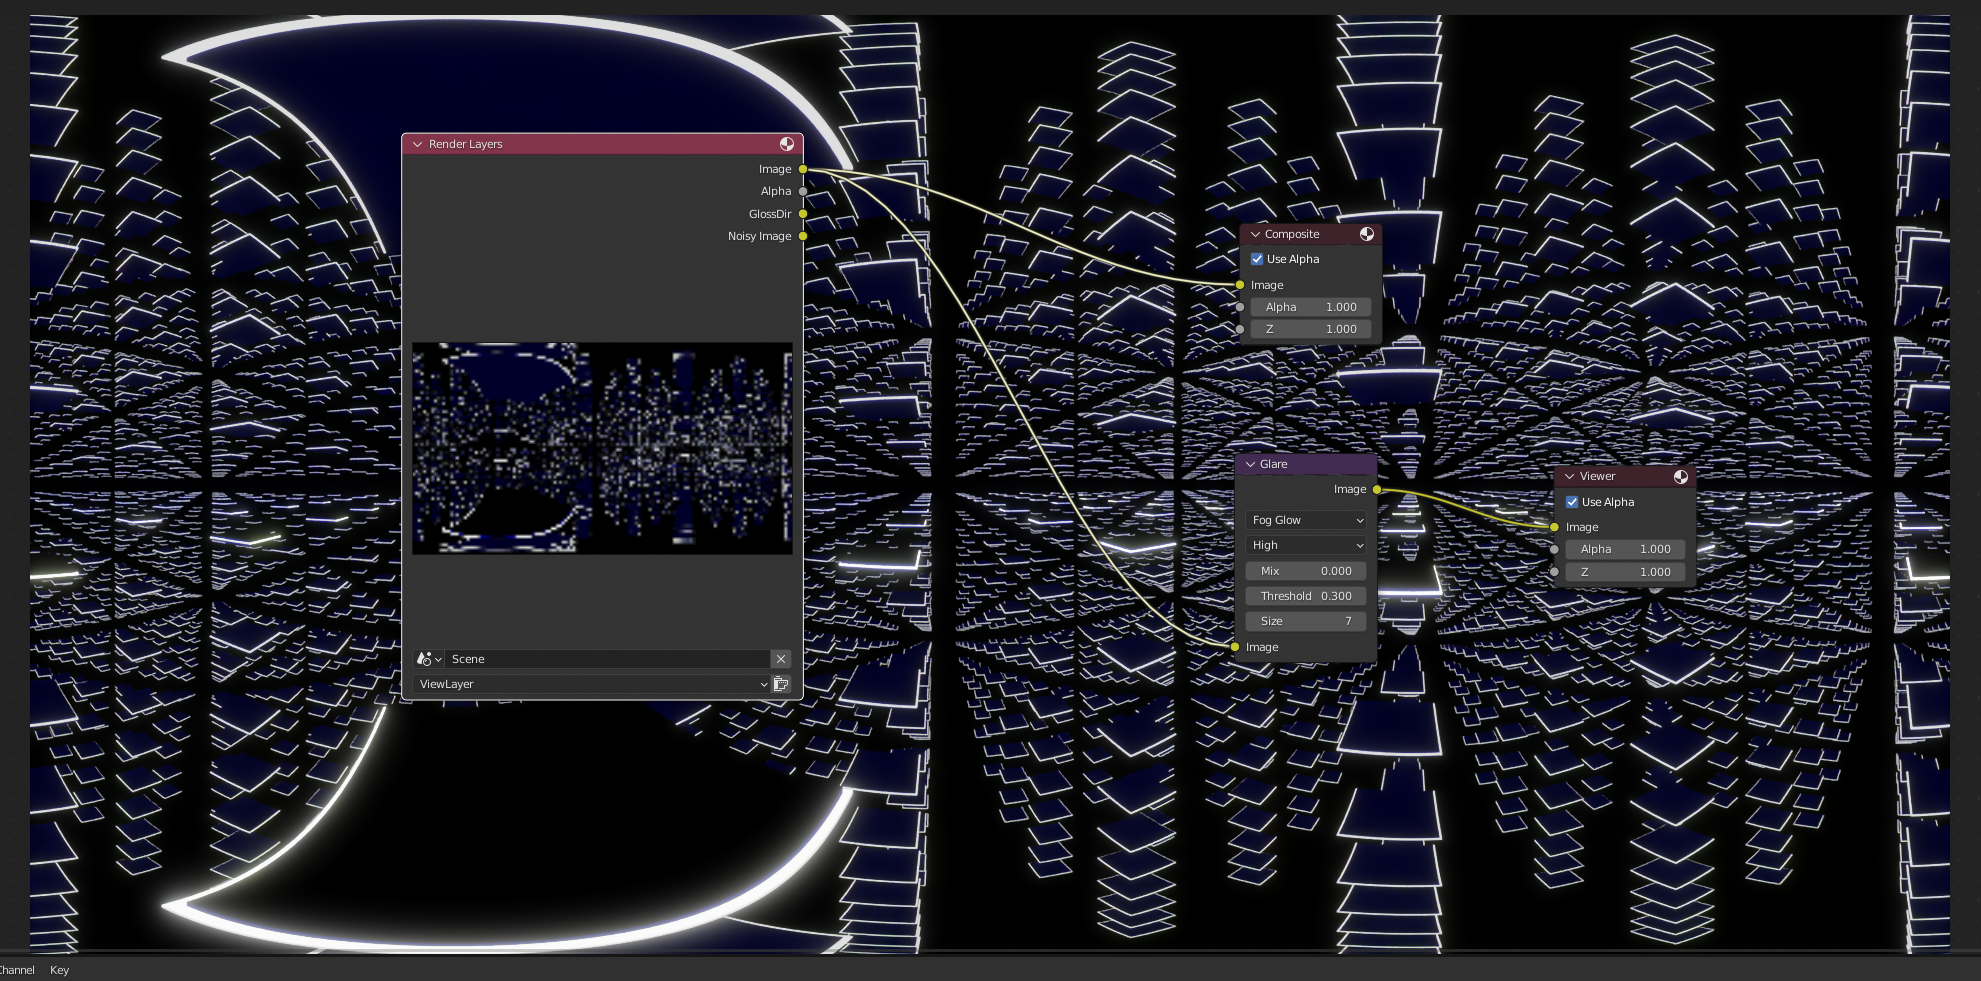
Compositing can be added to have glow effects. Compositing tab, Enable nodes. Add viewer and add glow.
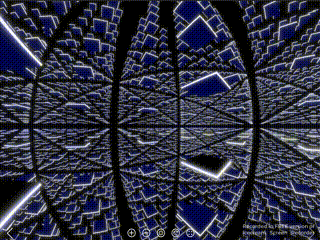
Ready to be played!!