🔧 Setup Phase
Open the online SketchUp app
→ Go to https://app.sketchup.com/app to begin modeling.
Sign Up and enter the App
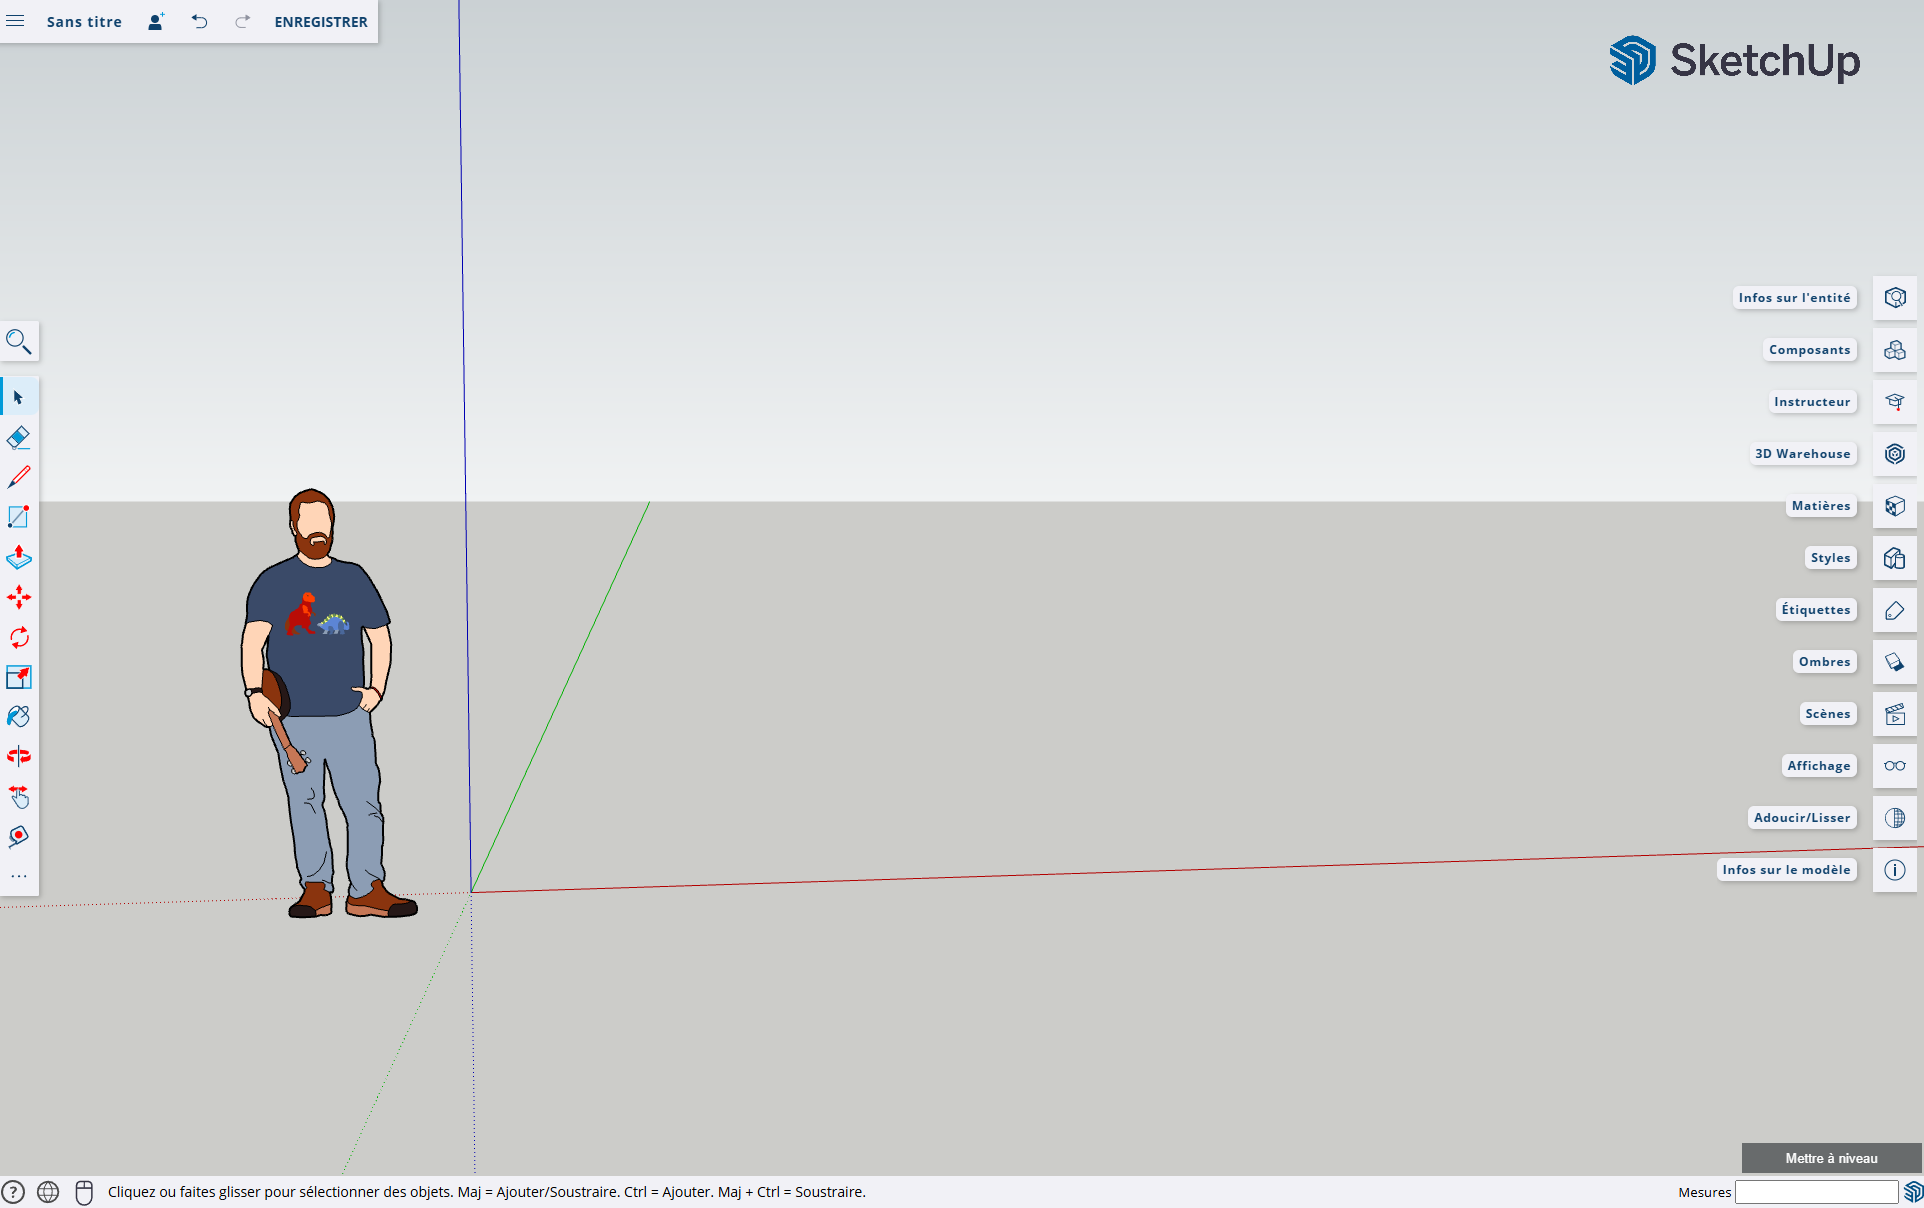
You start a New Project by creating a Workspace

Set a name for your first project
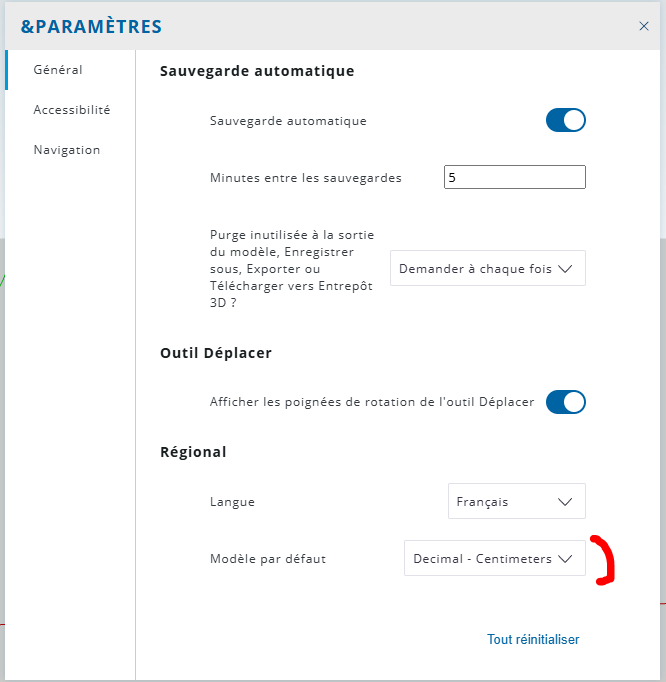
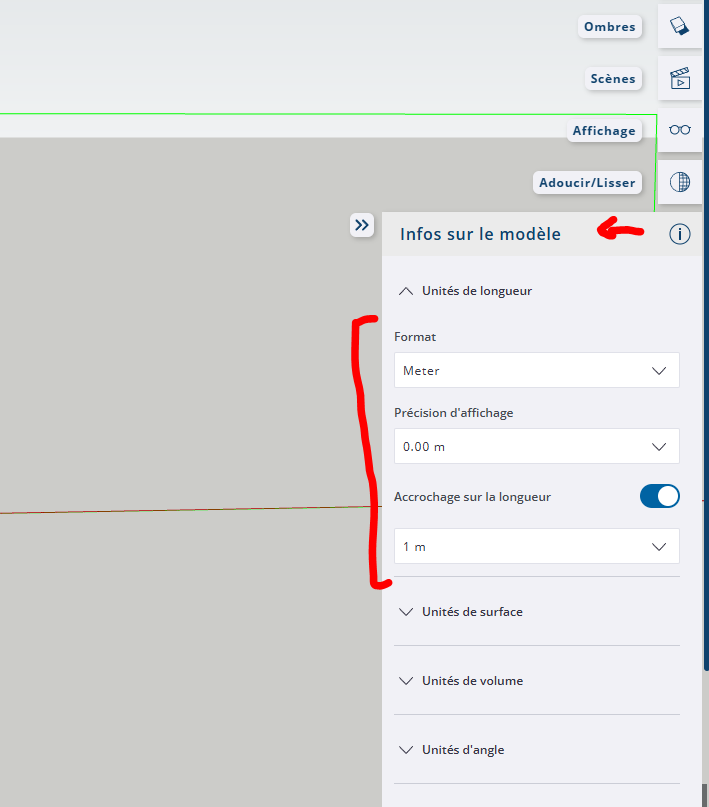
Check your settings
→ Adjust the units (meters preferred) by opening Model Info in the settings to ensure accurate measurements.
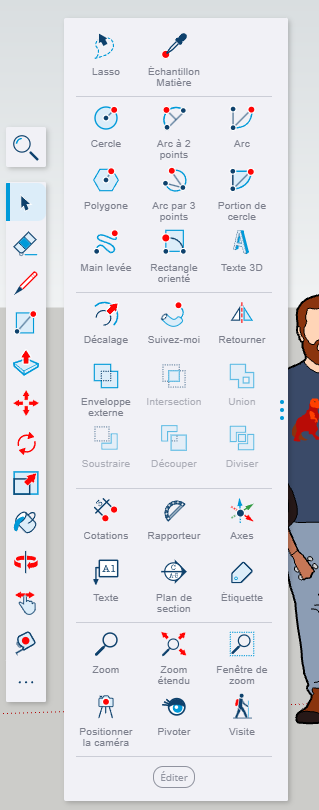
Enable toolbars
→ Ensure that essential tools (e.g., Rectangle, Push/Pull, Move) are visible for quicker access.
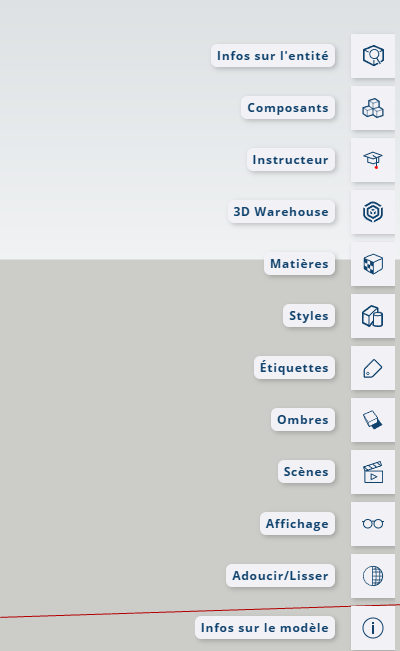
Check the Units in Infos about the model. It is still in Imperial. Change to Metric.
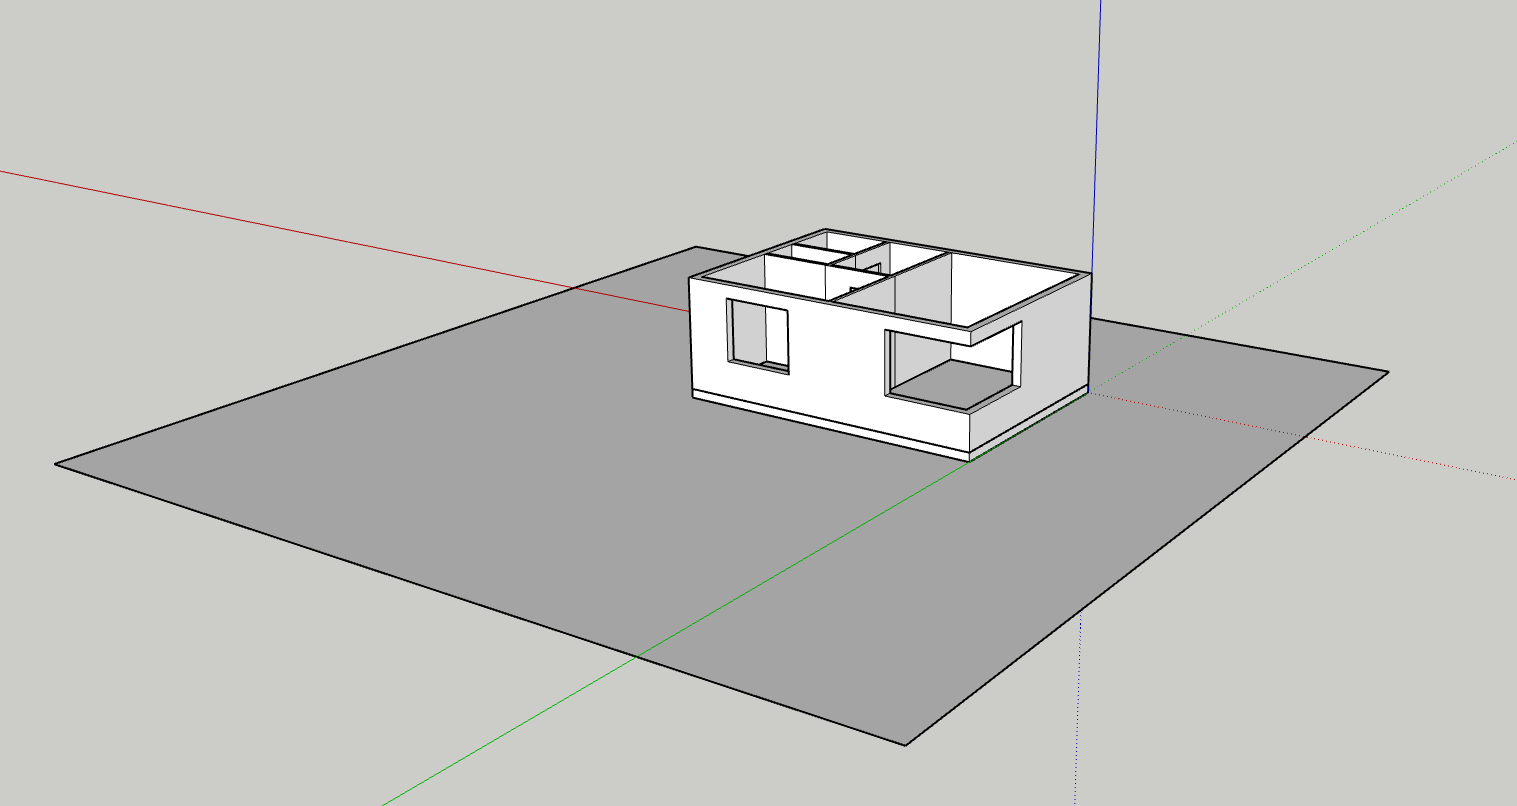
📐 Creating the Base Structure
-
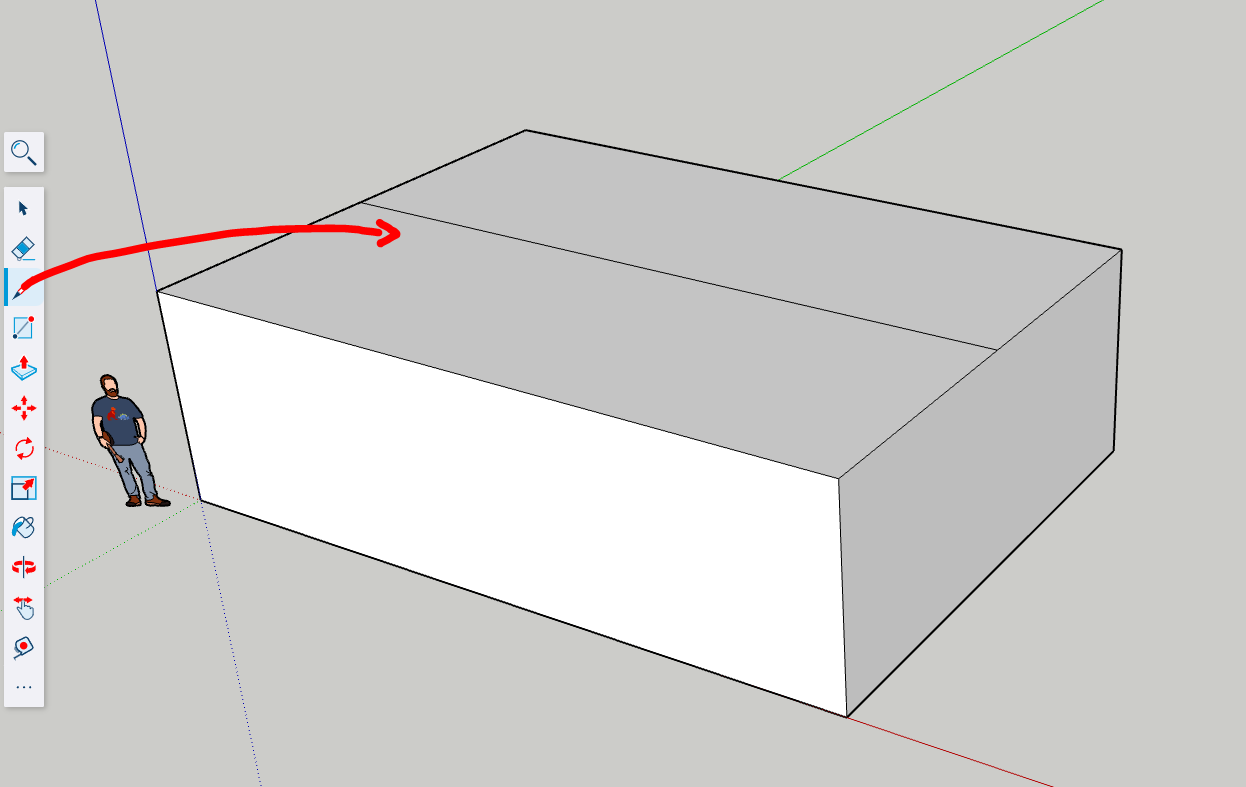
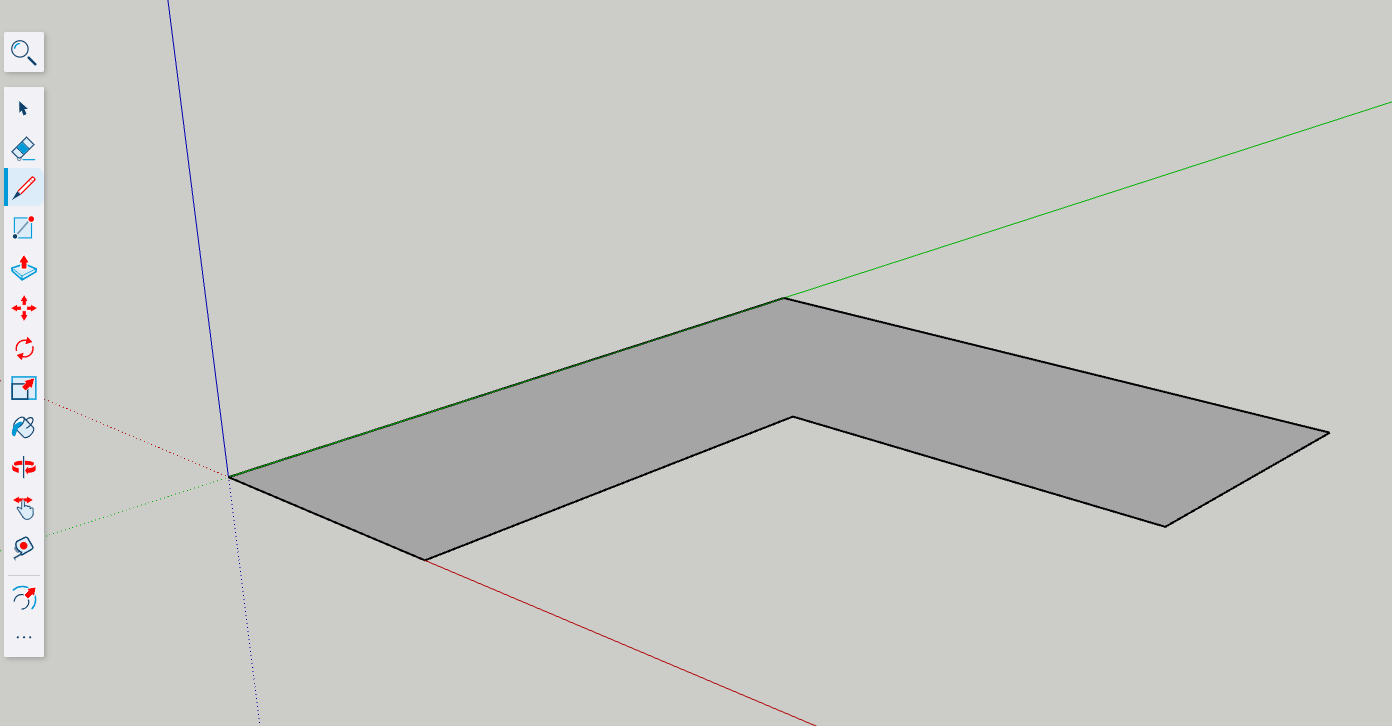
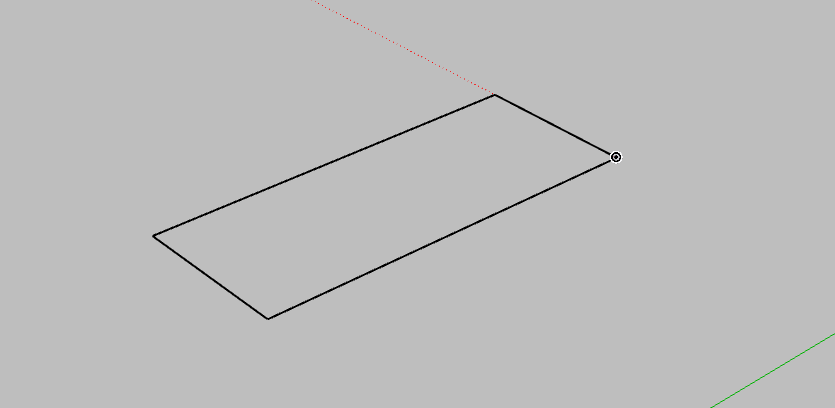
Draw the base rectangle
→ Use the Rectangle tool to create a base (e.g., 10×7 meters).
![]()
10x7m
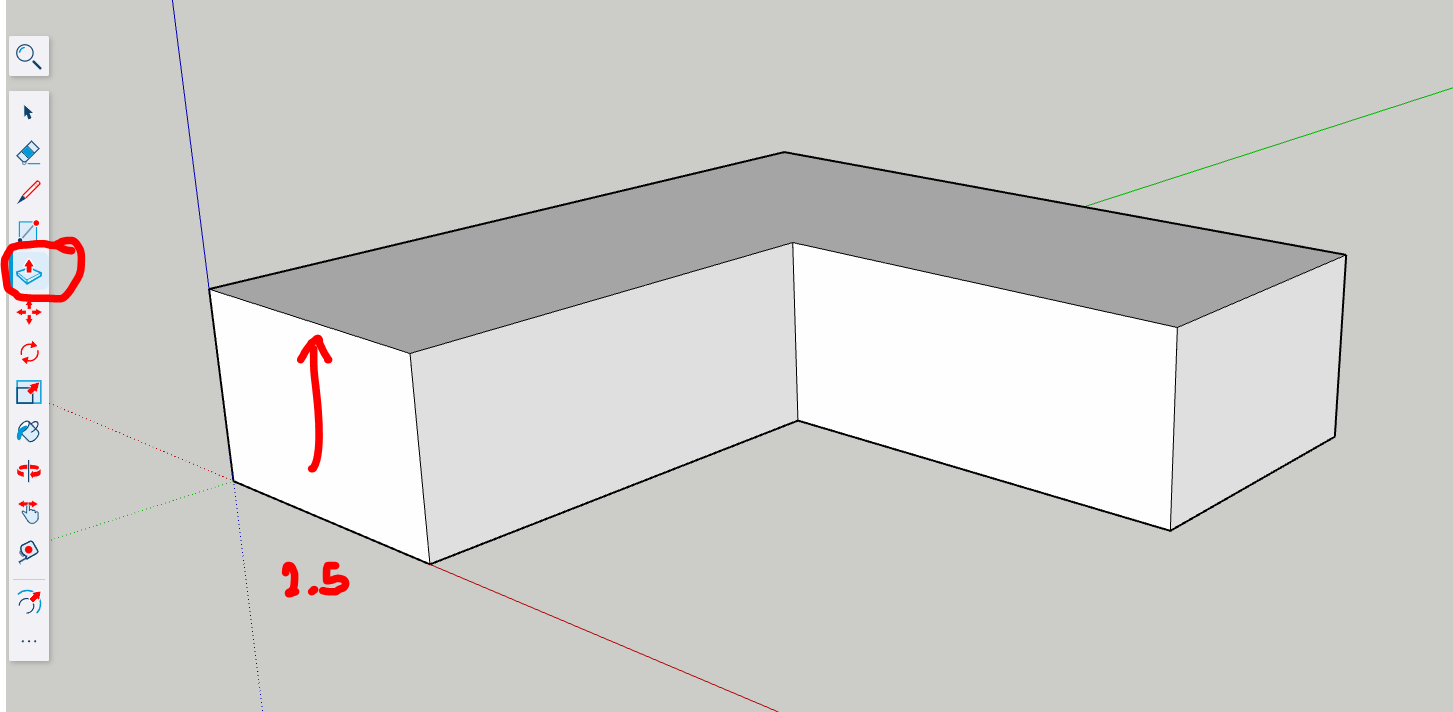
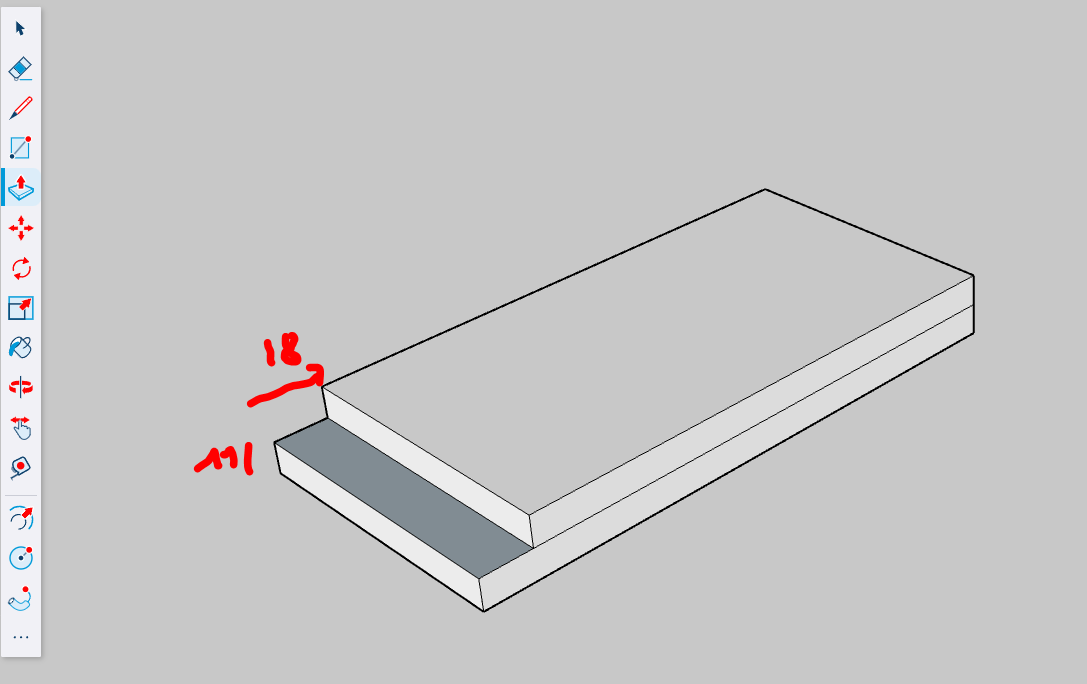
Extrude the base
→ Select the Push/Pull tool and pull the surface up to 3 meters to form the walls.![]()
3m
🏠Roof Construction
-
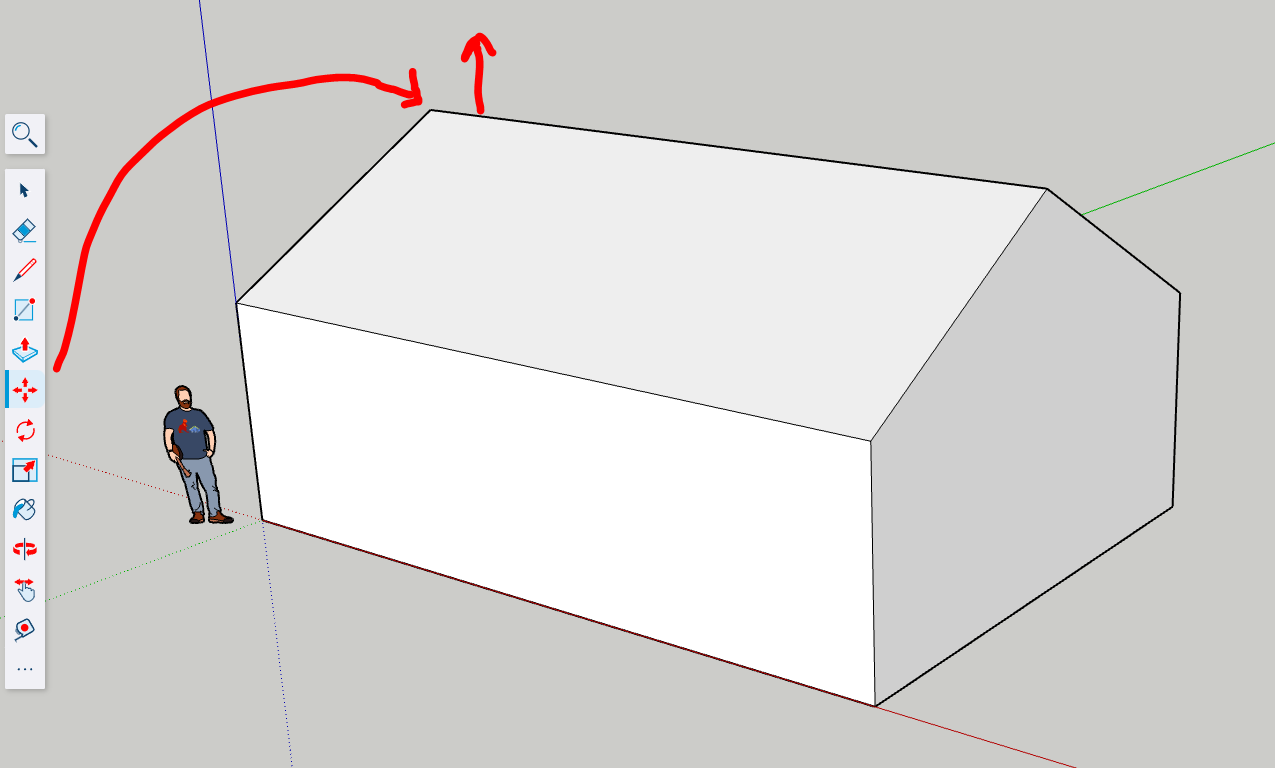
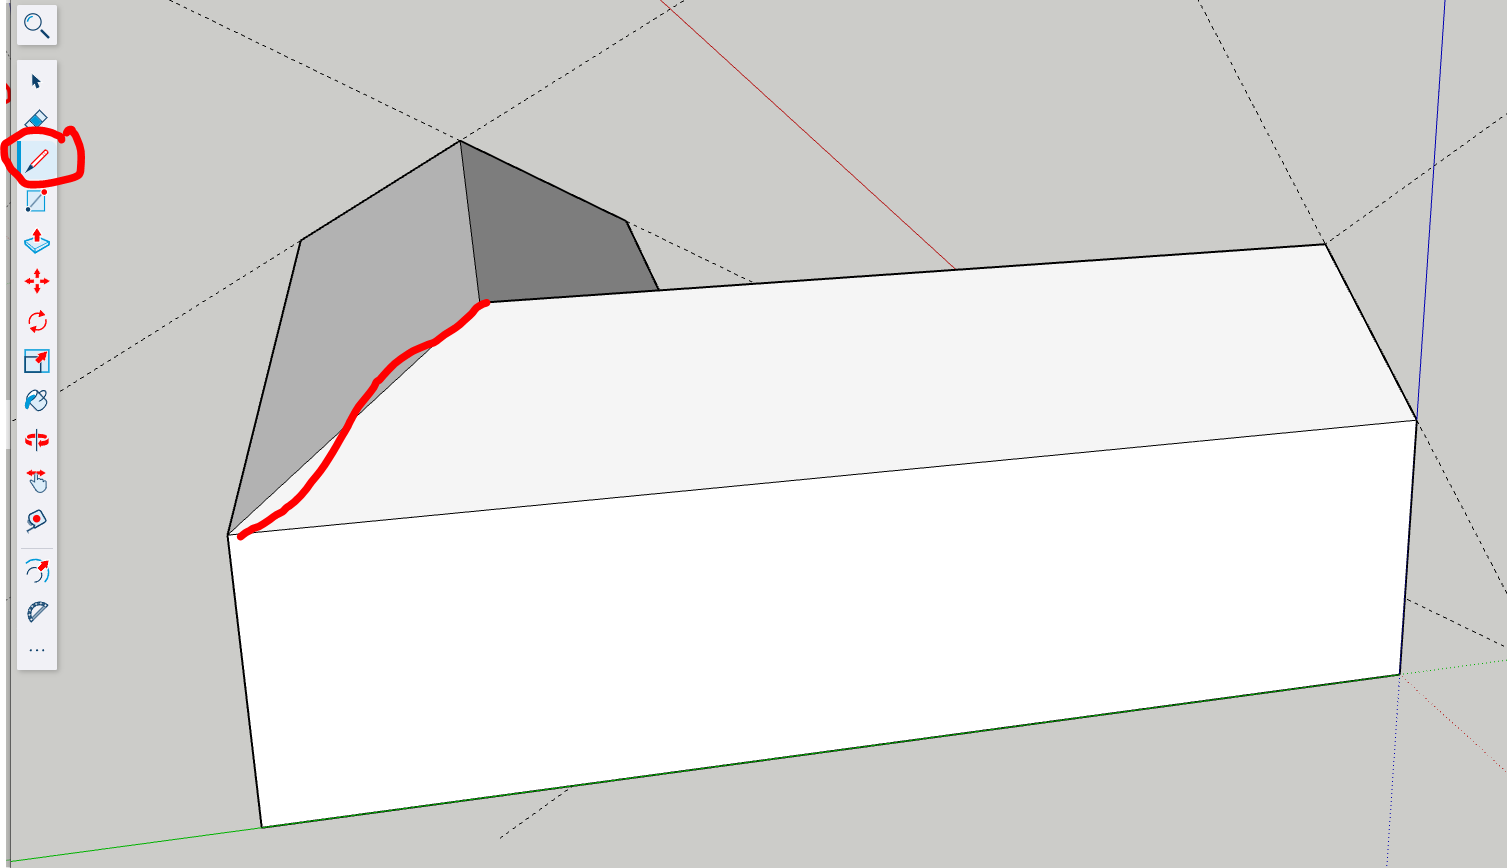
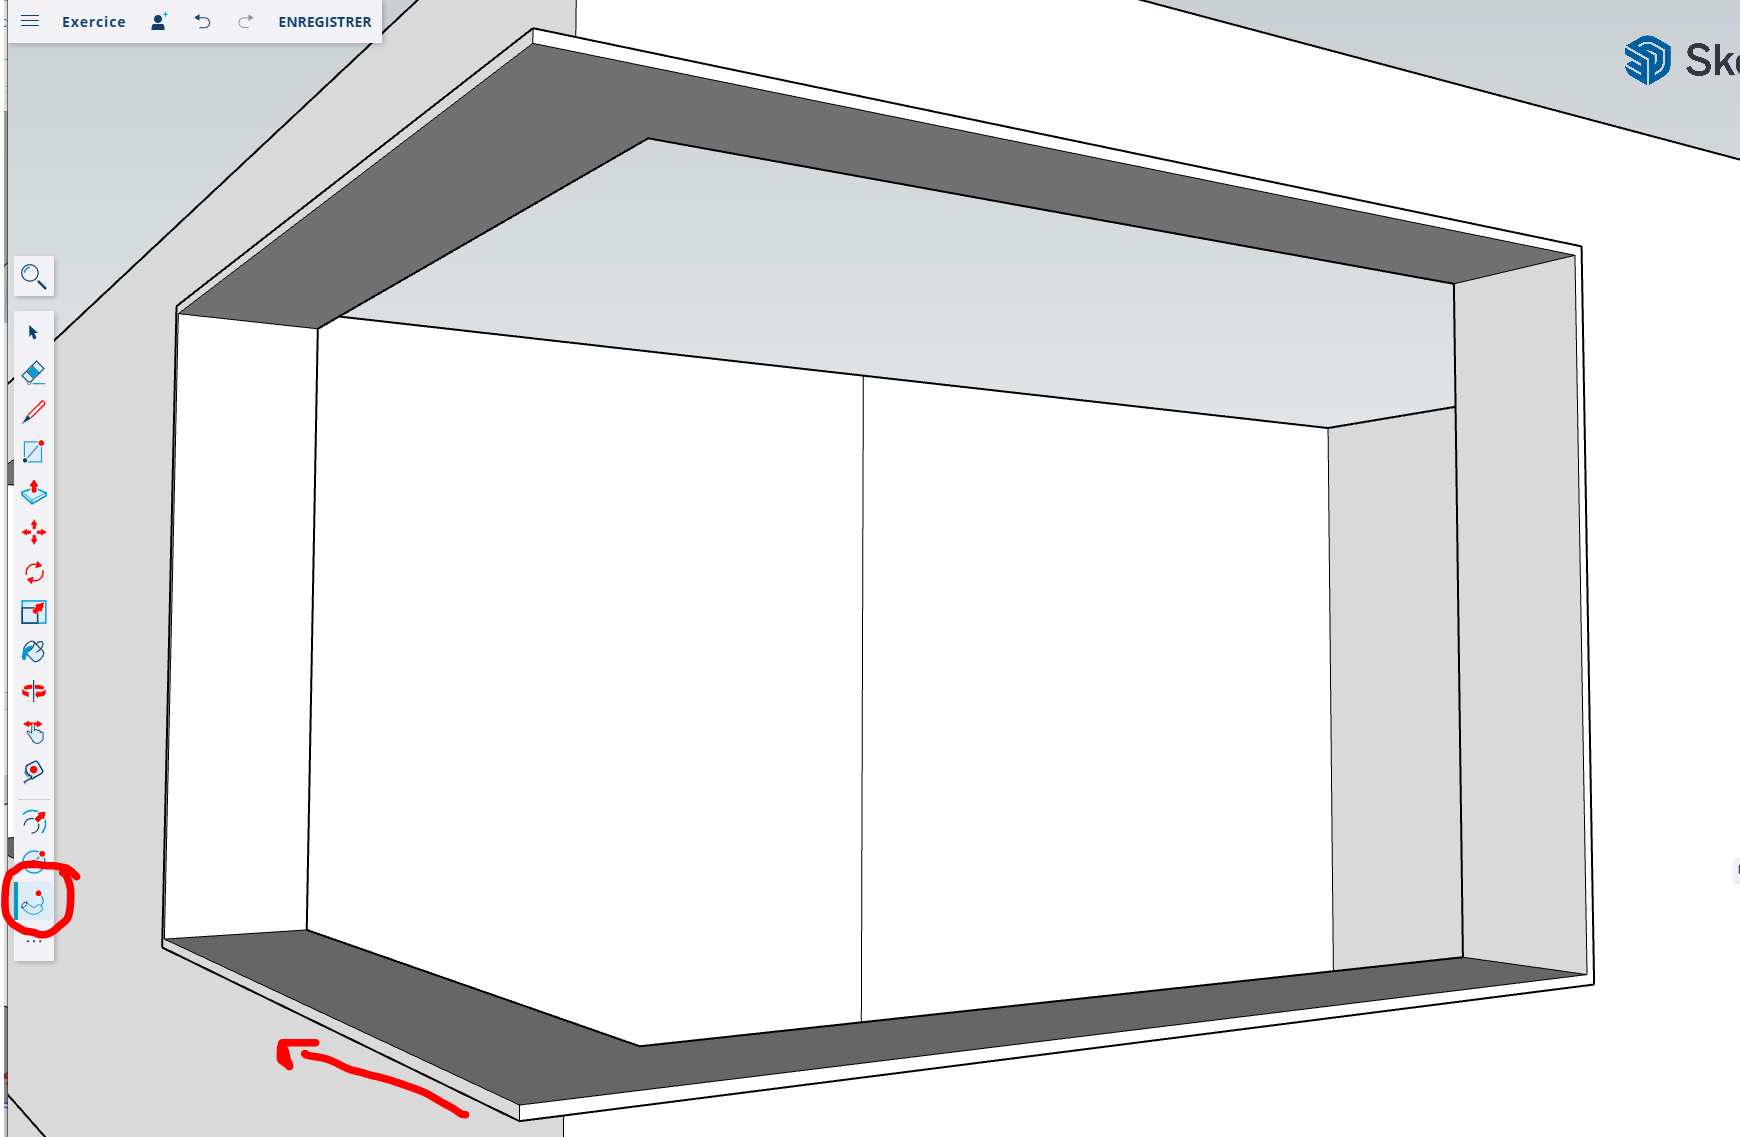
Create roof slopes
→ Draw diagonals or midpoint lines and use the Move tool to lift them, forming a gable roof.
Then create and select the mid line and use Move to elevate it. Beware to follow the blue guide in order to remain vertical.
Lift up following the blue line, 2 m
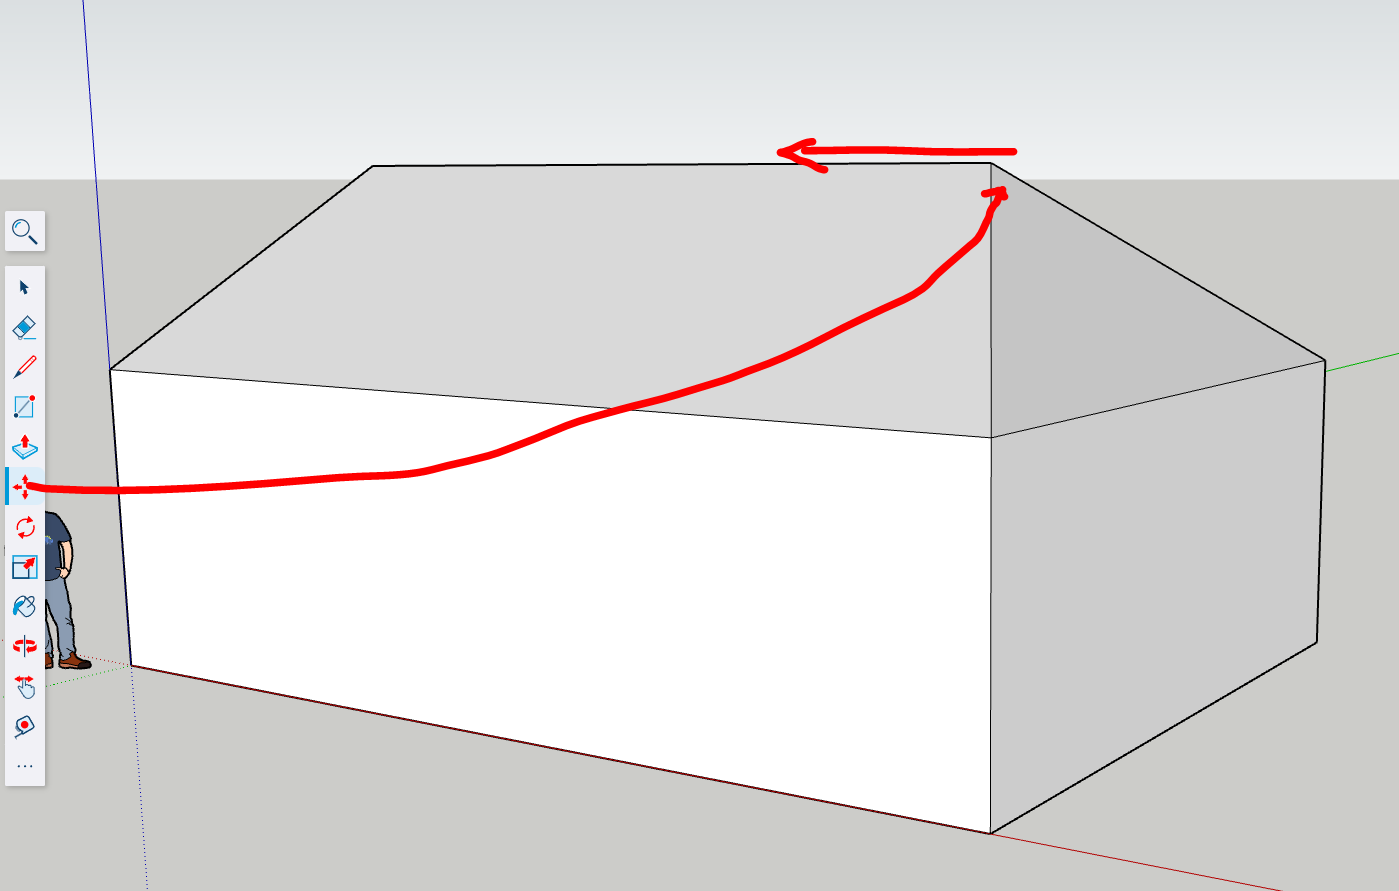
Add a line to crisp and fold
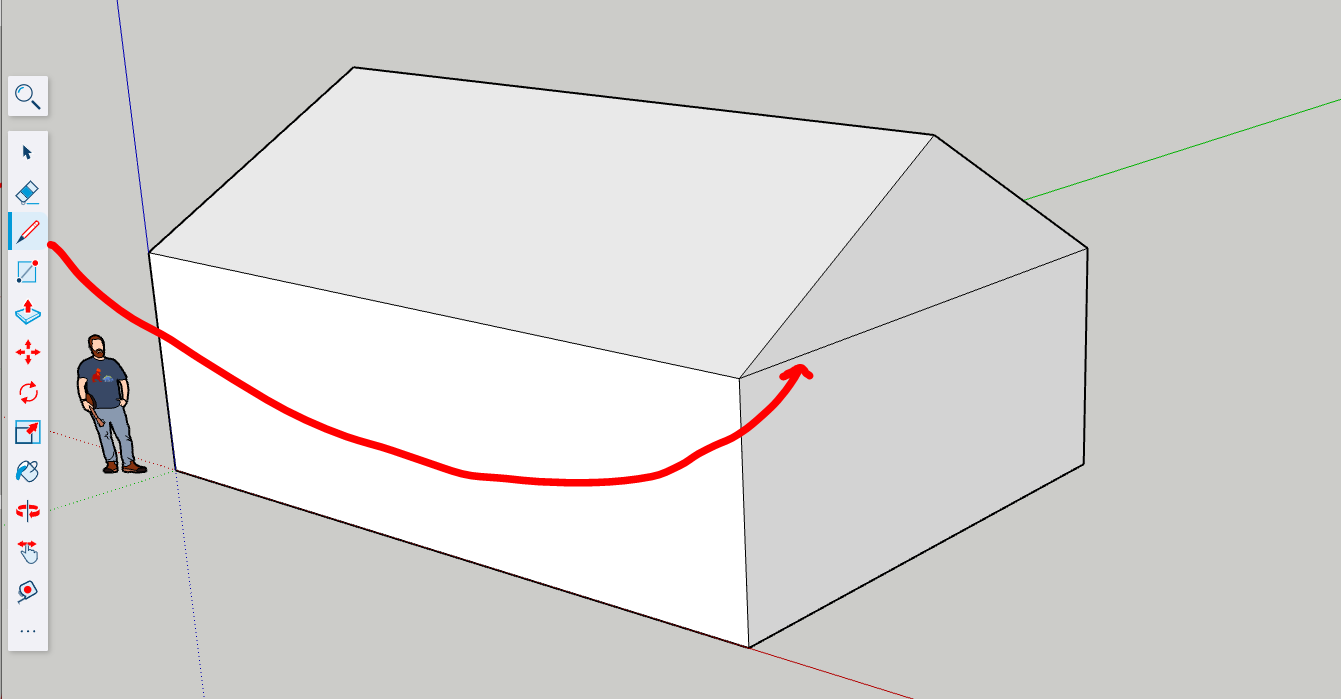
Slide using Move
🧱 Adding Architectural Features
-
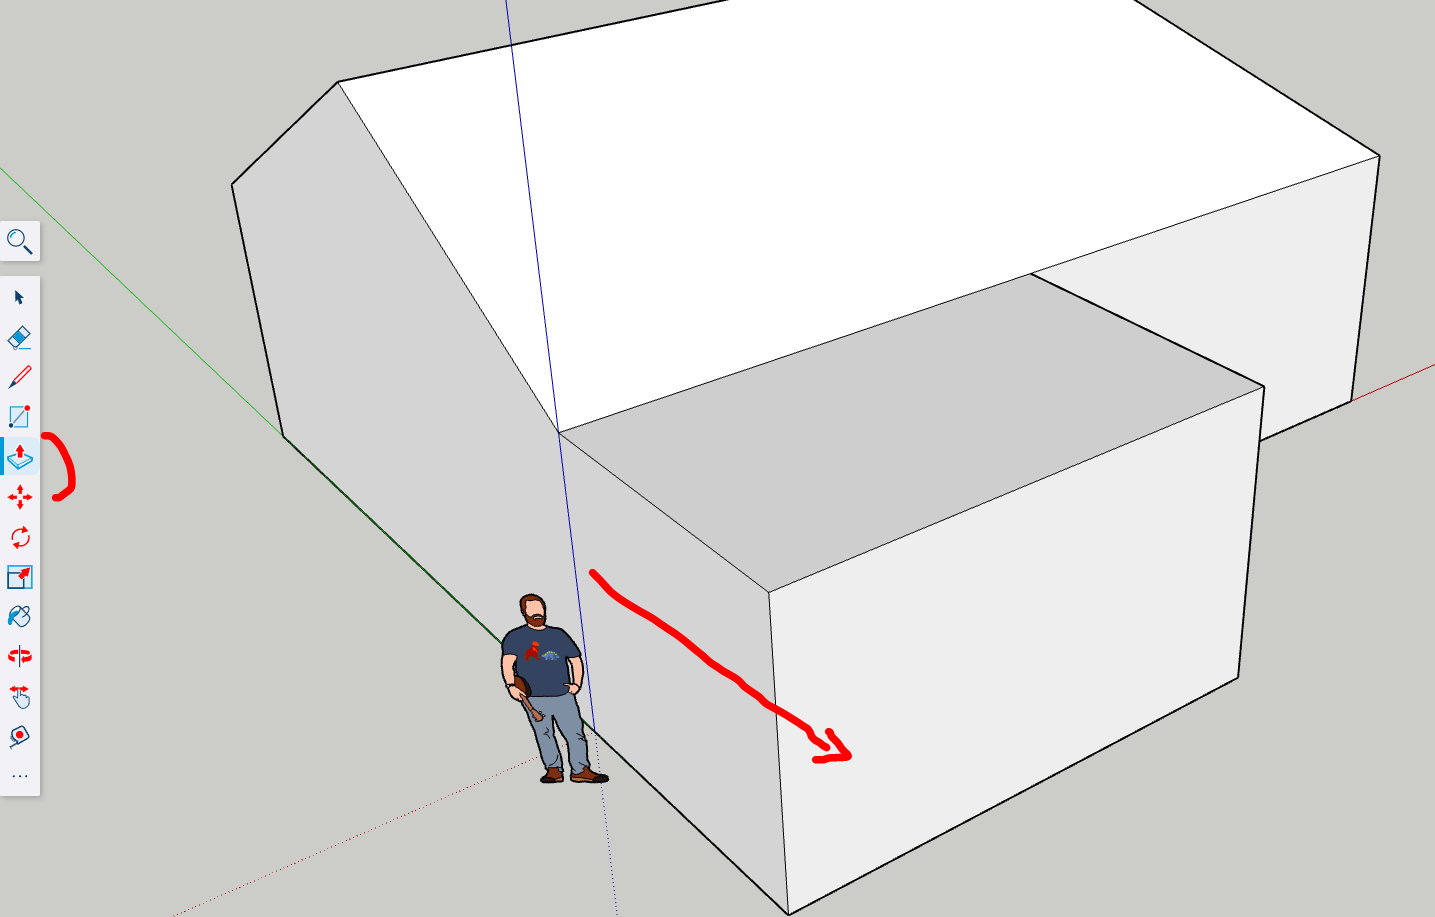
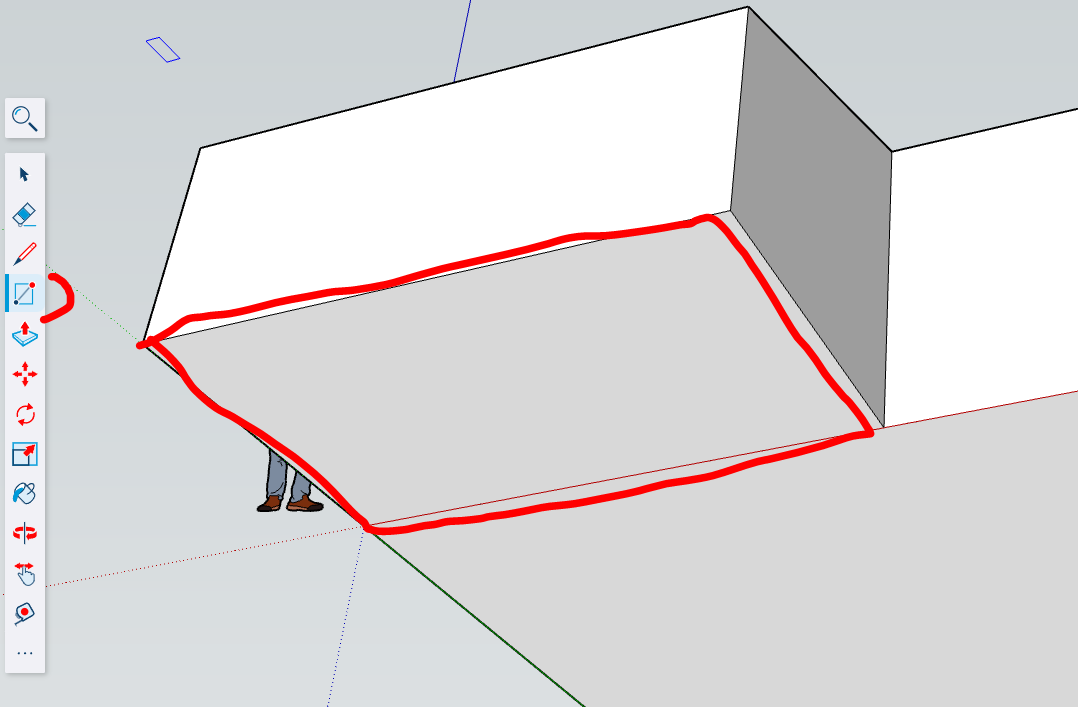
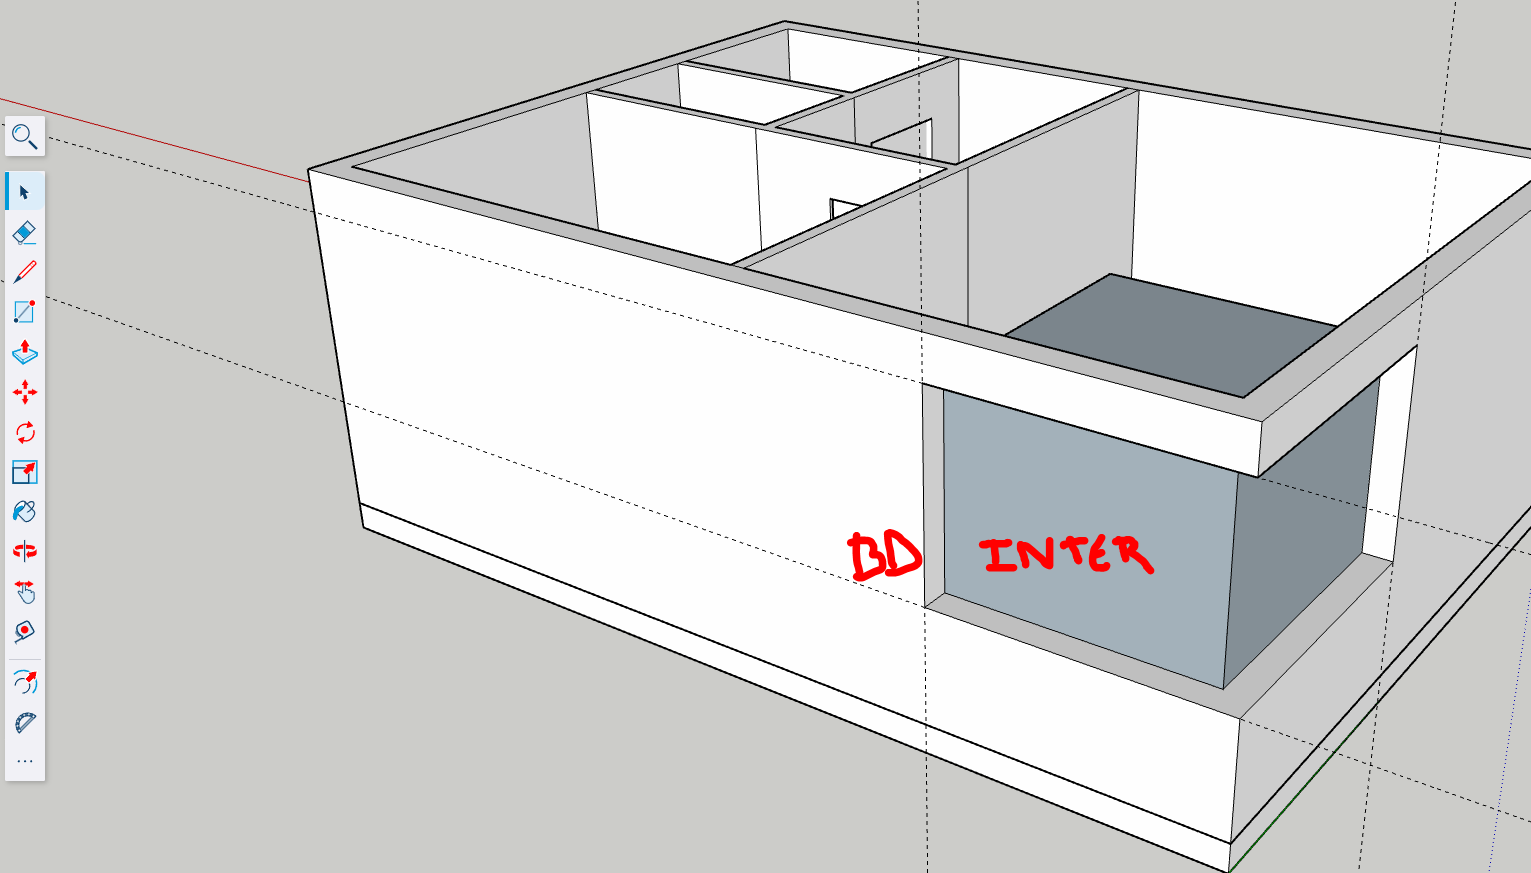
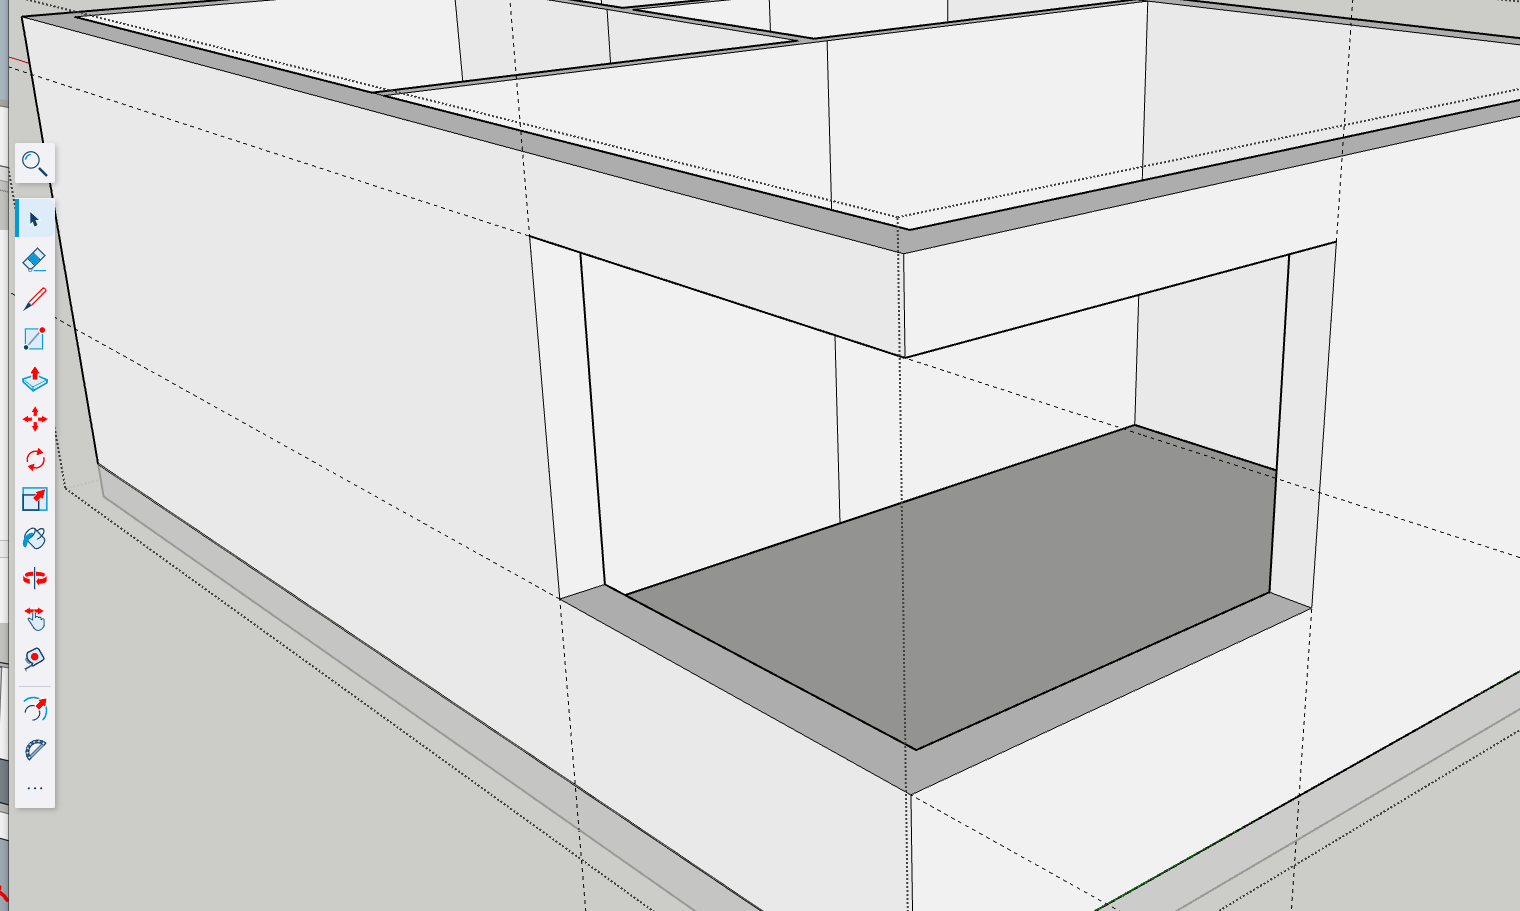
Draw openings for doors/windows
→ Use the Rectangle tool on vertical faces for openings.
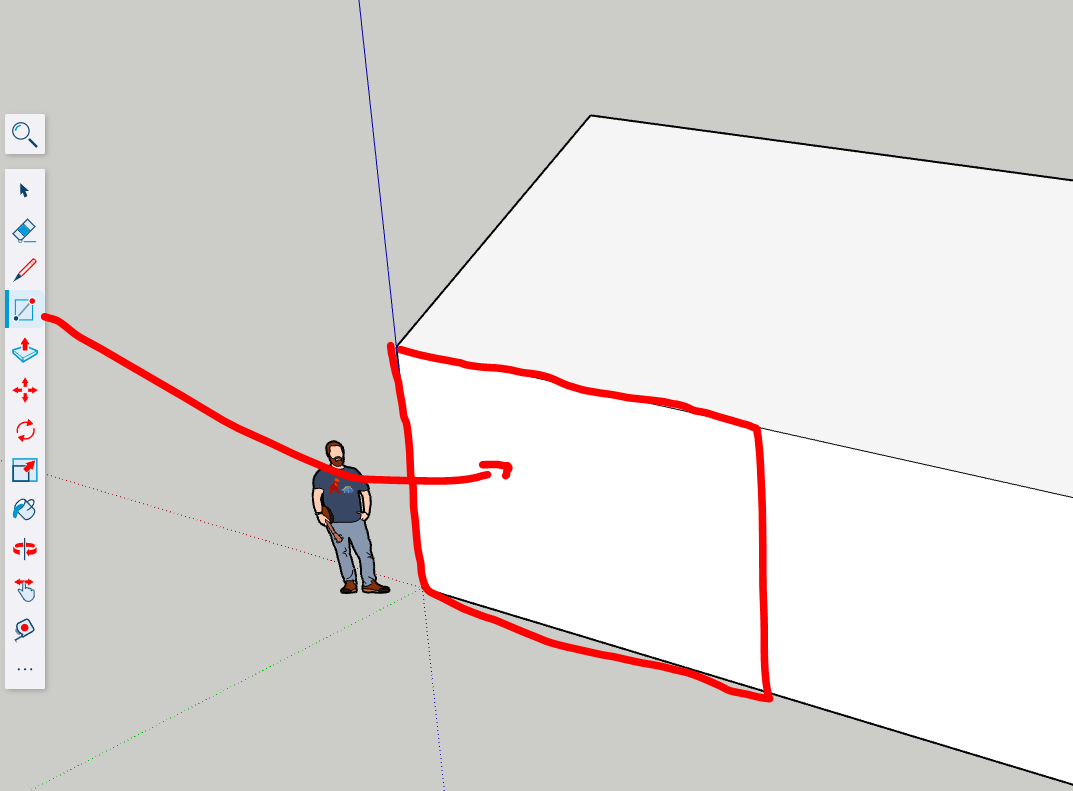
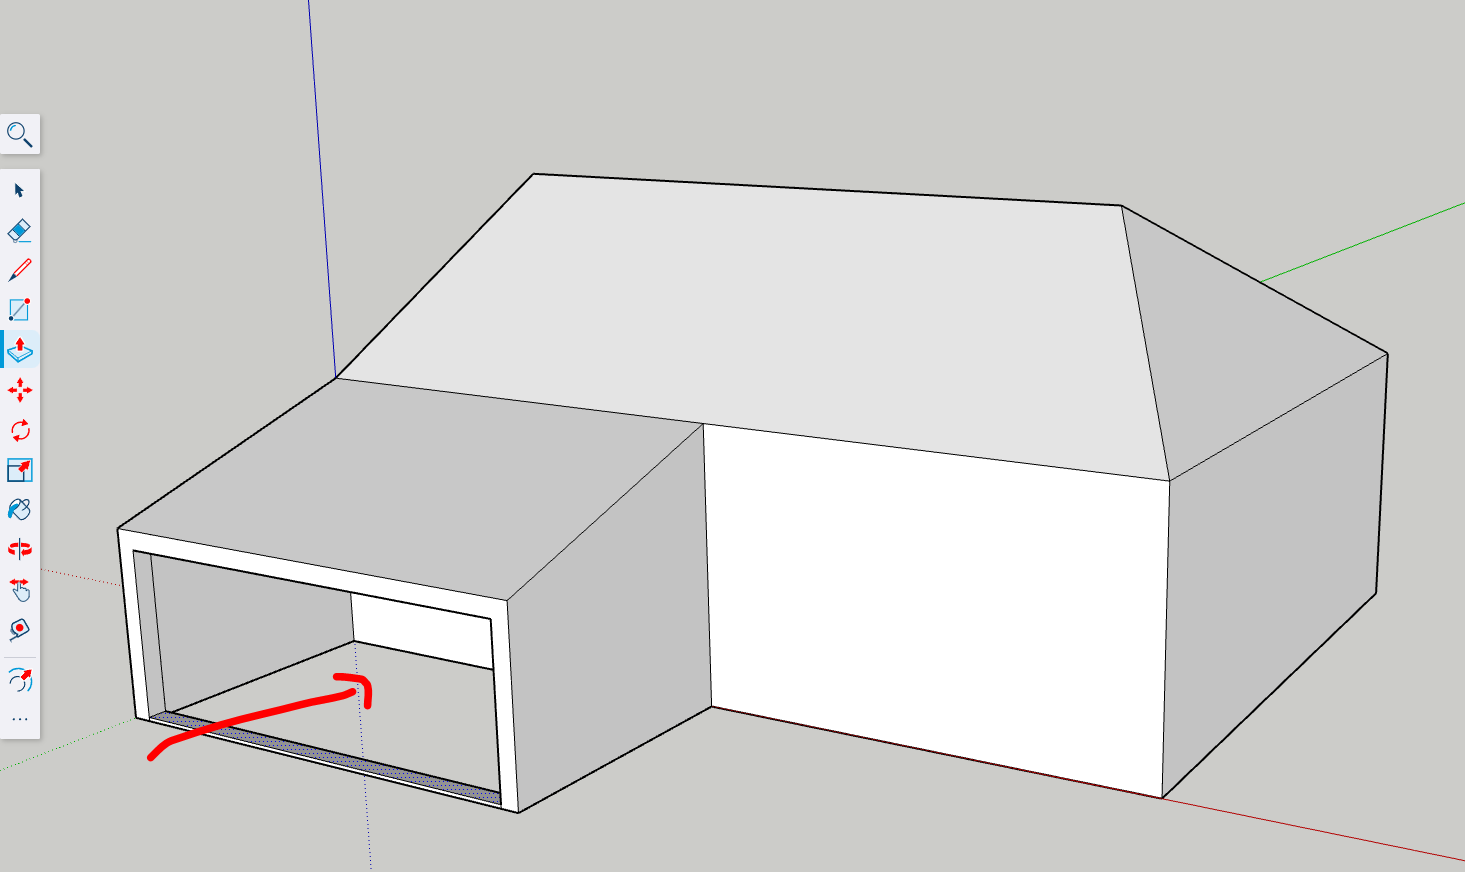
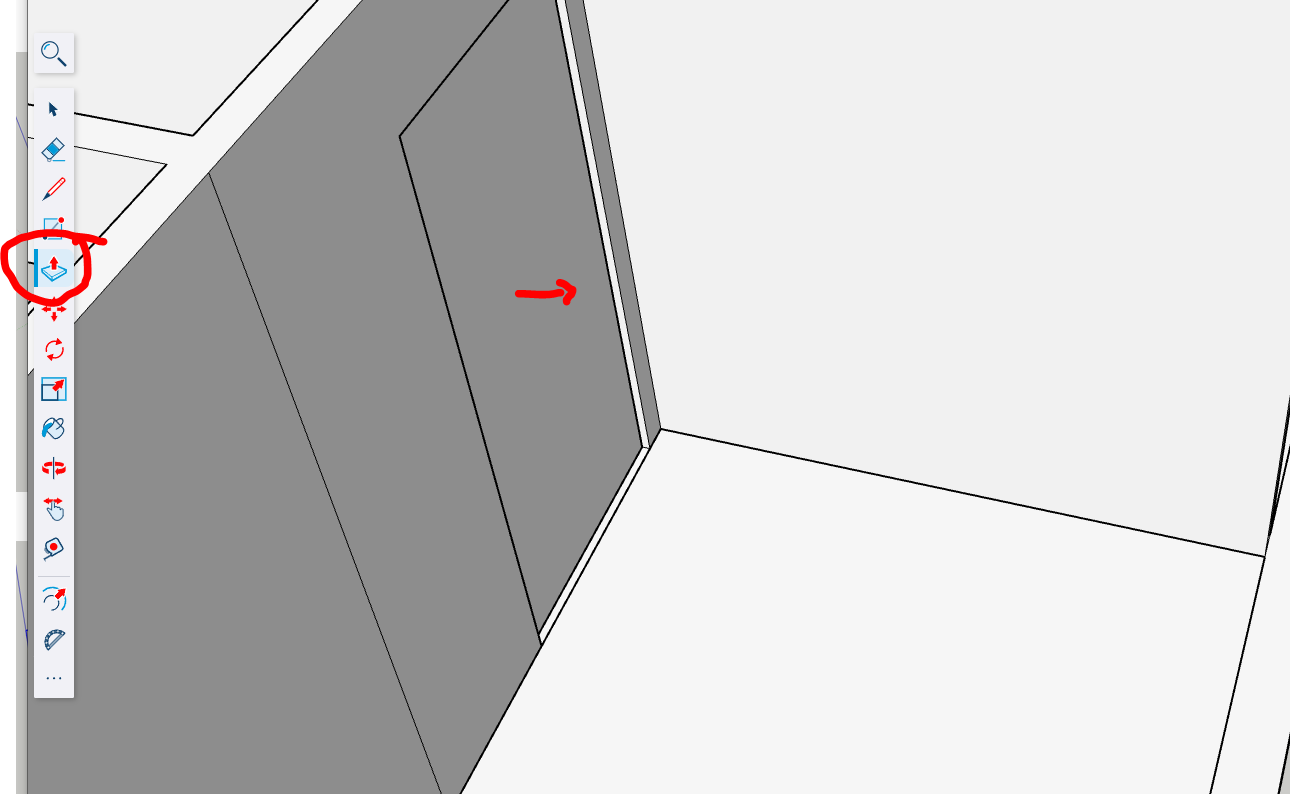
Push Pull to extrude the volume
Insets to create parallele lines in the face.
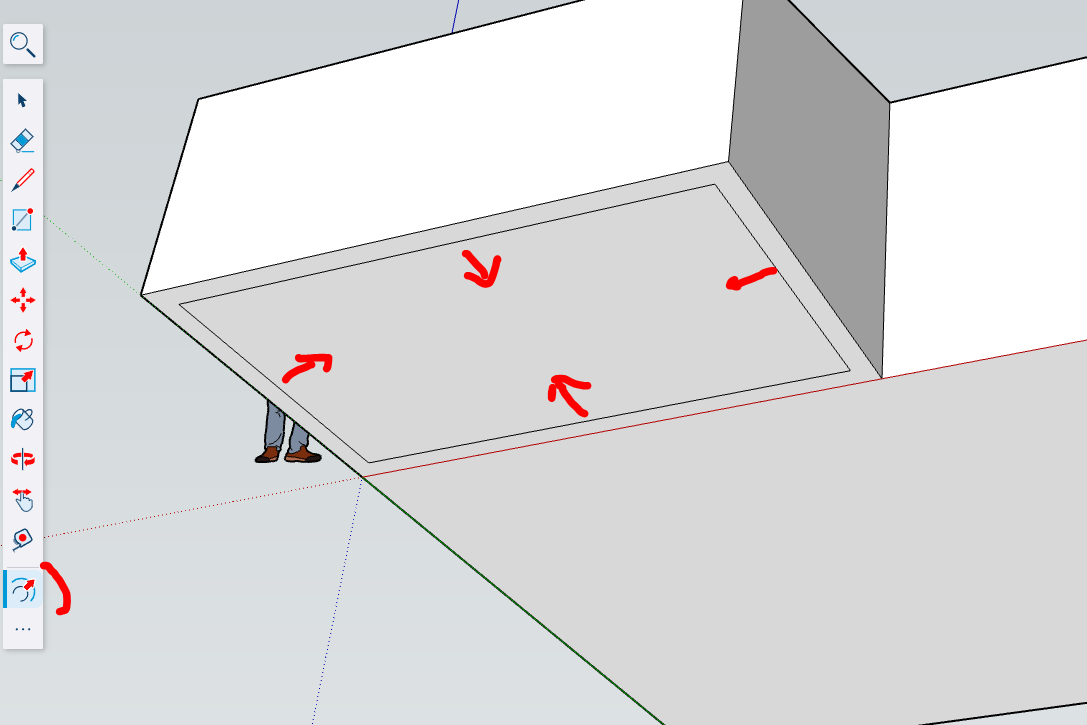
Push/Pull
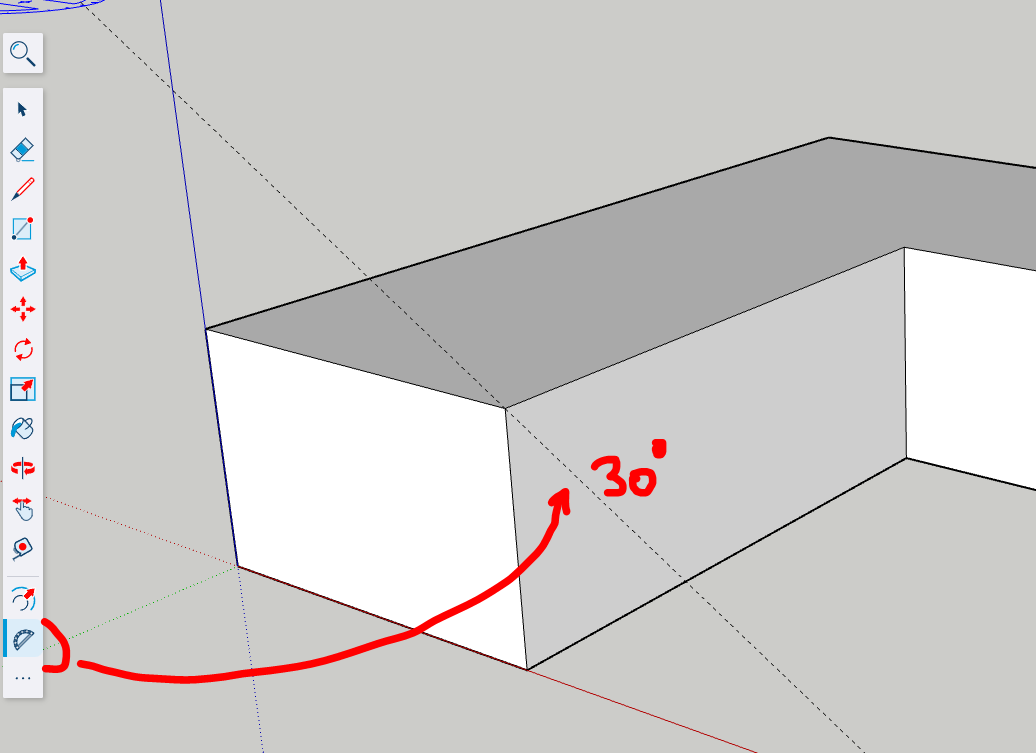
🏠More comple roofs Roof Construction
Create guideline (construction lines) with angle
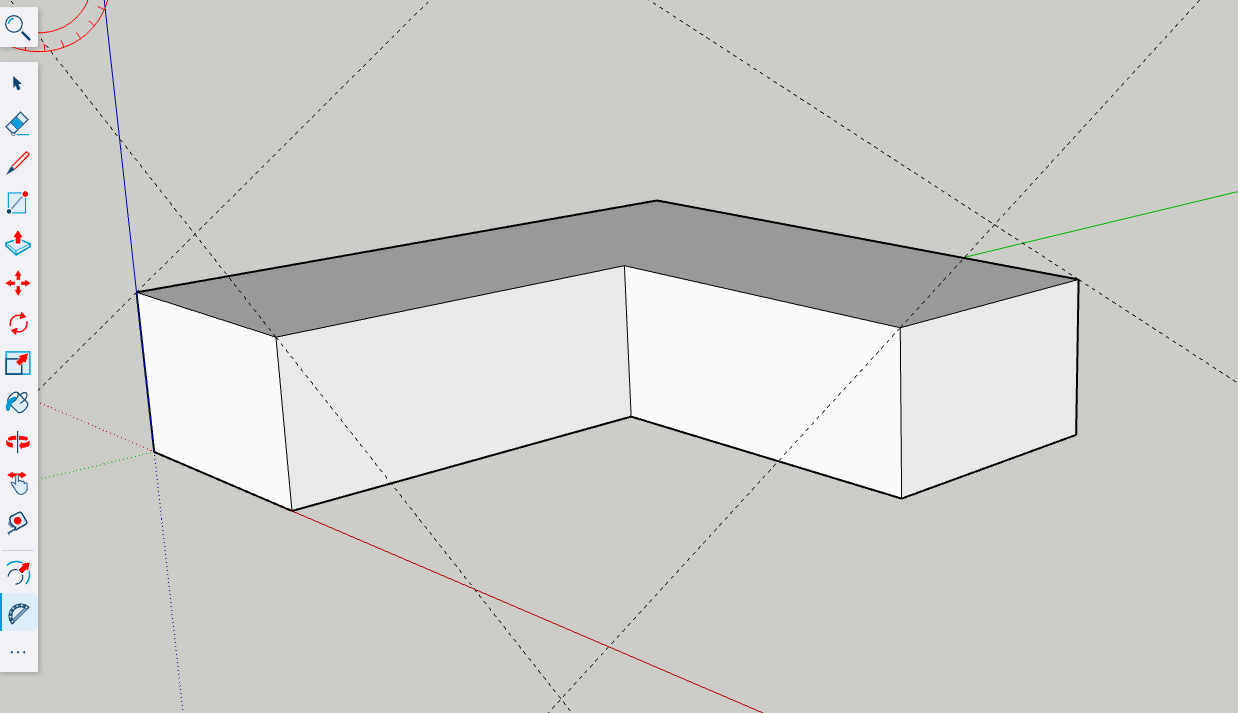
Draw the triangle
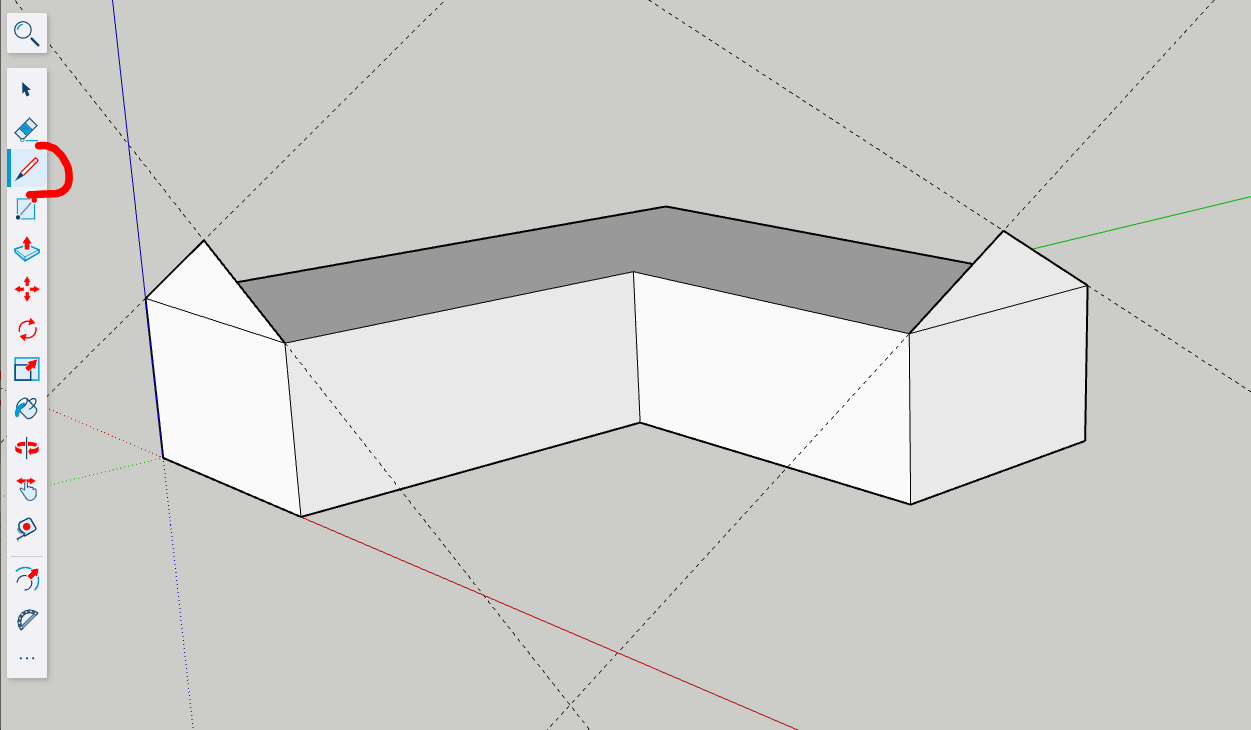
Complete by drawing
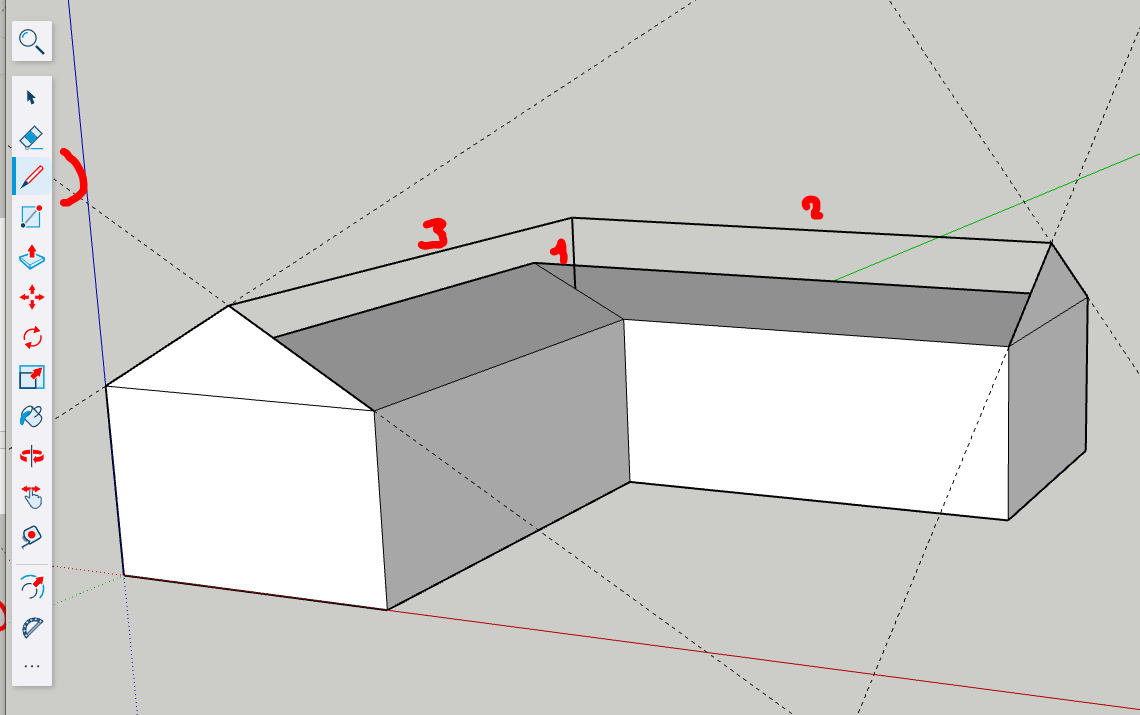
Close the shapes by adding the last lines
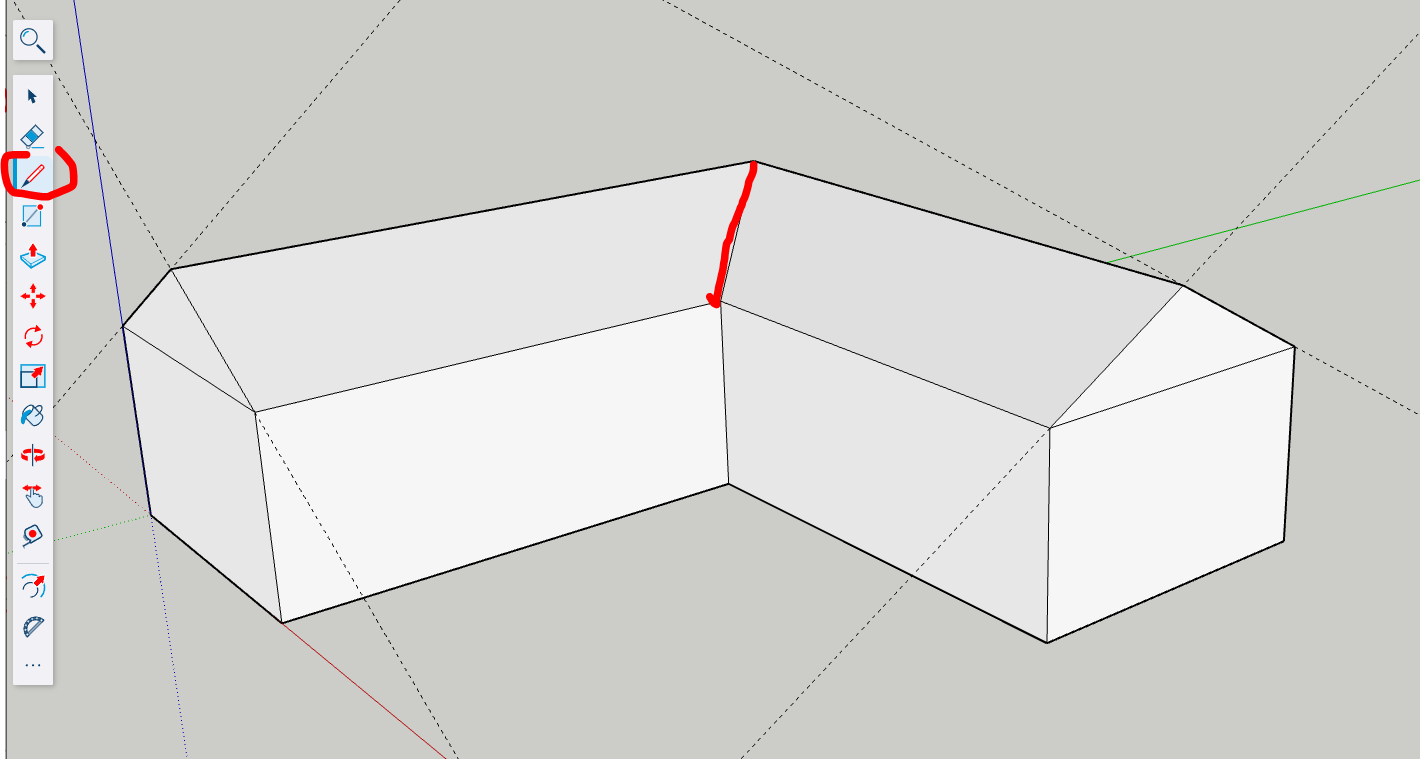
Remove unnecessary line and polygones
Redraw the missing line to close the geometry
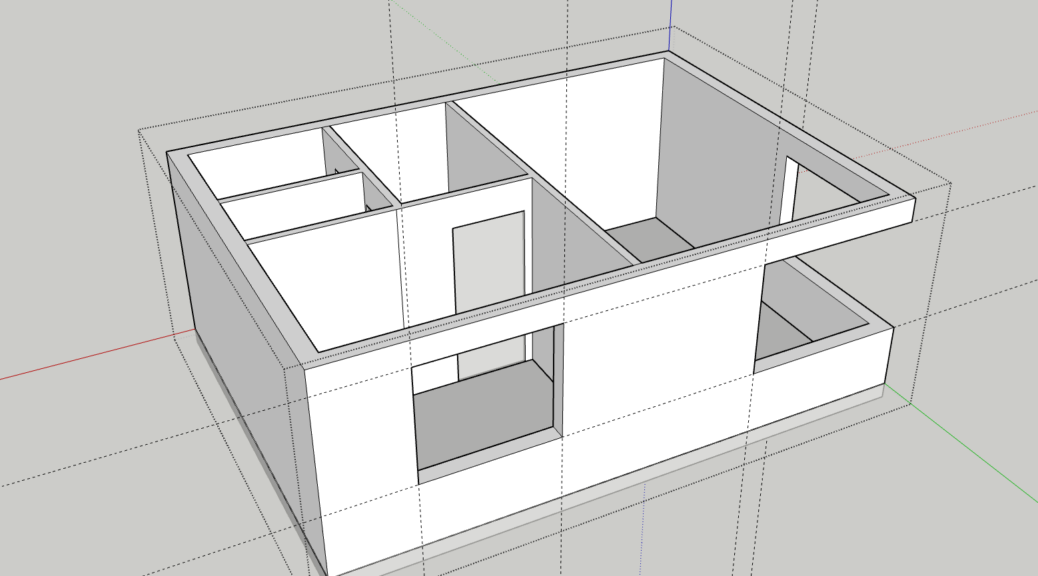
Interior design
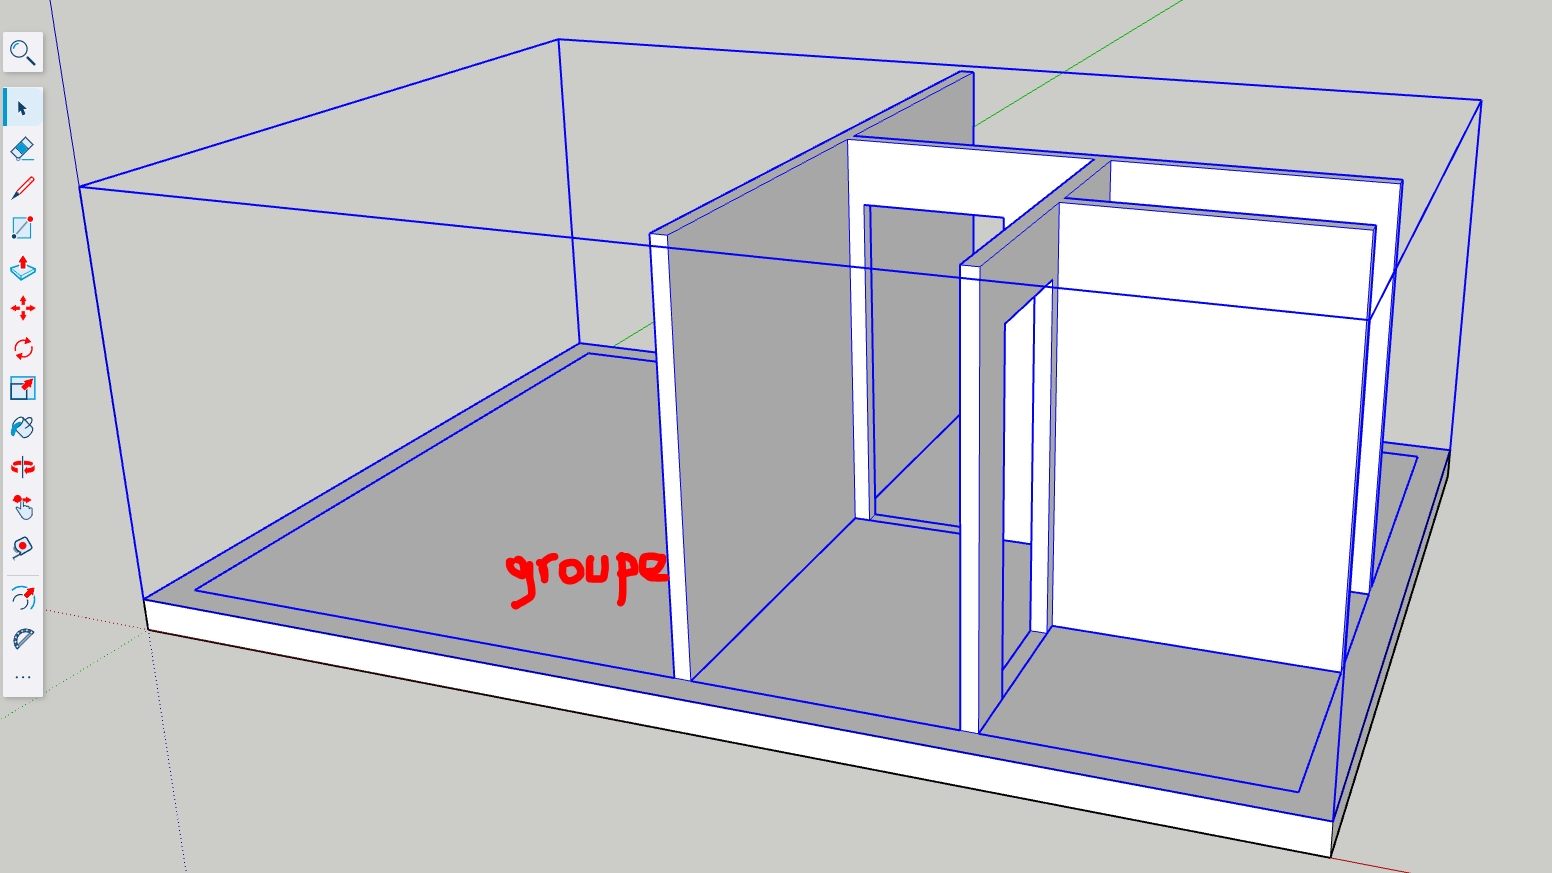
Create a slab, make a group
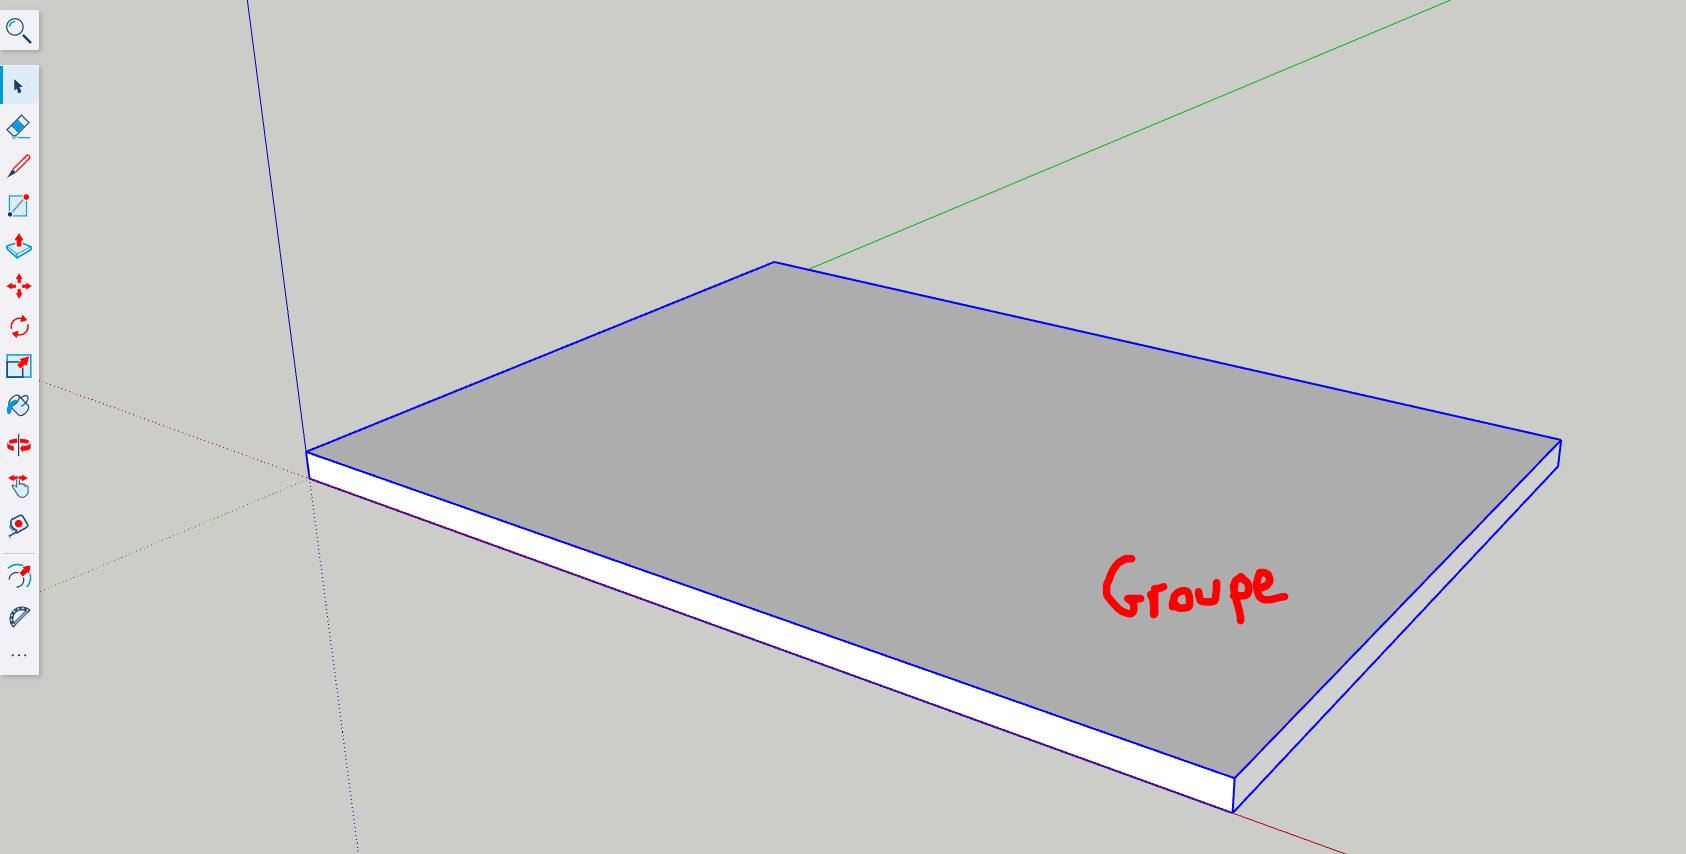
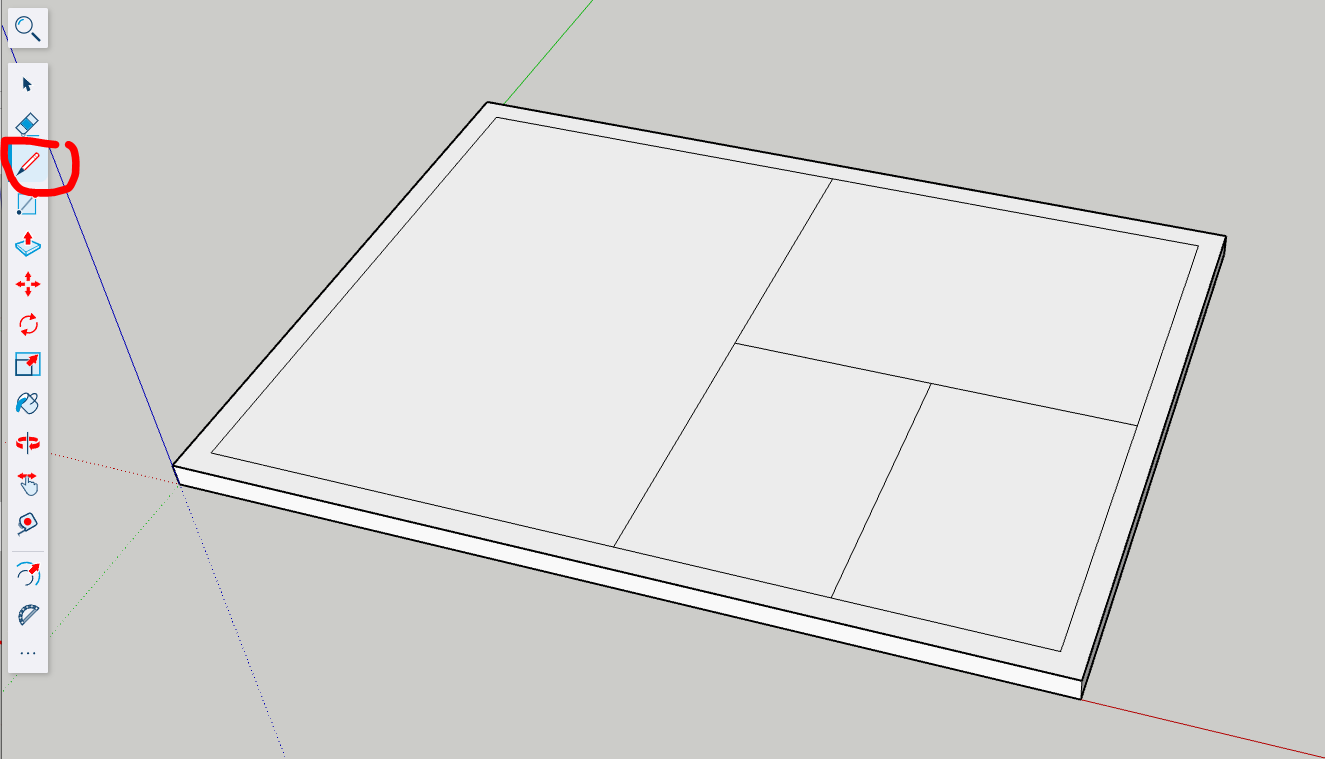
Select the Rectangle Tool (shortcut: R) and draw a rectangle on the ground plane to define the base of the house. This will serve as the floor plan on which walls will be built.
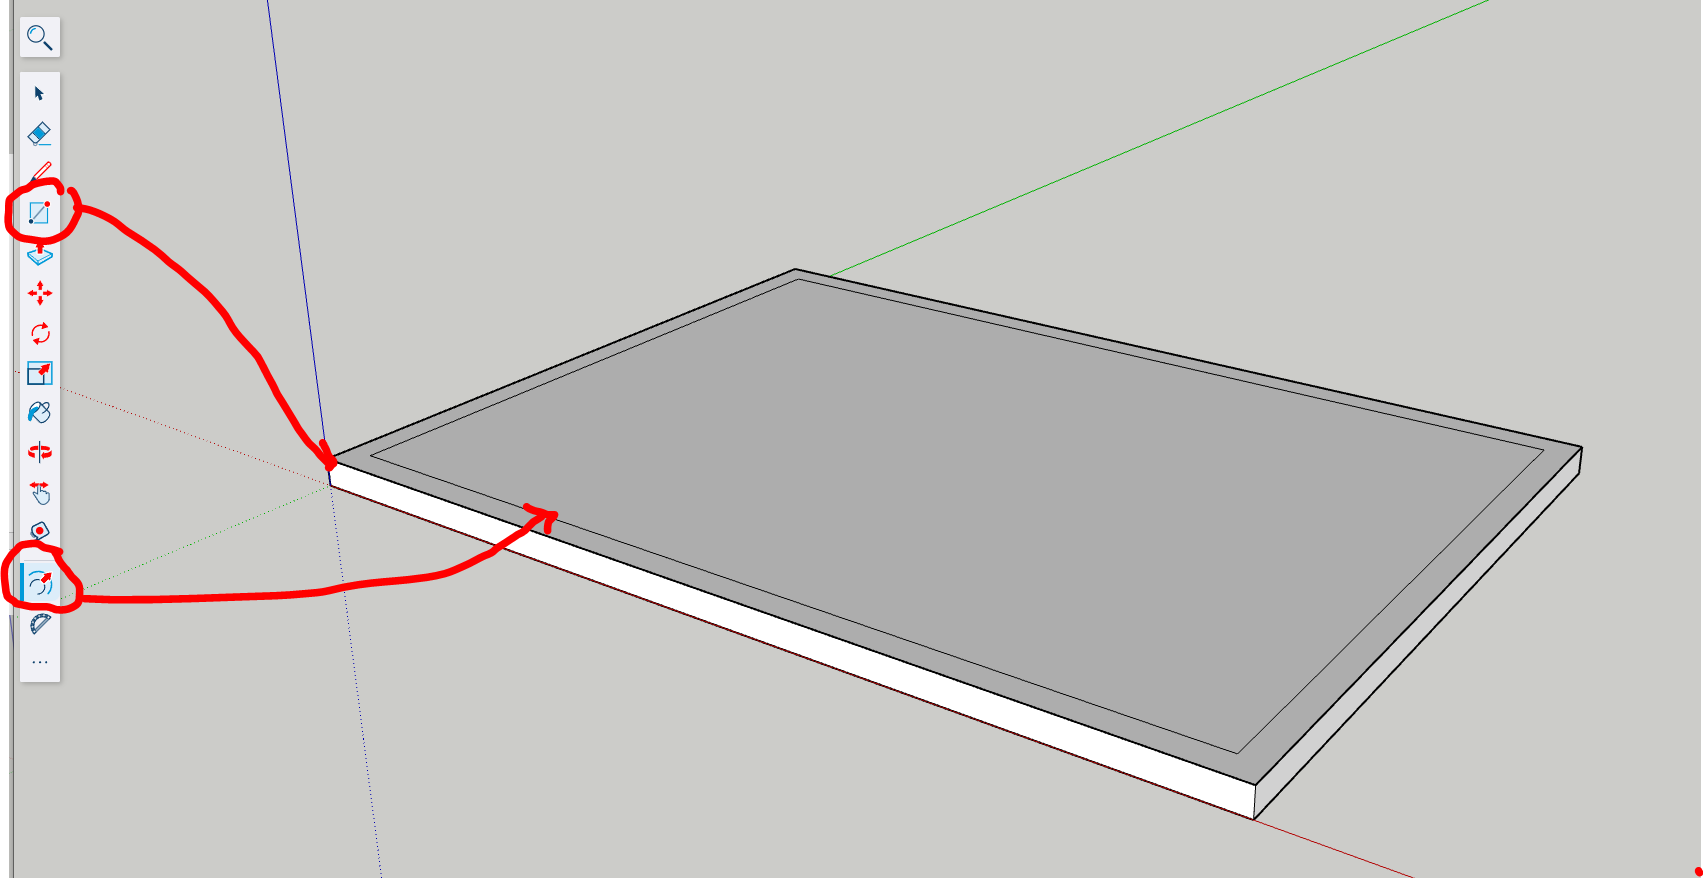
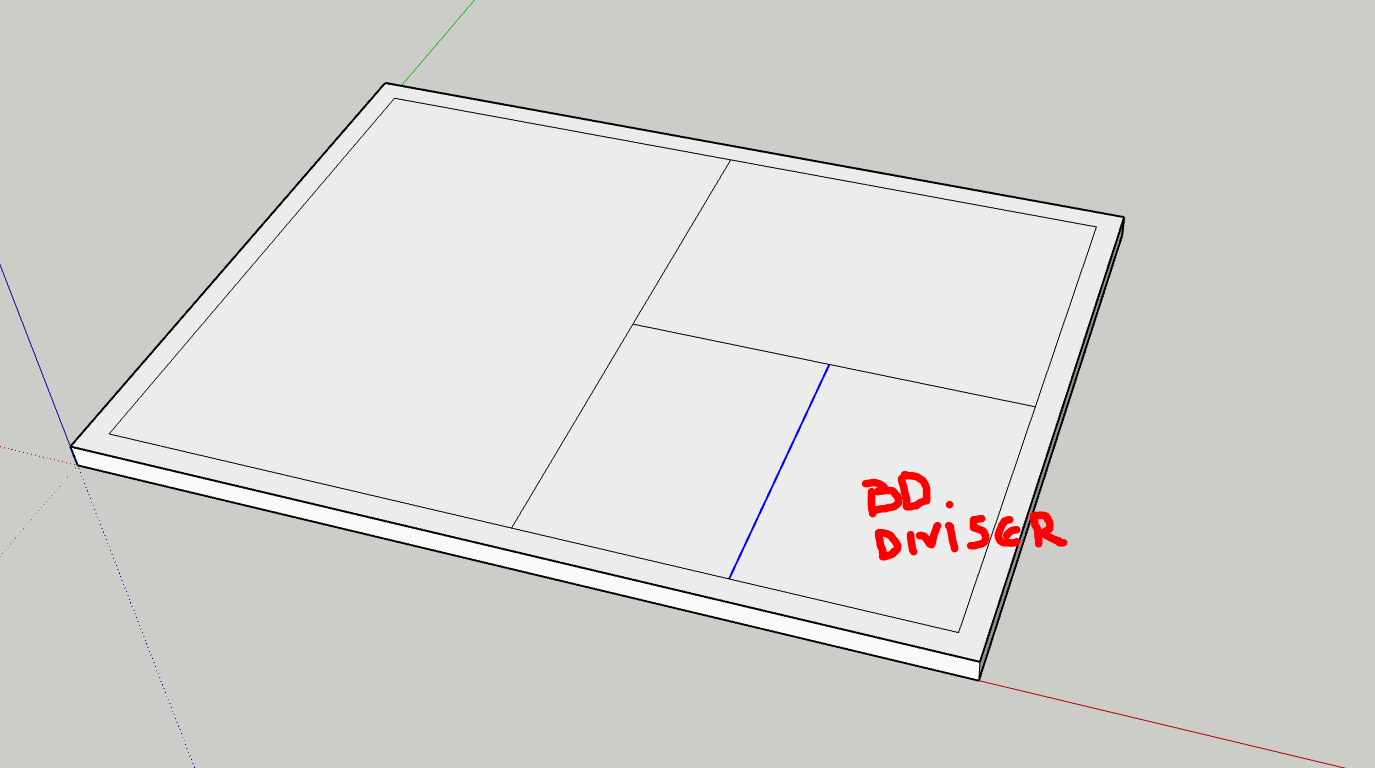
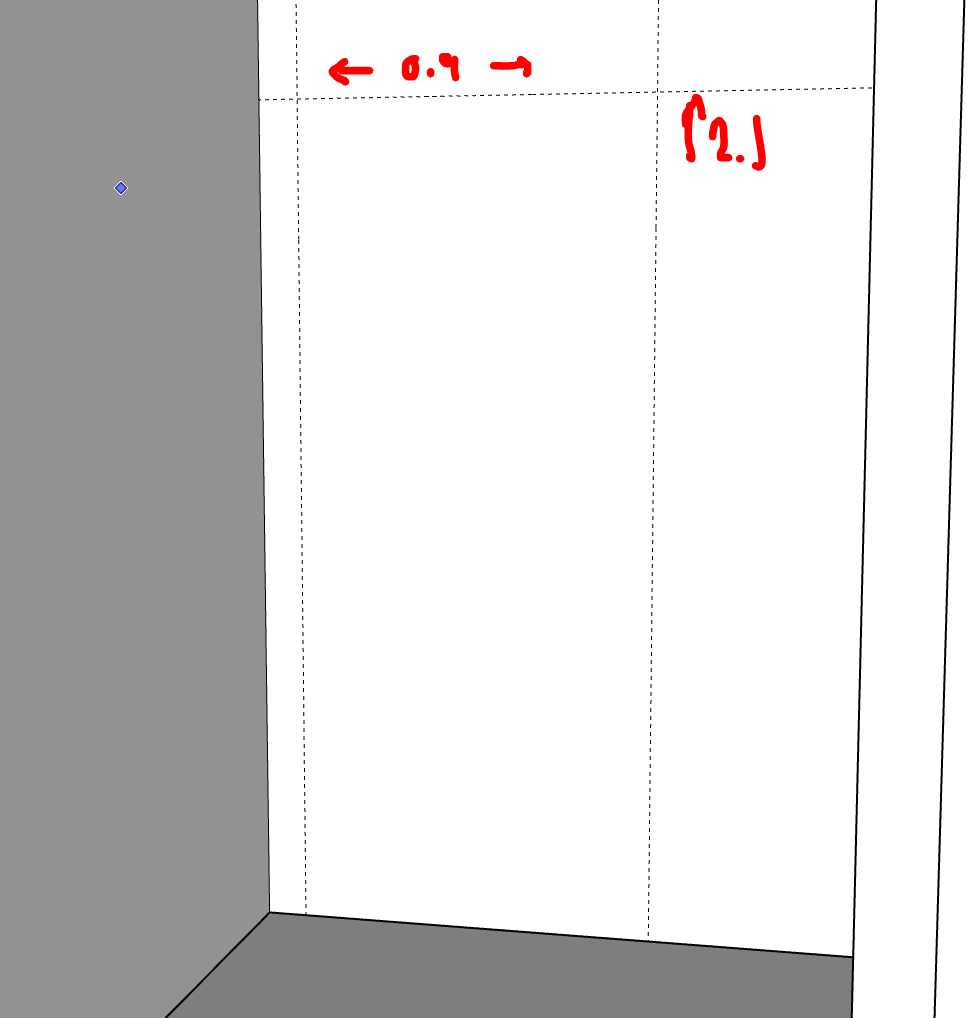
Using the Line Tool (shortcut: L), draw lines within the rectangle to indicate where the interior walls will be placed. Use the measurements input at the bottom-right corner to enter precise distances.
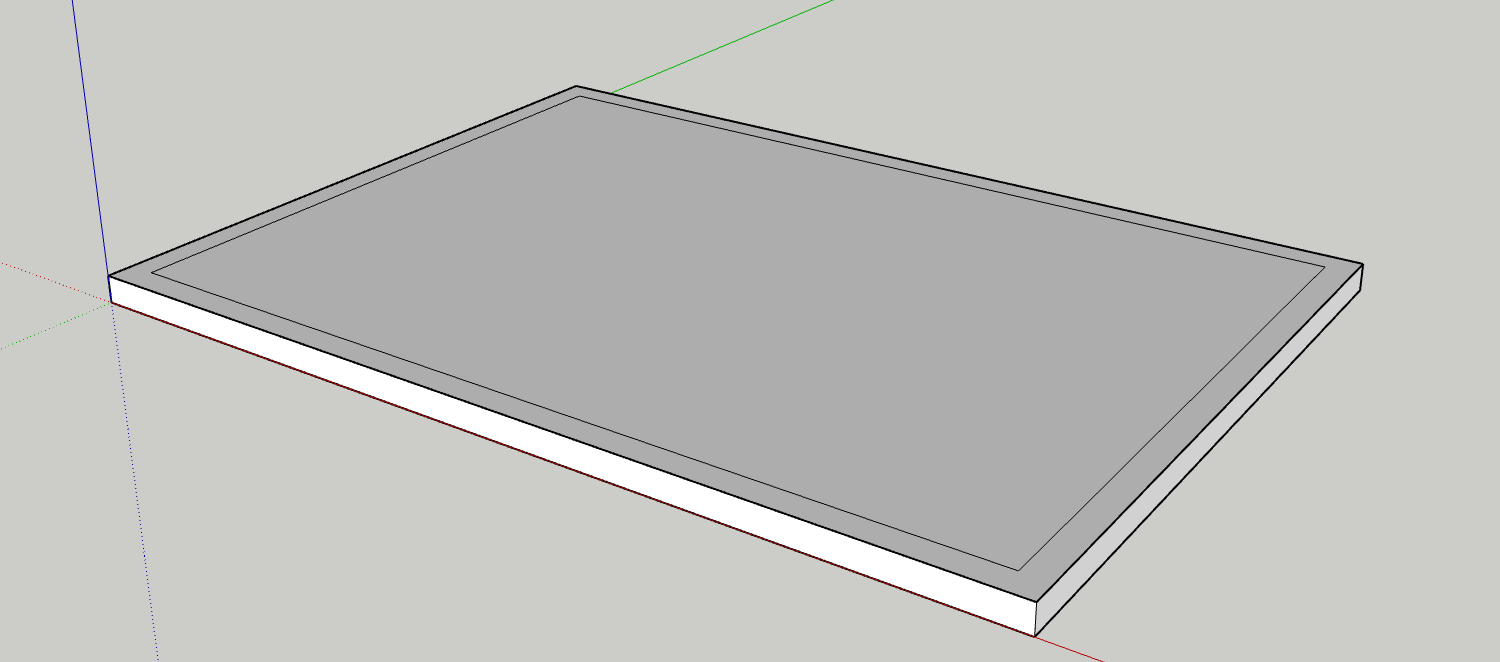
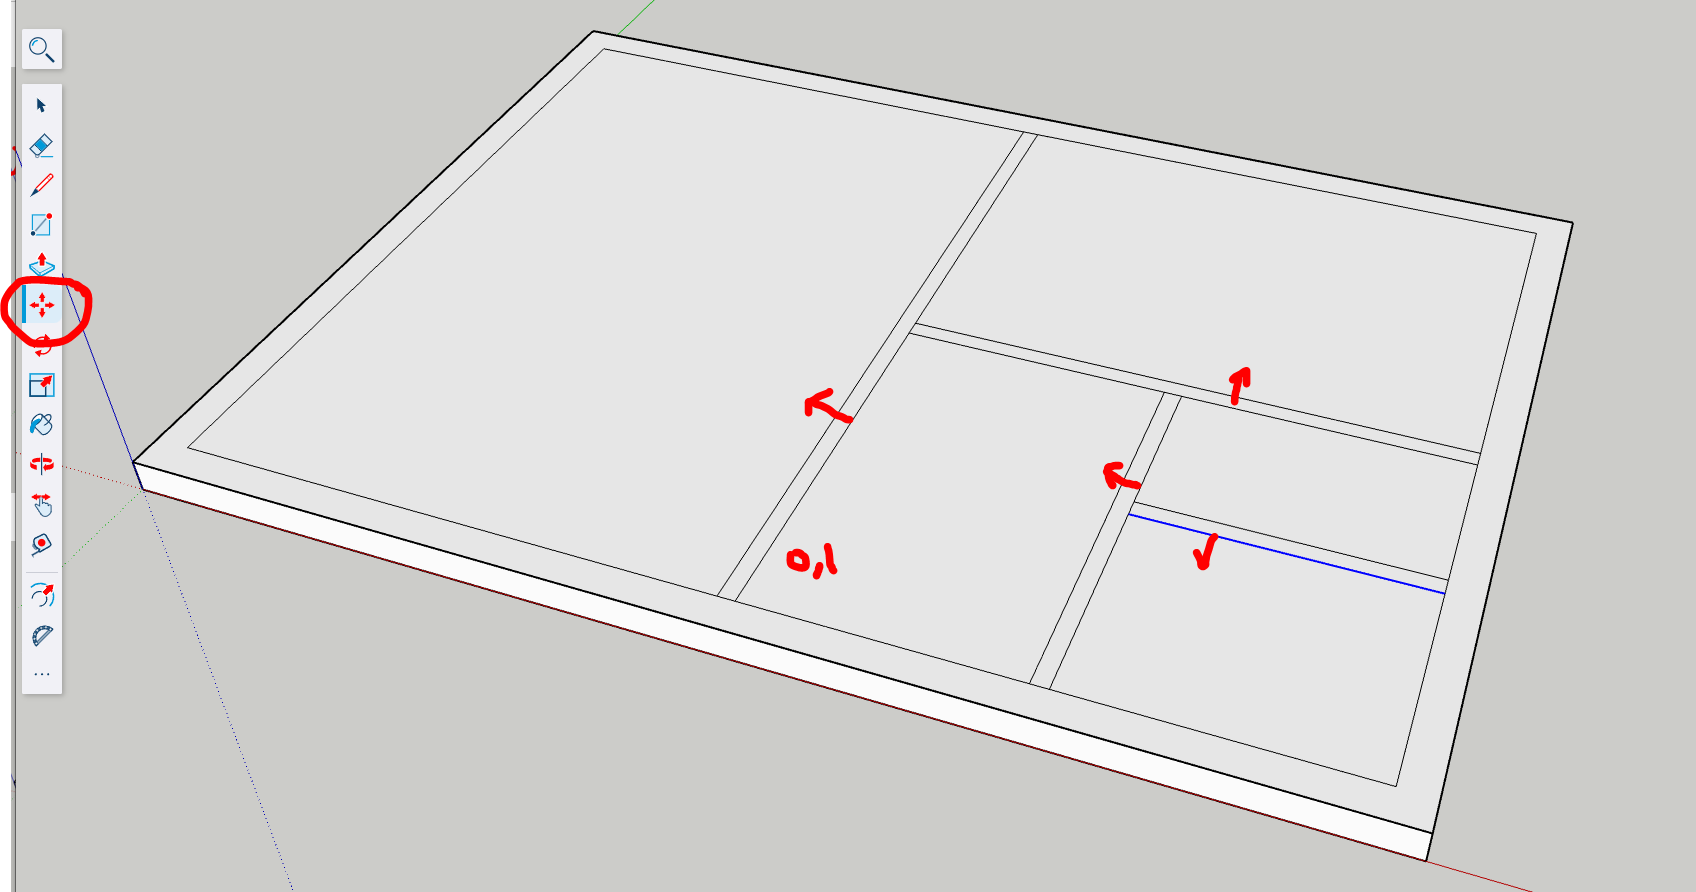
Use the Offset Tool (shortcut: F) to create parallel lines around your wall layout, representing the thickness of each wall. Click inside each section and drag outward to the desired wall width.
Inspect corners and edges to ensure they are clean. Use the Eraser Tool to delete unnecessary lines, and the Line Tool to reconnect any broken geometry.
Use the Eraser Tool (shortcut: E) or the Select Tool + Delete to remove intersecting or extra lines that are not part of the wall boundaries. Clean geometry ensures walls will extrude properly.
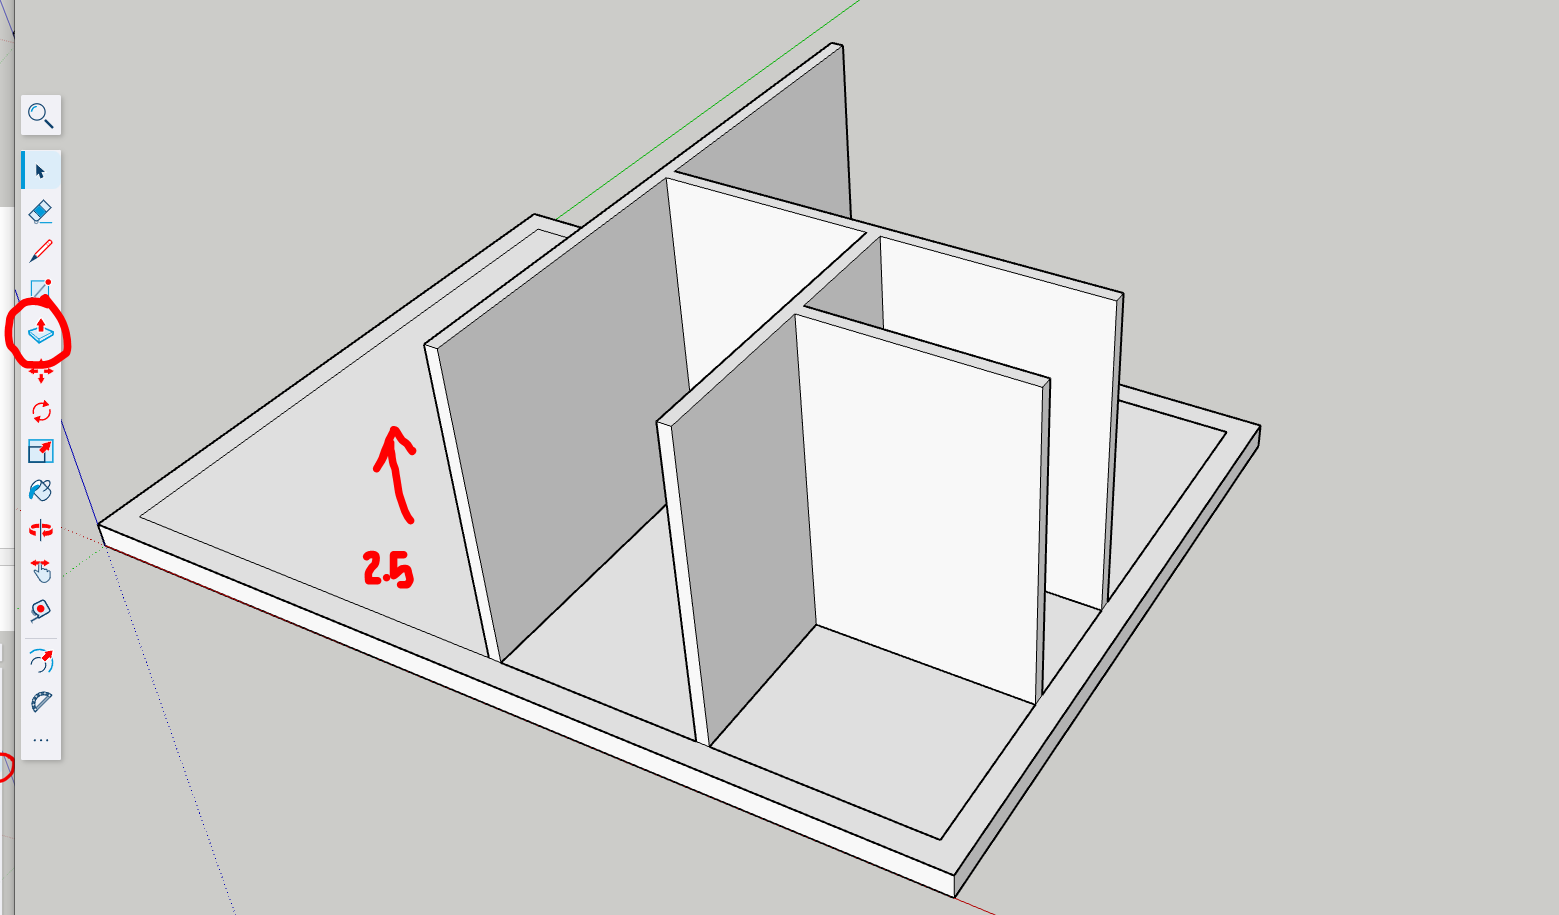
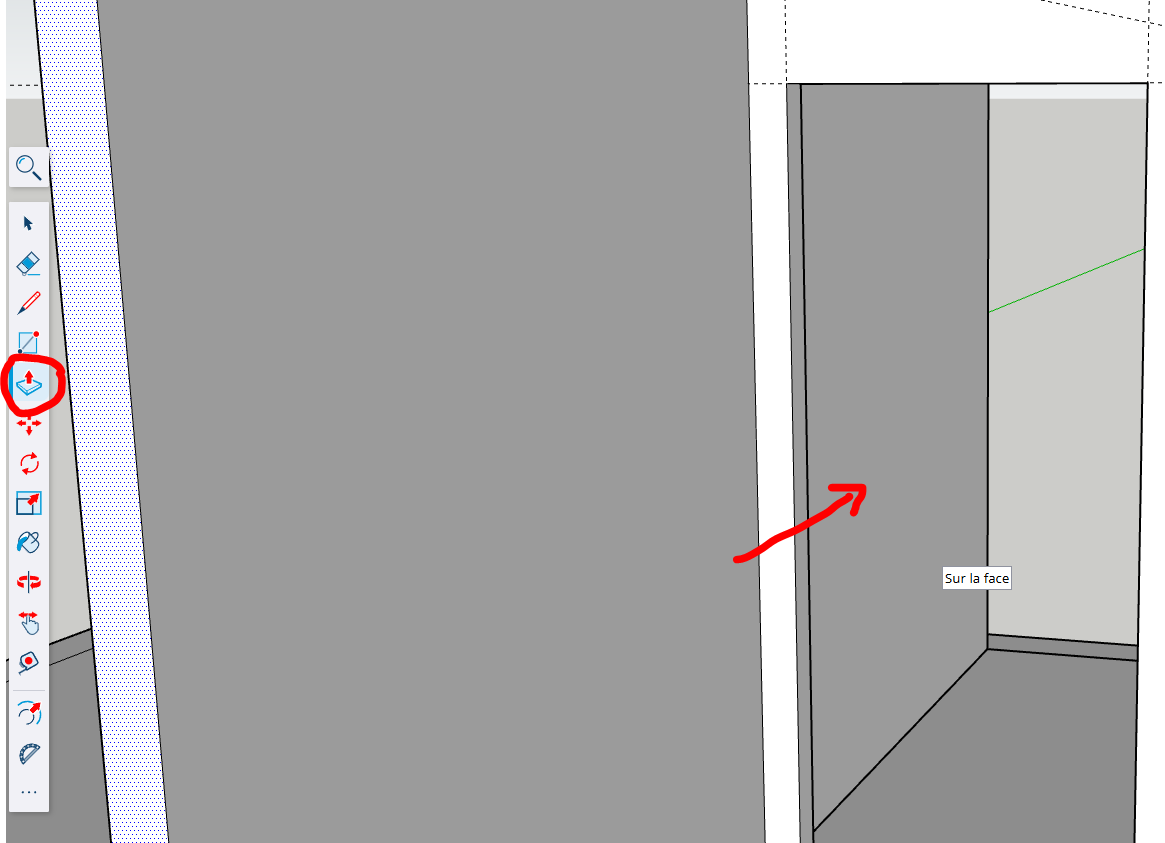
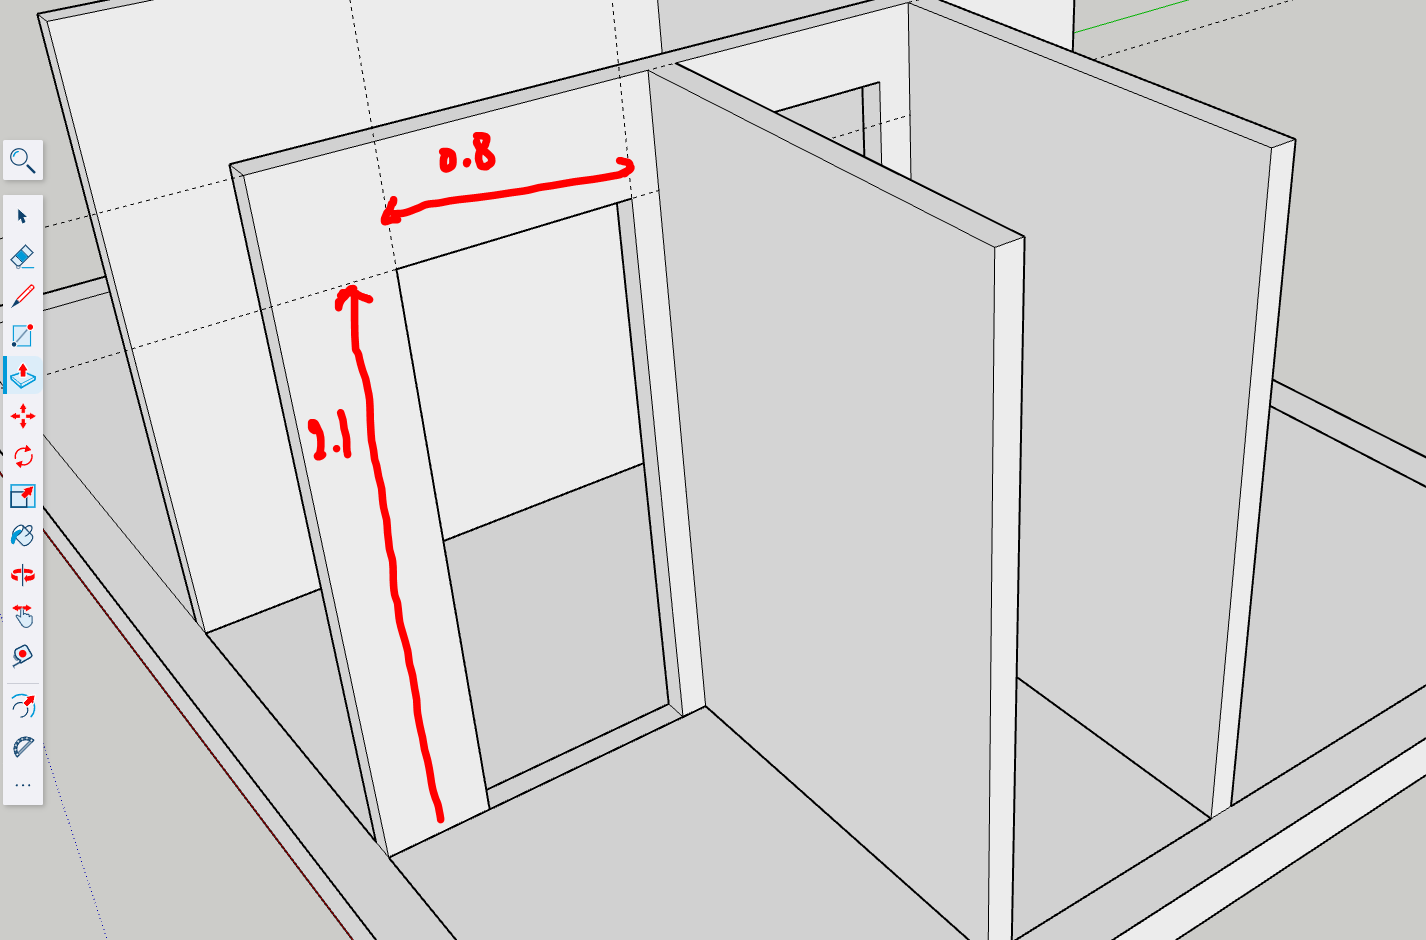
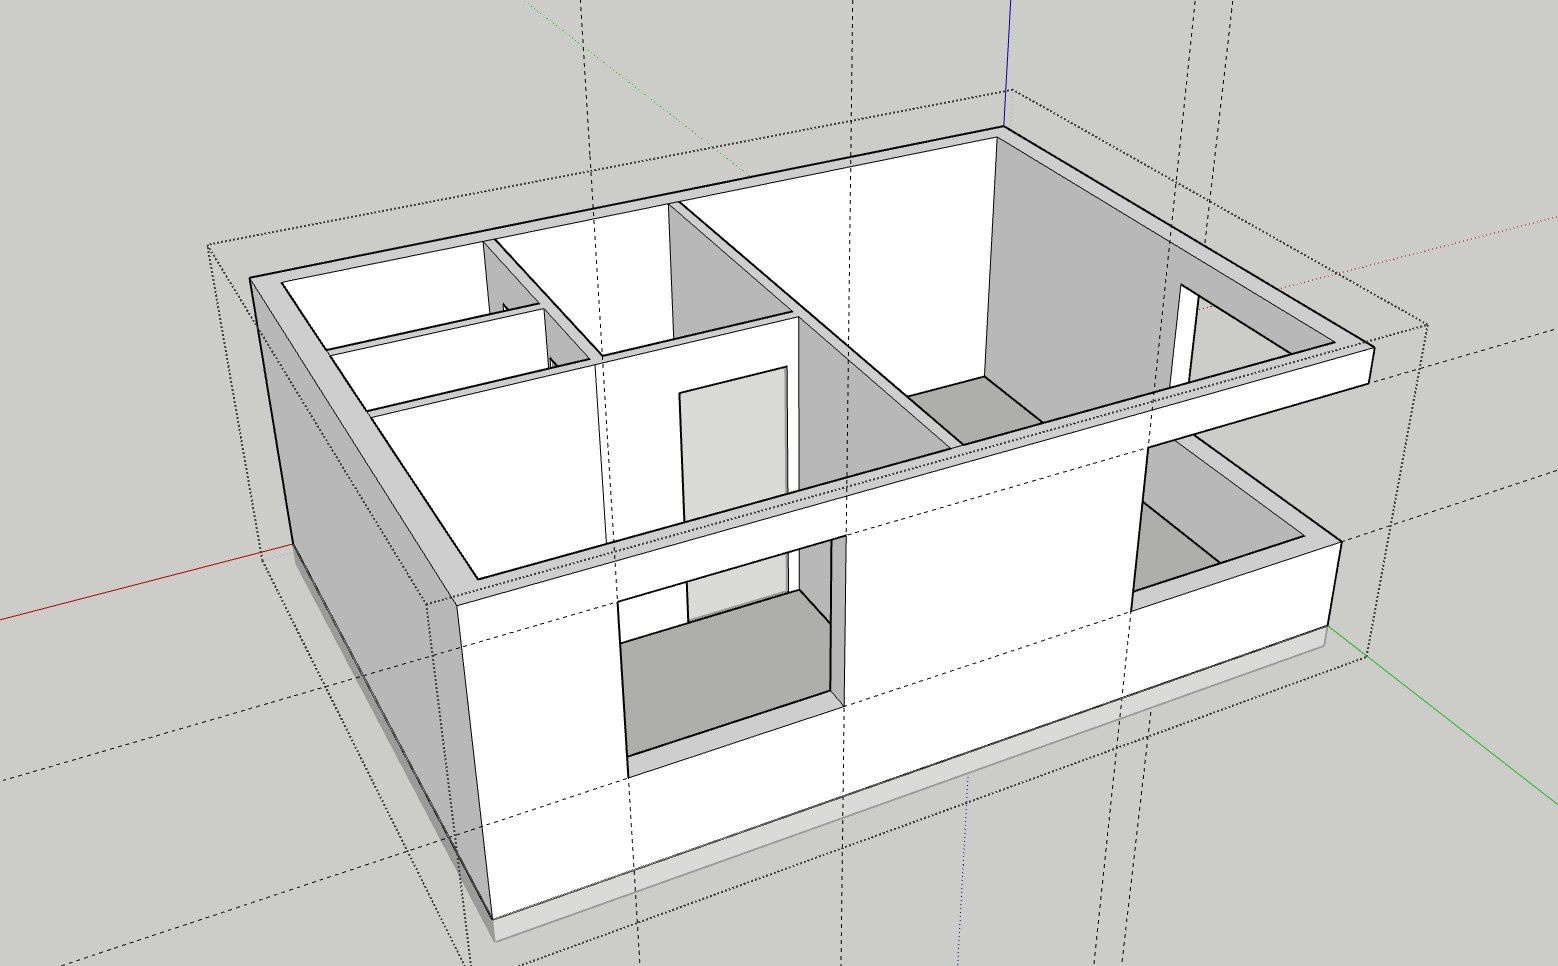
Activate the Push/Pull Tool (shortcut: P). Click each wall face and pull it upward to a consistent height, such as 9 feet or 270 cm. This converts your 2D plan into a 3D model.
Use the Orbit Tool (shortcut: O) and Zoom Tool (scroll wheel or shortcut: Z) to inspect the model from different angles. Ensure all walls are correctly placed and aligned.


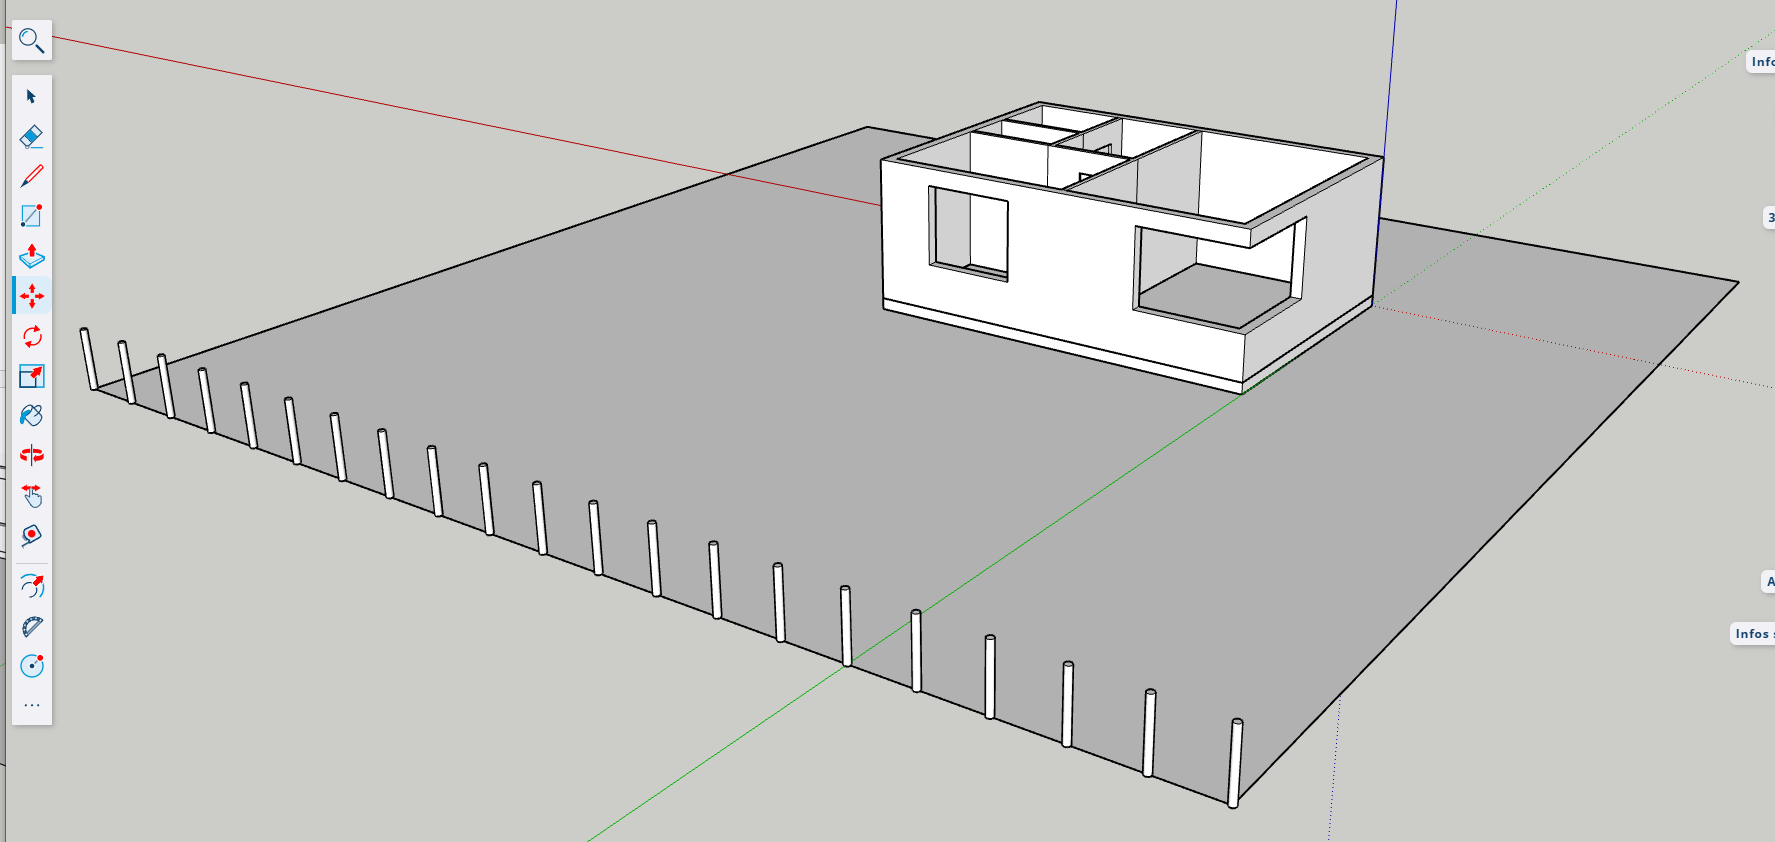
CTRL Distance X exemplaires
Ou CTRL Distance /X pour répartir
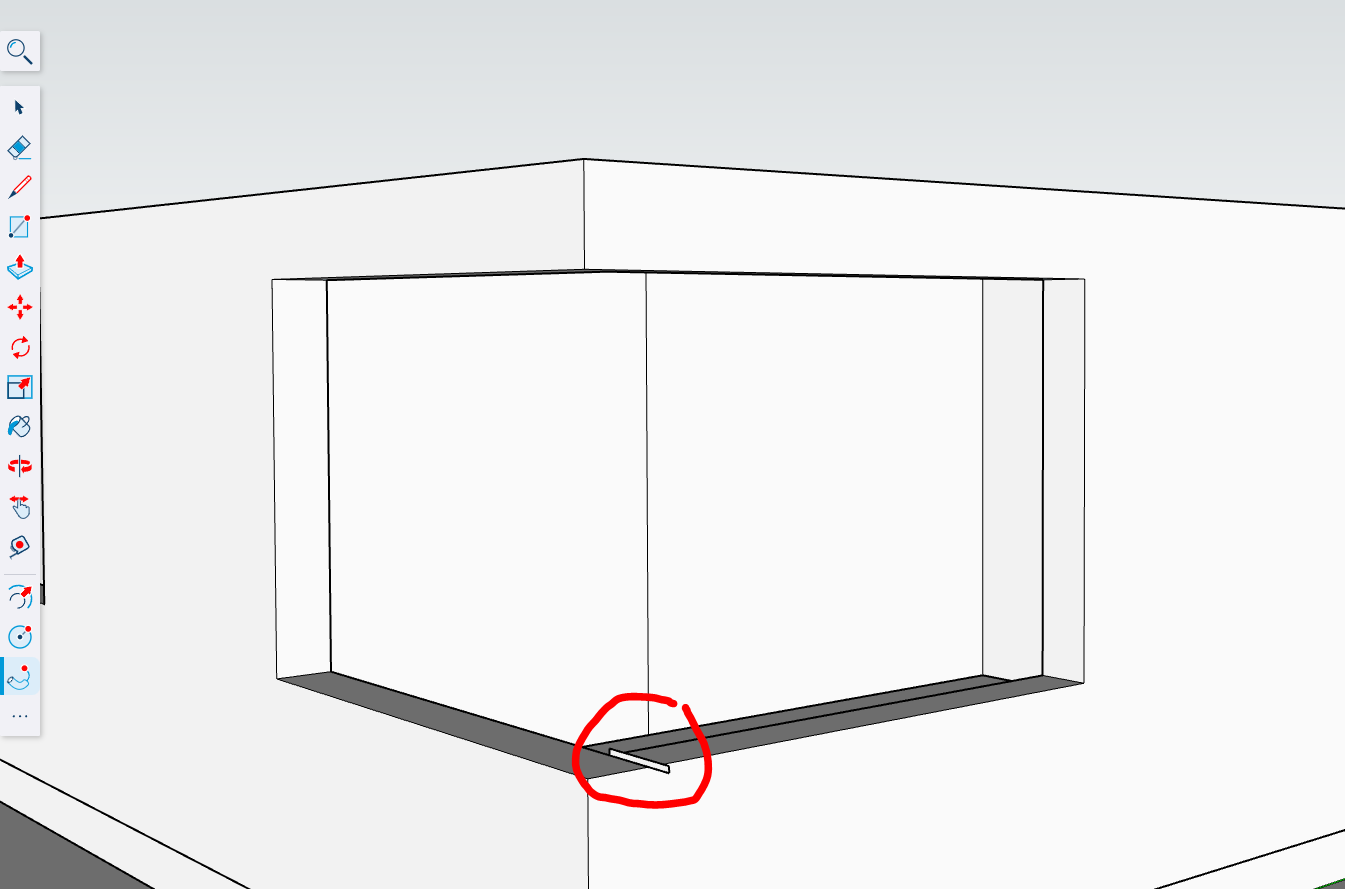
Push/Pull with CTRL to create a new step (11cm) and Push/Pull to slide.
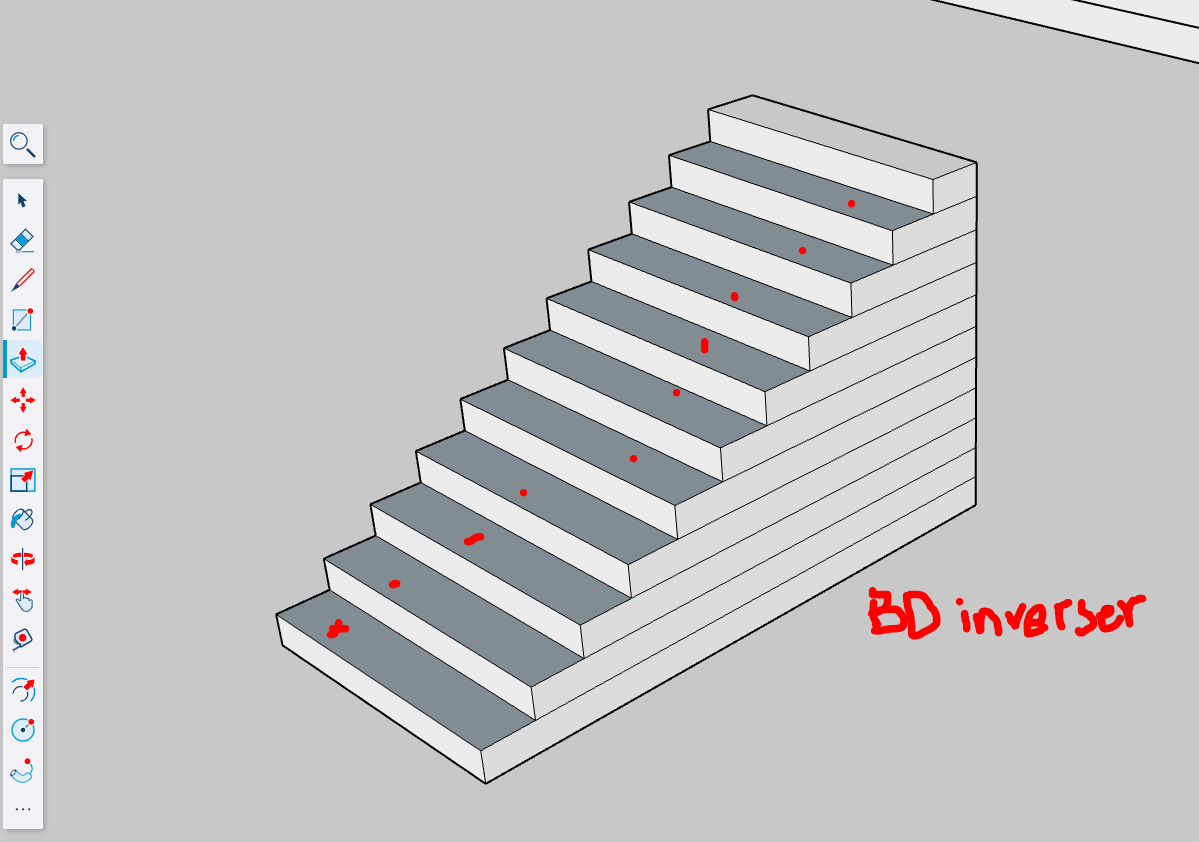
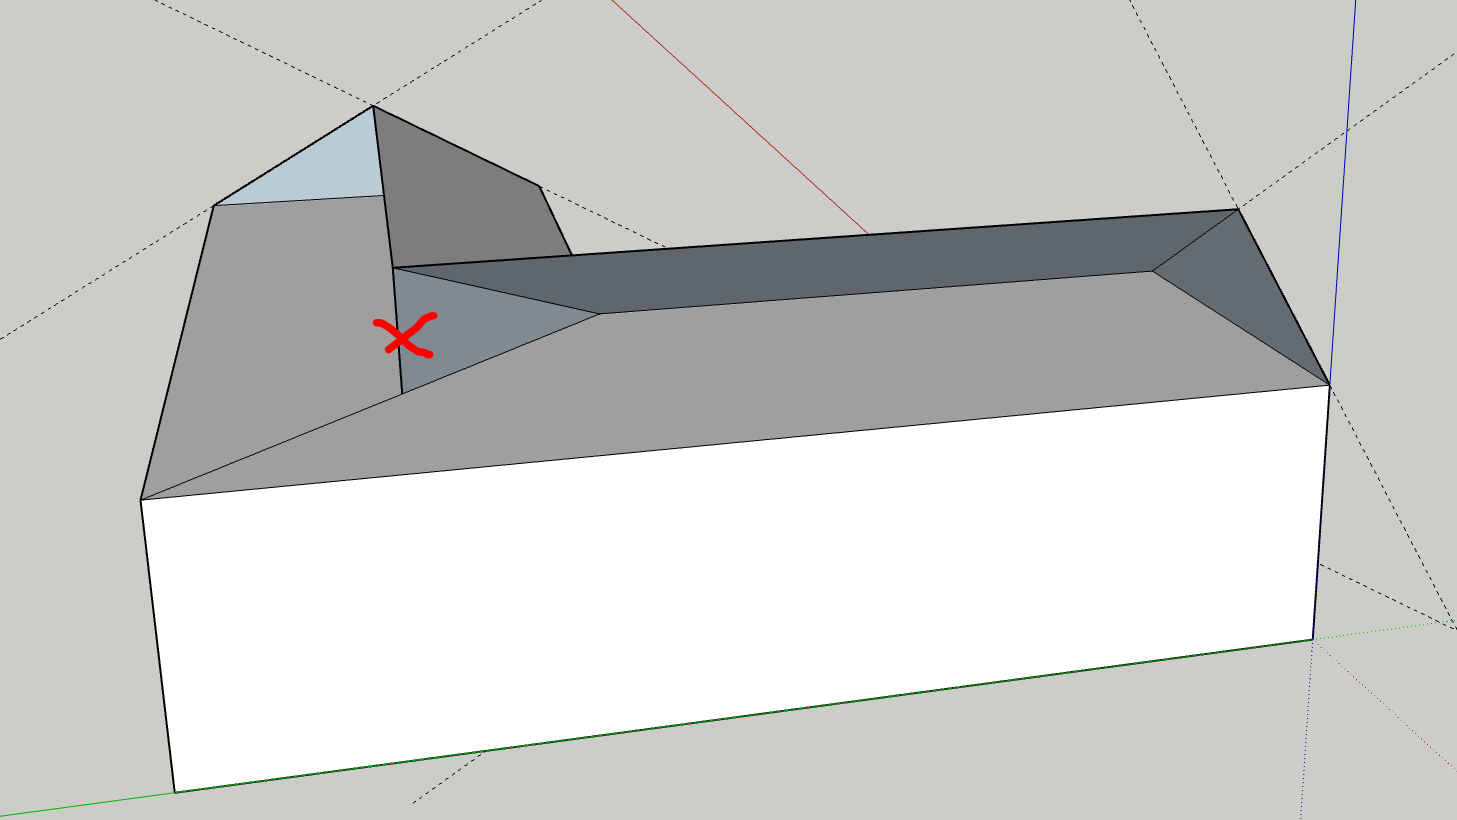
The dark grey faces are inverted, they’ll have to be reversed in order to have a clean model. Whenever we see inverted faces, they have to be inverted to avoid further problems. Right Button Click, Invert Faces.
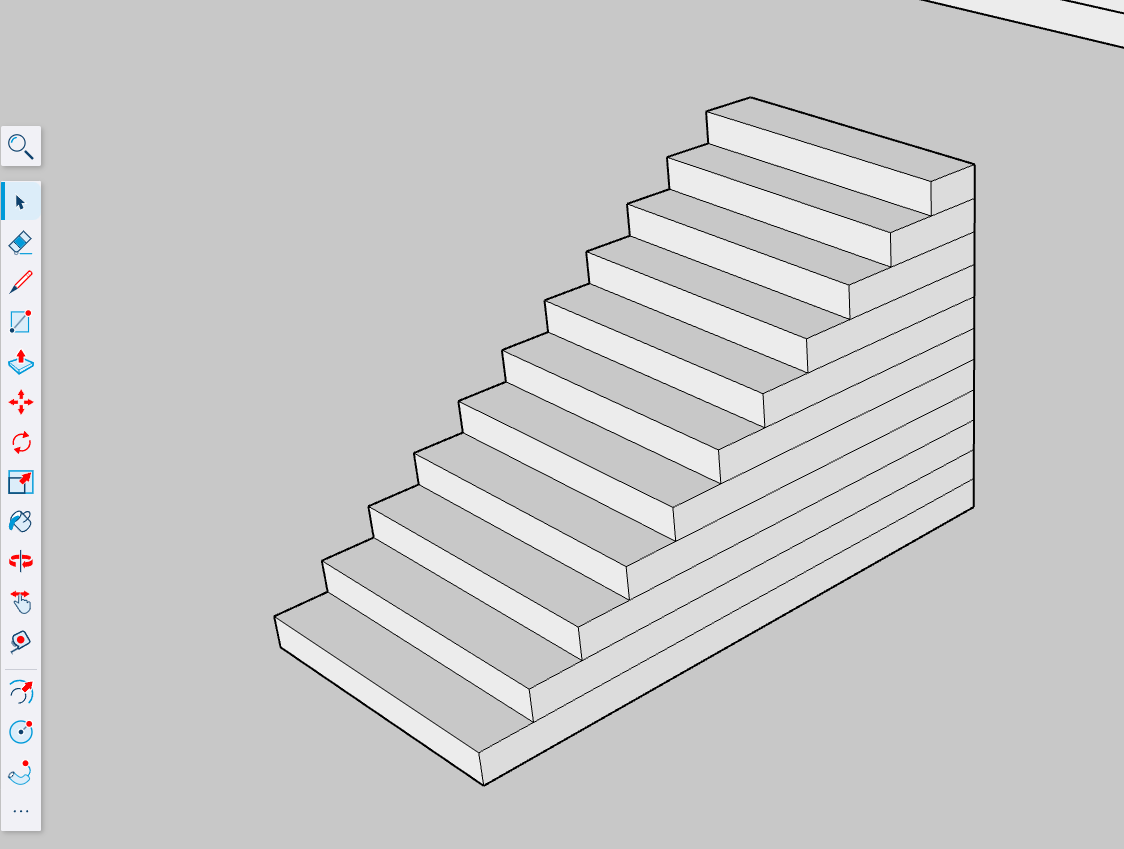
The stairs are roughly finished, create a Group.
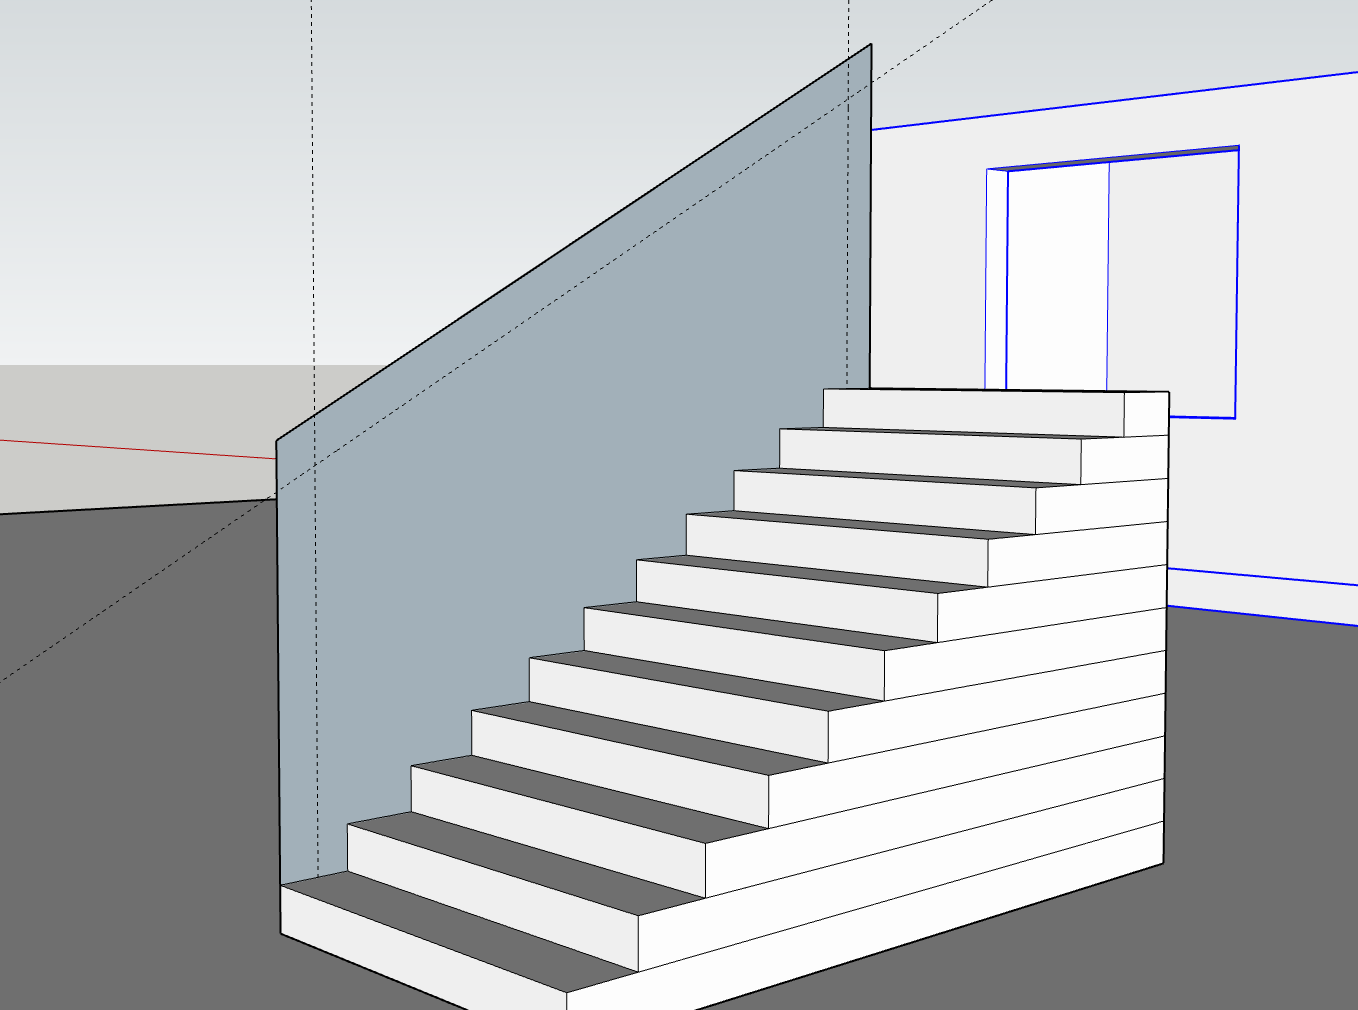
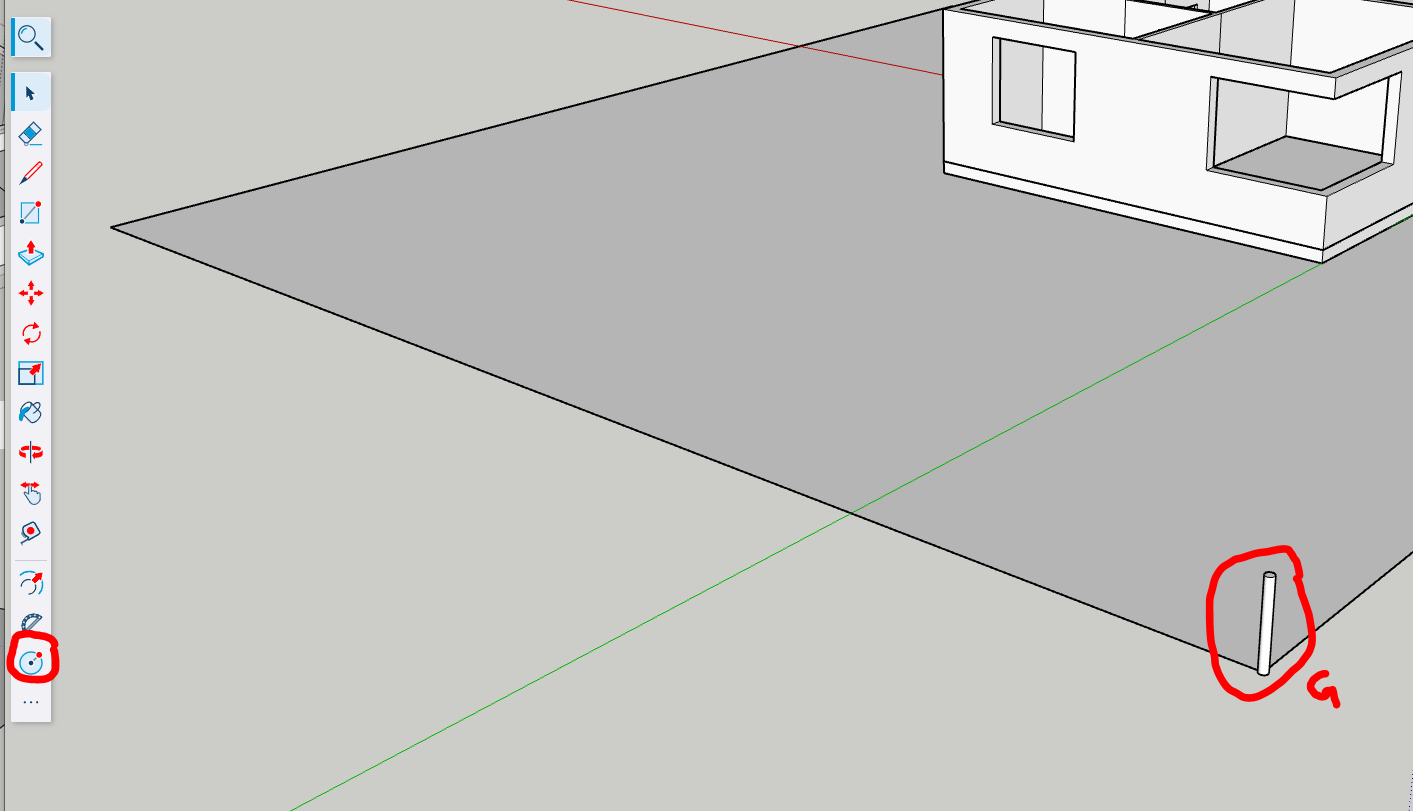
We create a ramp. First by creating the base geometry.
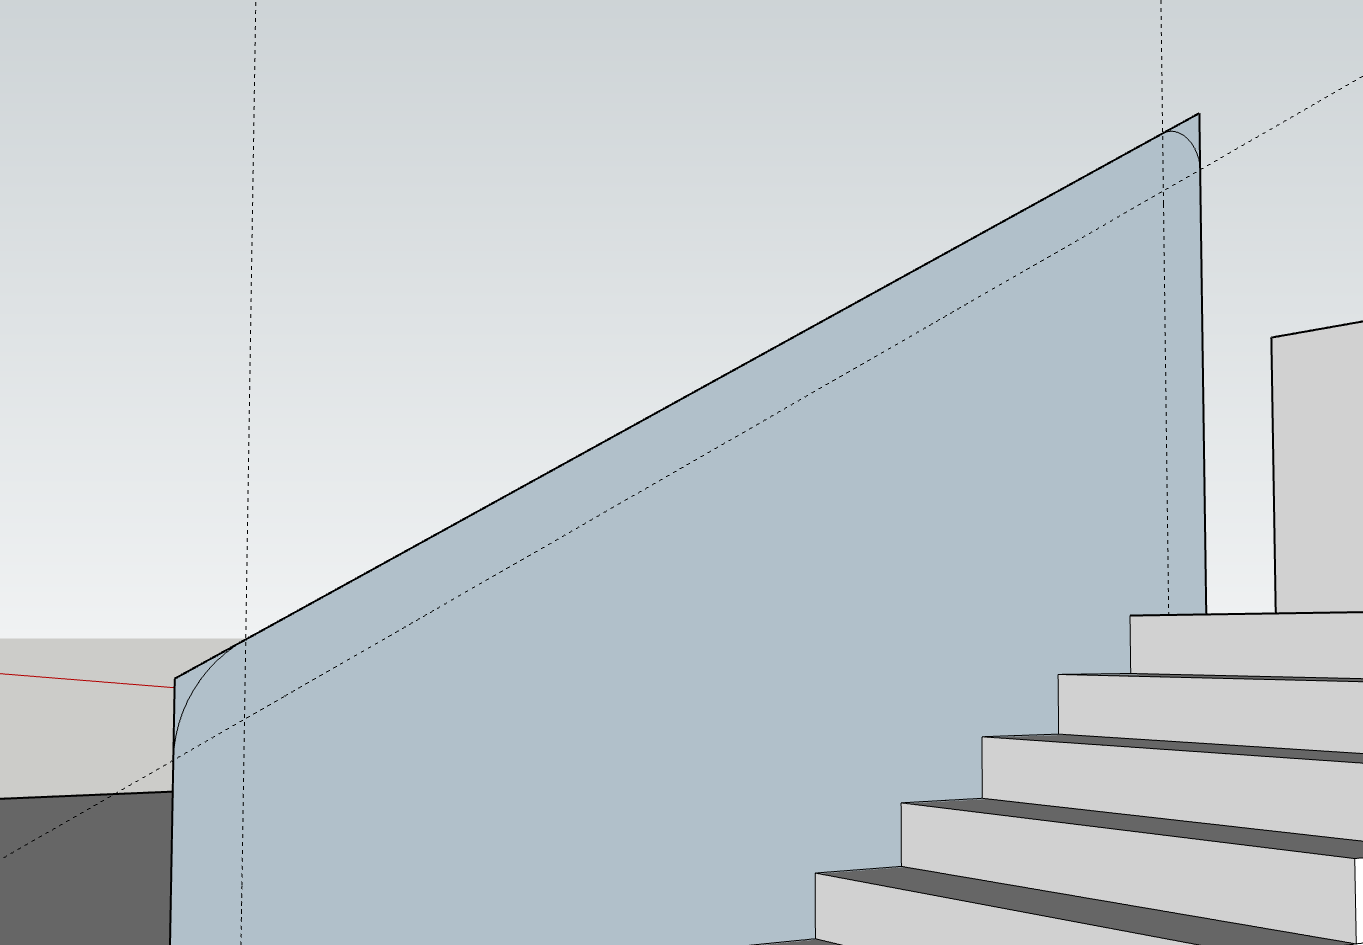
Then adding the round angles using 3 points arc and tangent.
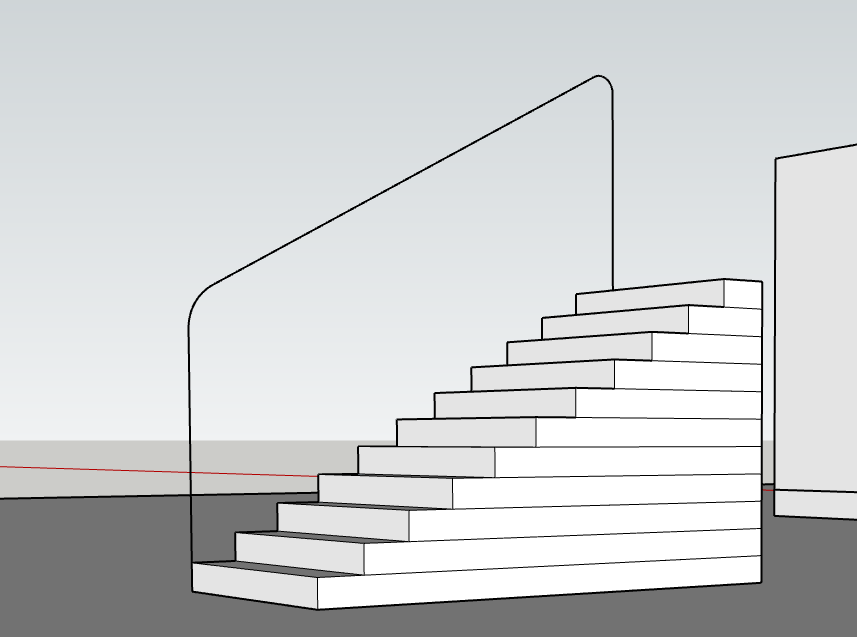
We clean everything to keep only the line.
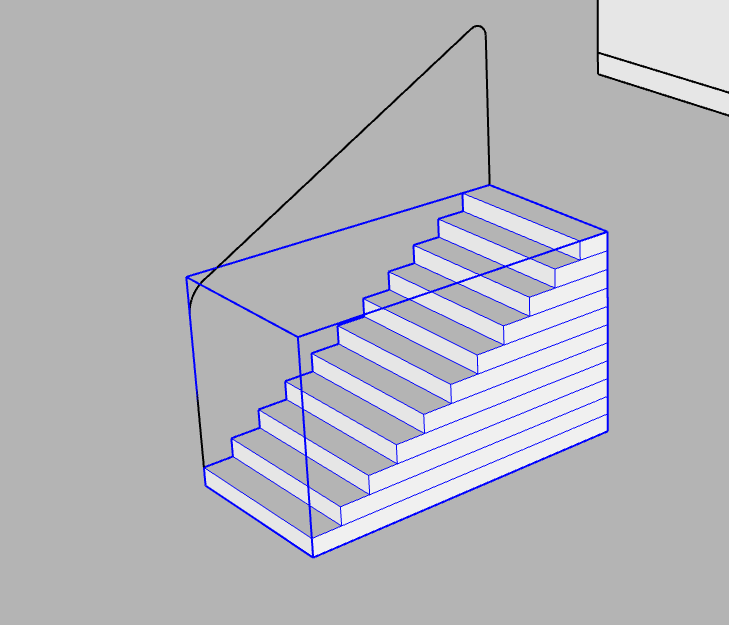
We verify that the stairs are in a group.
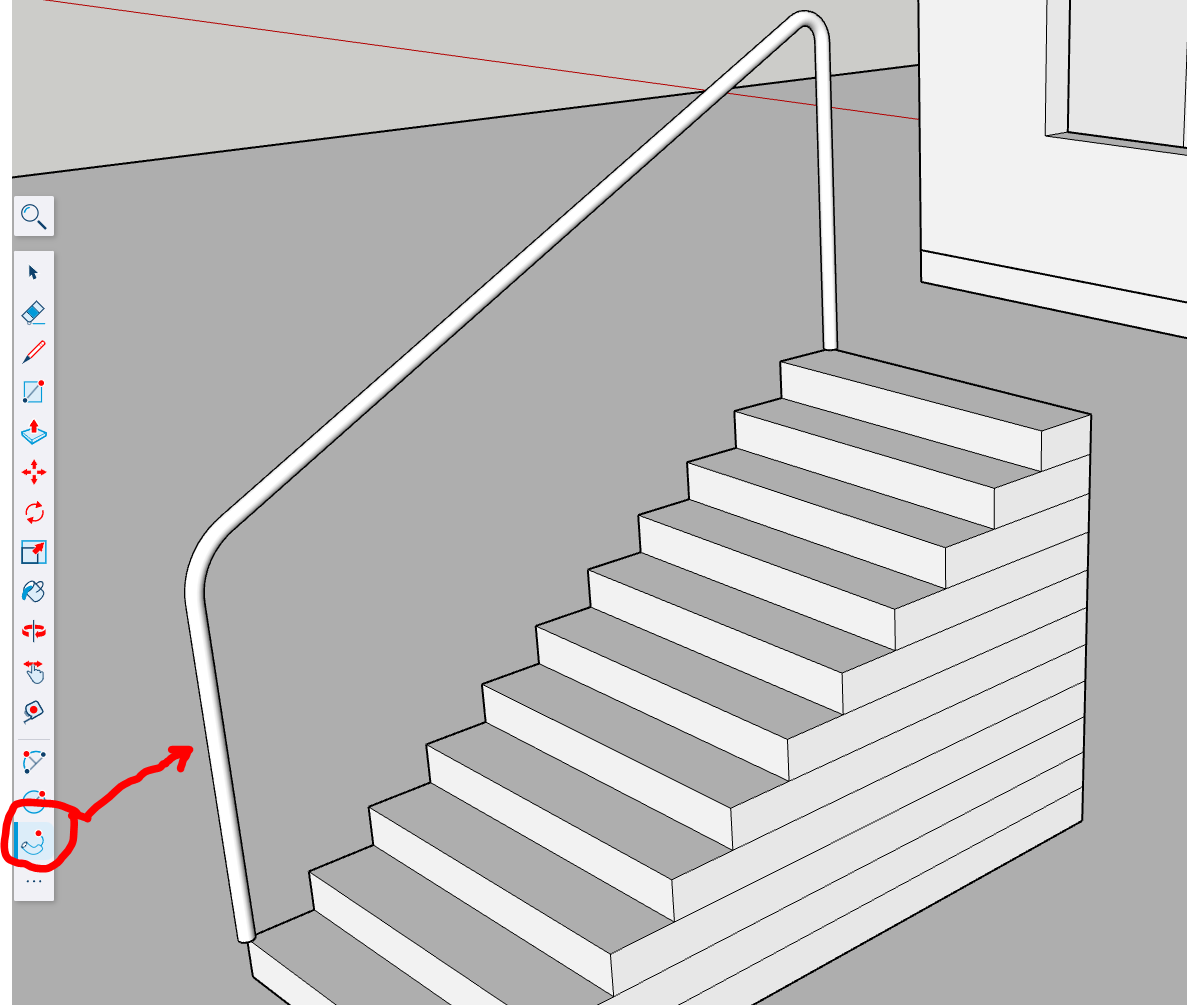
Follow Me to finish. Tip : Select the line, hold MAJ, select Follow Me and the cercle, it would create automaticly the shape.