A novel 3D generation method is introduced, enabling versatile and high-quality 3D asset creation. At its core is a unified Structured LATent (SLAT) representation, which supports decoding into multiple output formats, including Radiance Fields, 3D Gaussians, and meshes. This is achieved by combining a sparsely-populated 3D grid with dense multiview visual features extracted from a robust vision foundation model, effectively capturing both structural (geometry) and textural (appearance) information while preserving decoding flexibility.

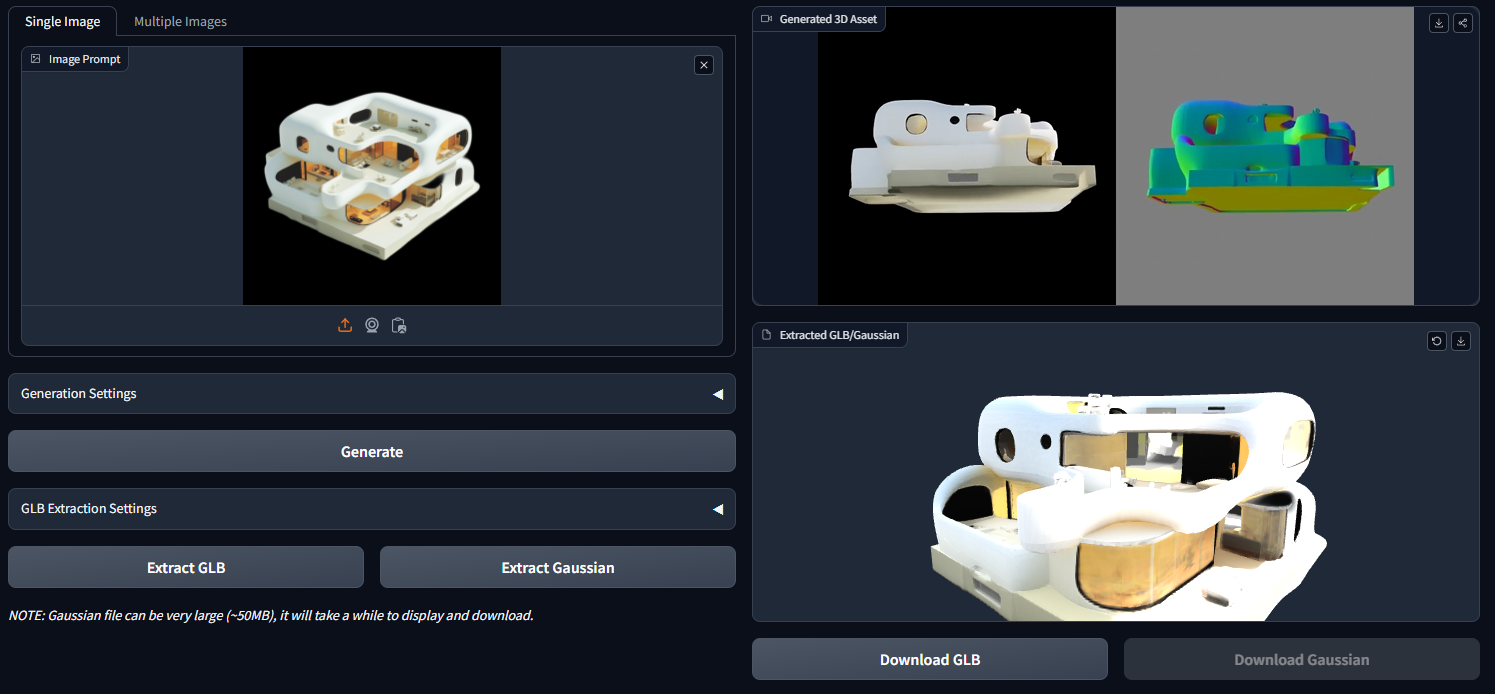 Structured 3D Latents for Scalable and Versatile 3D Generation (https://trellis3d.github.io/)