Task
Applying a Specific Style to an Image
This tutorial will guide you through the process of taking an existing image and modifying its style using a pre-configured ComfyUI workflow. The workflow uses specific nodes to load models, handle image inputs, apply prompts, and generate the final stylized image.
Kontext
Flux.1 Kontext is a family of multimodal image editing models from Black Forest Labs designed for in-context image generation and editing. Unlike traditional text-to-image models, the Flux.1 Kontext series allows users to use both text and images as inputs to perform precise edits while understanding the image’s context. This capability enables tasks such as character consistency, where a subject’s features are maintained across multiple edits or scenes, and surgical commands to change specific elements without affecting others.
The dev version, FLUX.1 Kontext [dev], is an open-source diffusion transformer model with 12 billion parameters, primarily intended for research and development. It is known for its excellent context understanding, character consistency, and its ability to handle multiple, step-by-step edits without losing quality or a subject’s identity. It can be used for things like style transfer, object changes, text editing, and background swapping.
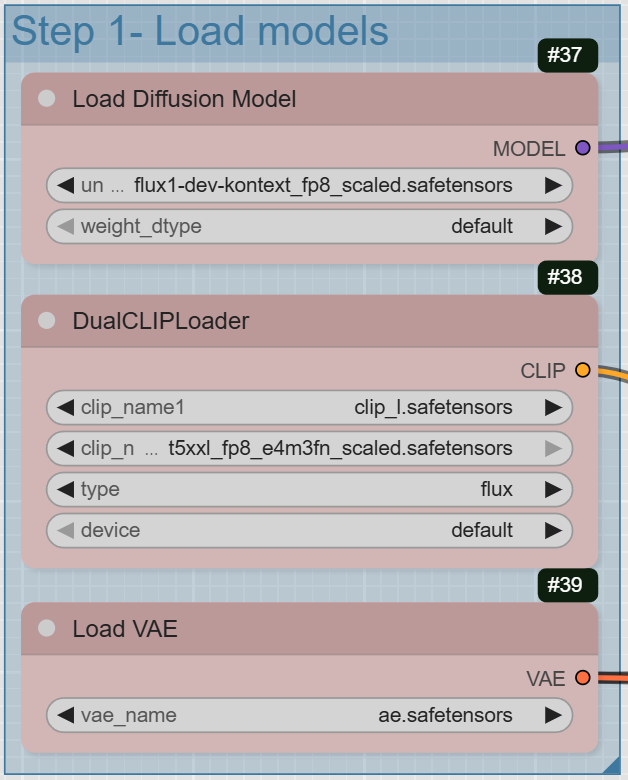
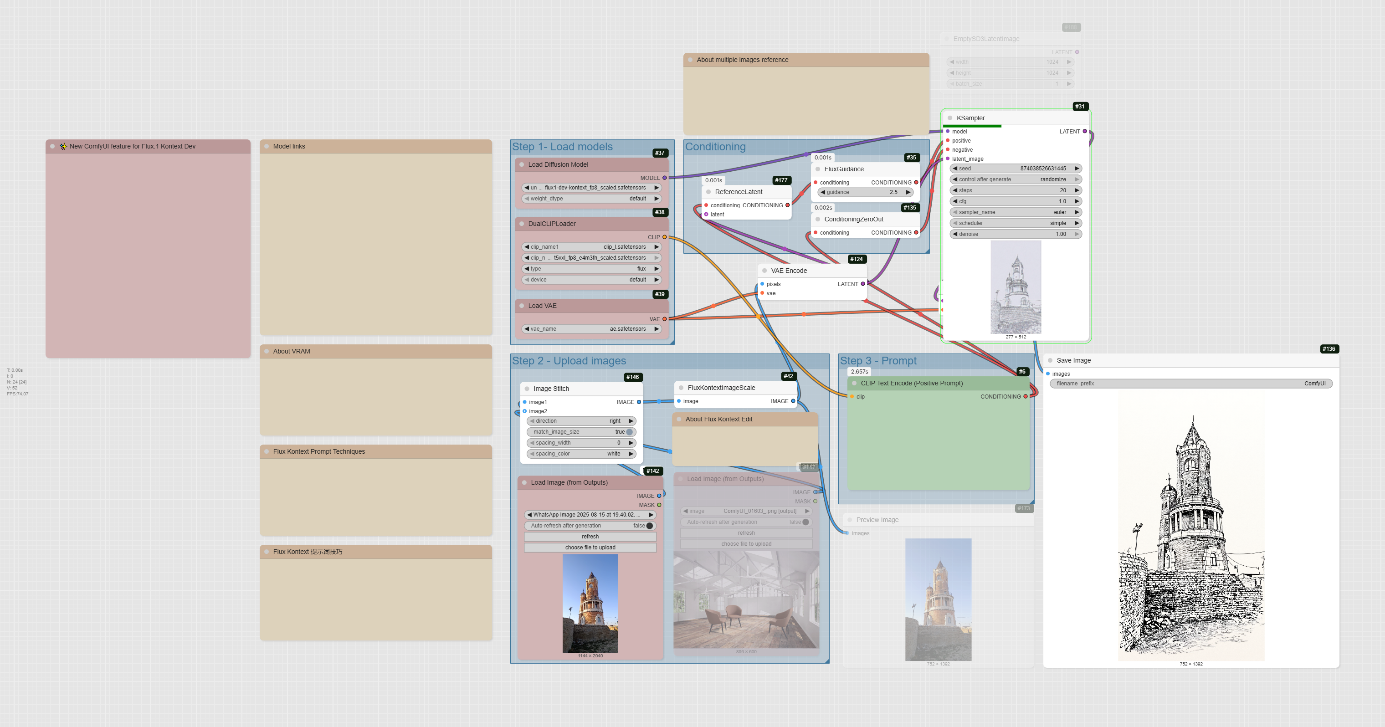
Step 1: Load the Models
The first step is to load all the necessary models for the workflow.
- UNETLoader: This node loads the diffusion model. Look for flux1-dev-kontext_fp8_scaled.safetensors in the diffusion_models directory. The fp8_scaled version requires approximately 20GB of VRAM, while the original model requires about 32GB of VRAM.
- DualCLIPLoader: This node loads the text encoders. It should be configured with clip_l.safetensors and either t5xxl_fp16.safetensors or t5xxl_fp8_e4m3fn_scaled.safetensors from the text_encoders directory.
- VAELoader: This node loads the VAE model. The workflow specifies ae.safetensors from the vae directory.
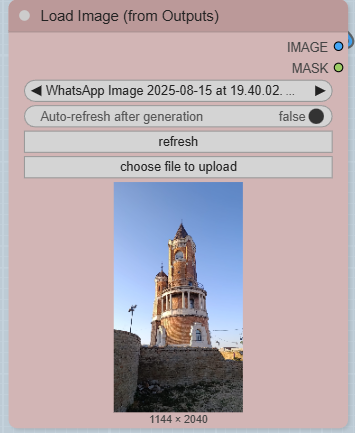
Step 2: Upload Your Images
This workflow is designed for image-to-image styling. You will need to upload the image you want to modify.
- LoadImageOutput: There are two LoadImageOutput nodes. They allow you to upload images and connect them to the workflow.
- ImageStitch: This node combines the two images you uploaded into a single image. You can specify the direction (e.g., right) and other settings like spacing.
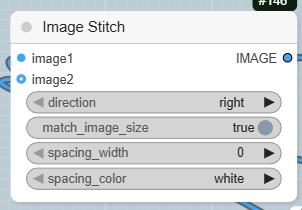
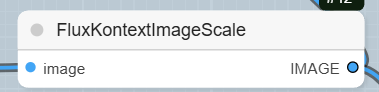
- FluxKontextImageScale: This node scales the stitched image to the appropriate size for the model.
Step 3: Write Your Prompt
The prompt is where you define the style you want to apply.
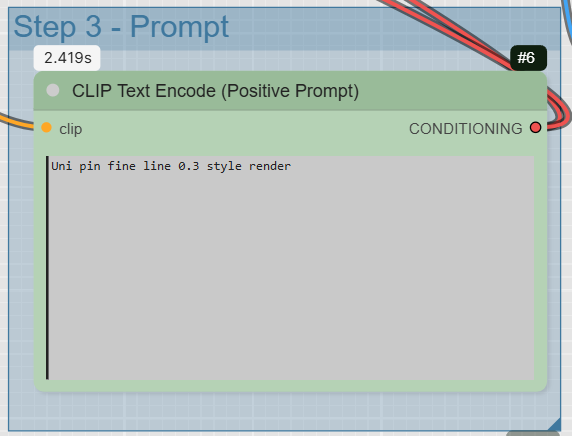
- CLIPTextEncode: This node is used for your positive prompt. In the provided workflow, the example prompt is « John Buscema style portrait ». This tells the model what style to apply to the input image.
Step 4: Connect the Conditioning and Latent Images
This is where the magic happens, as you prepare the inputs for the sampler.
- ConditioningZeroOut: This node zeros out the conditioning, a step often used in this type of workflow to prepare the negative prompt.
- ReferenceLatent: This node connects the positive prompt and the latent image of your input image.
- VAEEncode: This node converts the processed image into a latent space representation, which is what the KSampler works with.
- FluxGuidance: This node takes the conditioning from ReferenceLatent and applies the specified guidance to it. In the example, the guidance is set to 2.5.
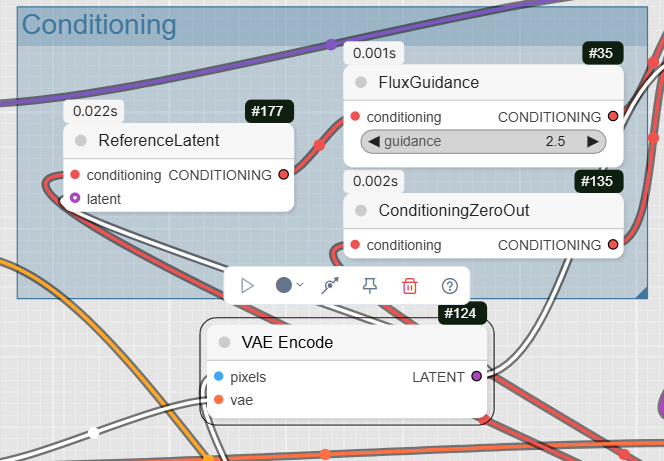
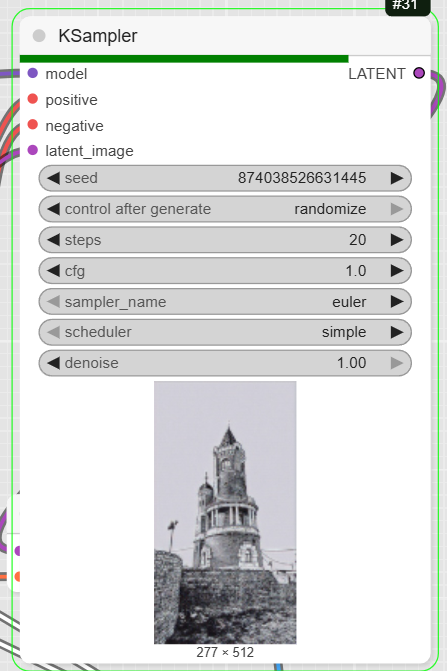
- KSampler: This is the core diffusion sampler. It takes the model, positive and negative conditioning, and the latent image to generate a new latent image with the applied style.
Step 5: Decode and Save the Final Image
The last step is to convert the output back into a viewable image and save it.
- VAEDecode: This node decodes the latent output from the KSampler back into a standard image format.
- PreviewImage: This node displays a preview of the final image.
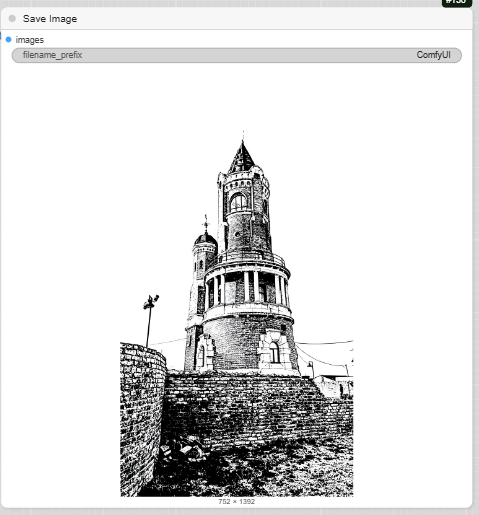
- SaveImage: This node saves the final generated image to your computer.
Artistic Mediums and Techniques
You can specify different hand-drawn mediums and techniques to achieve a particular look.
- Pencil Sketch: Use terms like pencil sketch or pencil drawing to create a traditional, graphite-like drawing.
- Ballpoint Pen Sketch: This will produce an image that looks like it was created with a ballpoint pen, often with fine lines and cross-hatching.
- Chalk: Use chalk or chalk art for a softer, more smudged appearance, similar to a chalkboard drawing.
- Charcoal: This medium creates a gritty, high-contrast look with deep blacks and a textured feel.
- Hatching and Cross-Hatching: These techniques use parallel or intersecting lines to create tone and texture. You can use these terms to give your drawing a sense of volume and shading.
- Scribble Sketching: This involves using overlapping, energetic scribbles to quickly build up tone and texture.
- Stippling: Use stippling to create an image composed entirely of dots.
- Contour Drawing: This style focuses on the outline and major edges of a subject, training the eye to see subtle shifts in shape. You can also specify blind contour drawing for a continuous, single-line style.
- Gesture Drawing: This technique focuses on fast, loose sketches that capture the basic action and flow of a subject.
Combining Styles
For more control, you can combine different styles and elements in your prompt.
- Lo-Fi Style: Use keywords like hand drawn panel, lo-fi 1980s japanese magazine art style, muted tones, pastel color palette, and soft grain to create a nostalgic, animated drawing.
- General Keywords: You can also incorporate keywords like hand drawn and sketch directly into your prompts to influence the overall style.
Examples
- « a hand drawn panel from an old japanese anime about a woman reading a book in a spaceship. Lo-fi 1980s japanese magazine art style, muted tones, pastel color palette, soft grain, nostalgic aesthetic, animated »
- « a simple line-drawn illustration of a small plant starting to sprout from a seed »
- « a graceful portrait of a ballerina, captured in a gesture drawing style sketch »
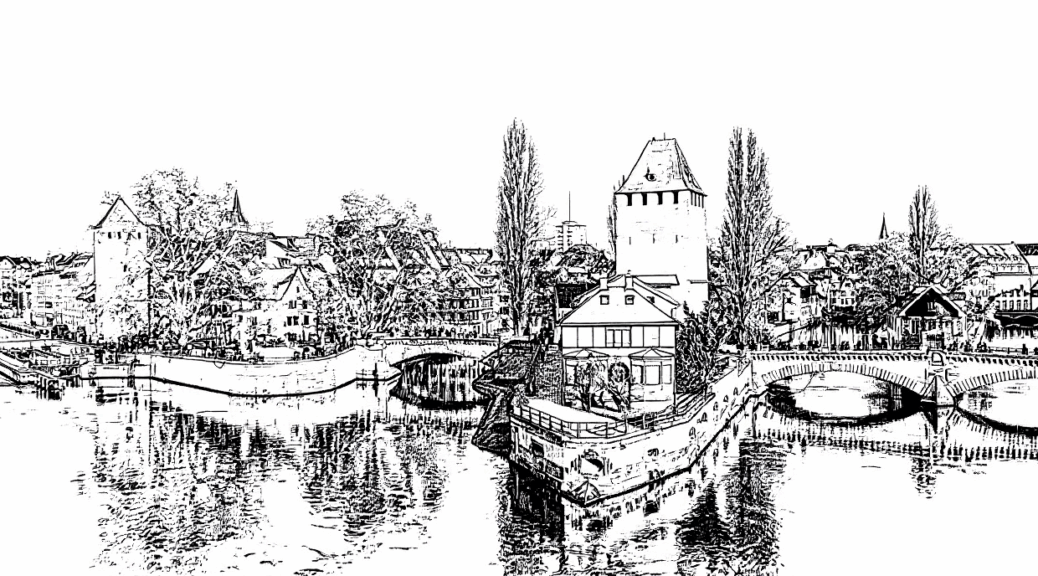
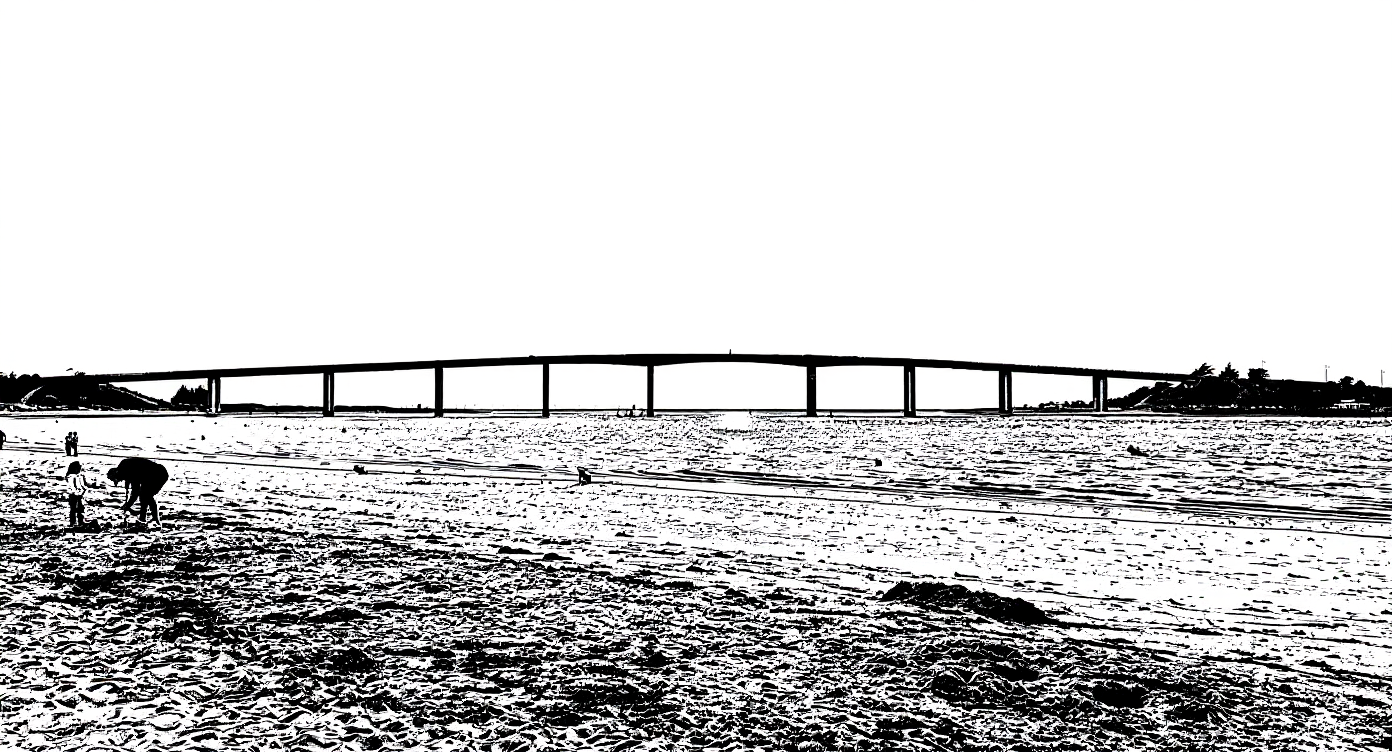
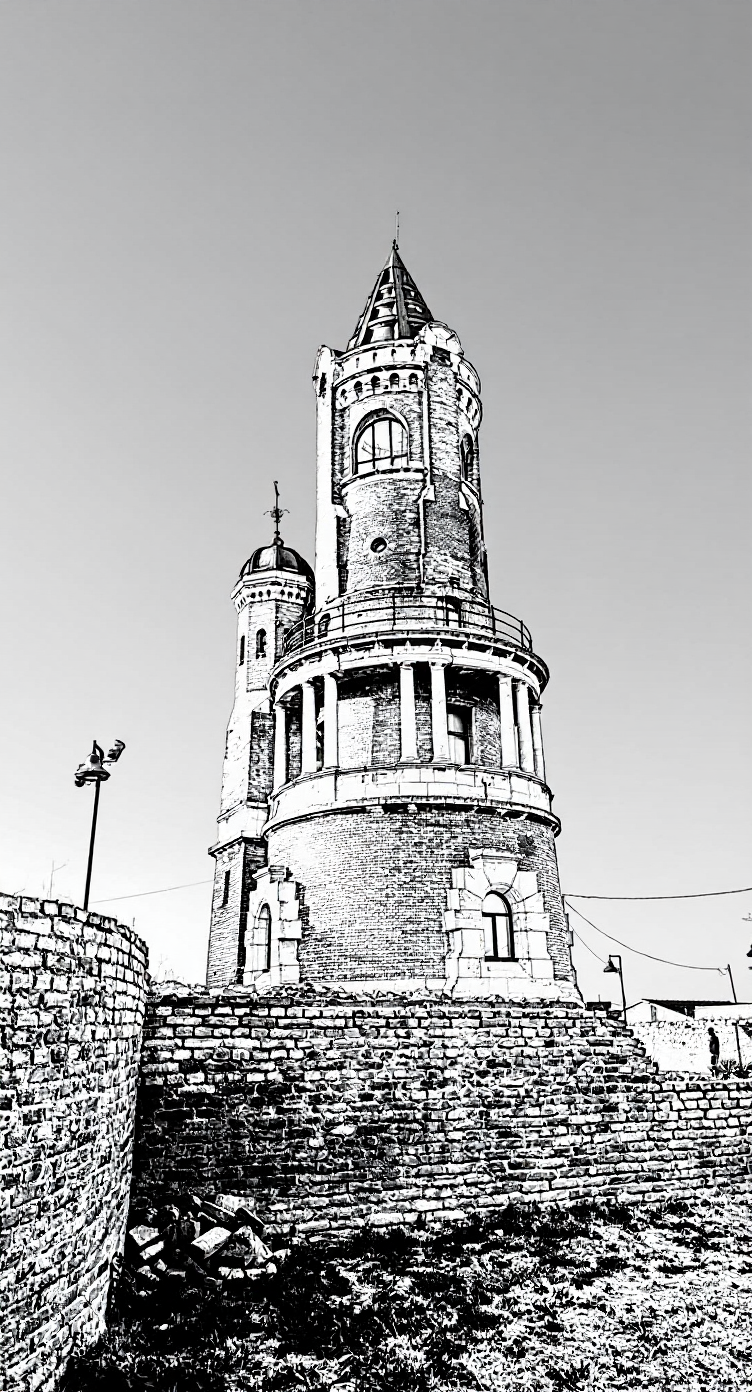
Black and white Marvel thin brush Scribble Sketching style render
Black and white Marvel brush Scribble Sketching style render
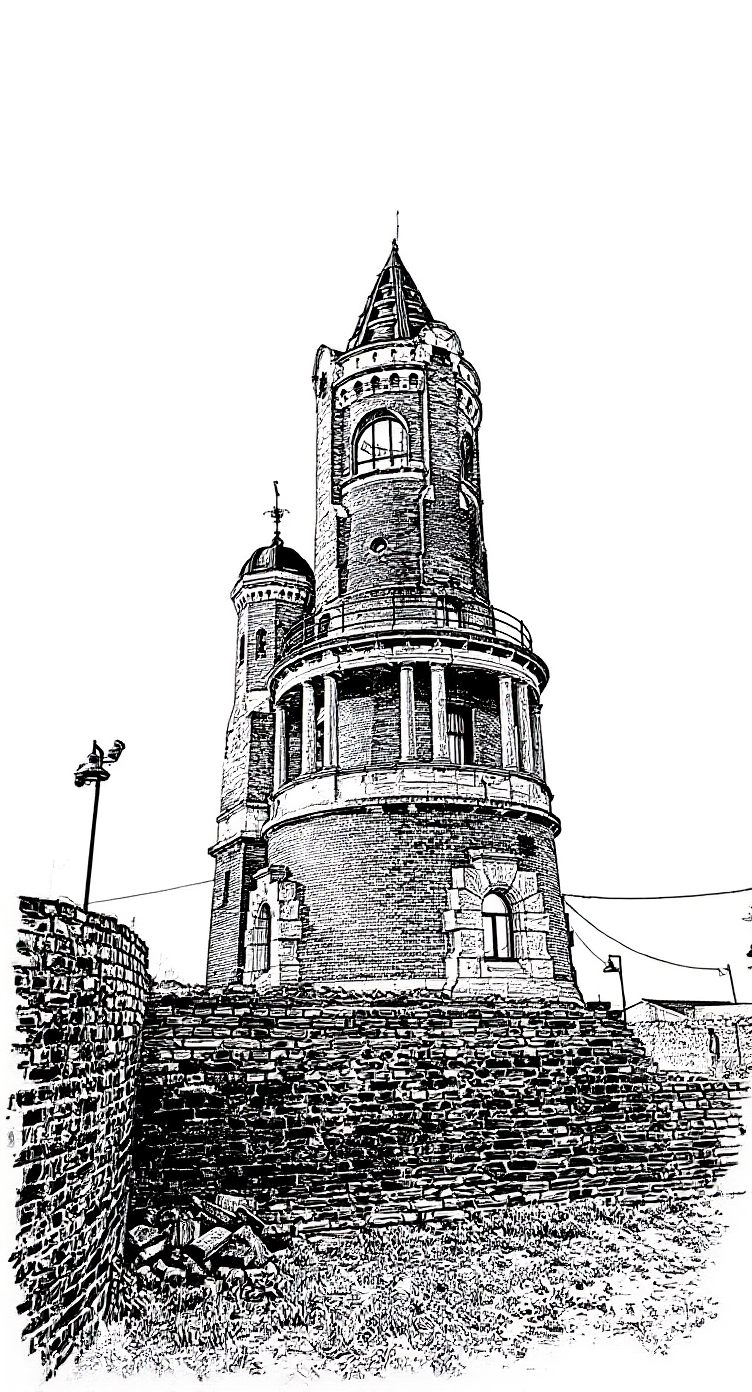
Black and white Marvel Scribble Sketching style render
scrible Drawing style render
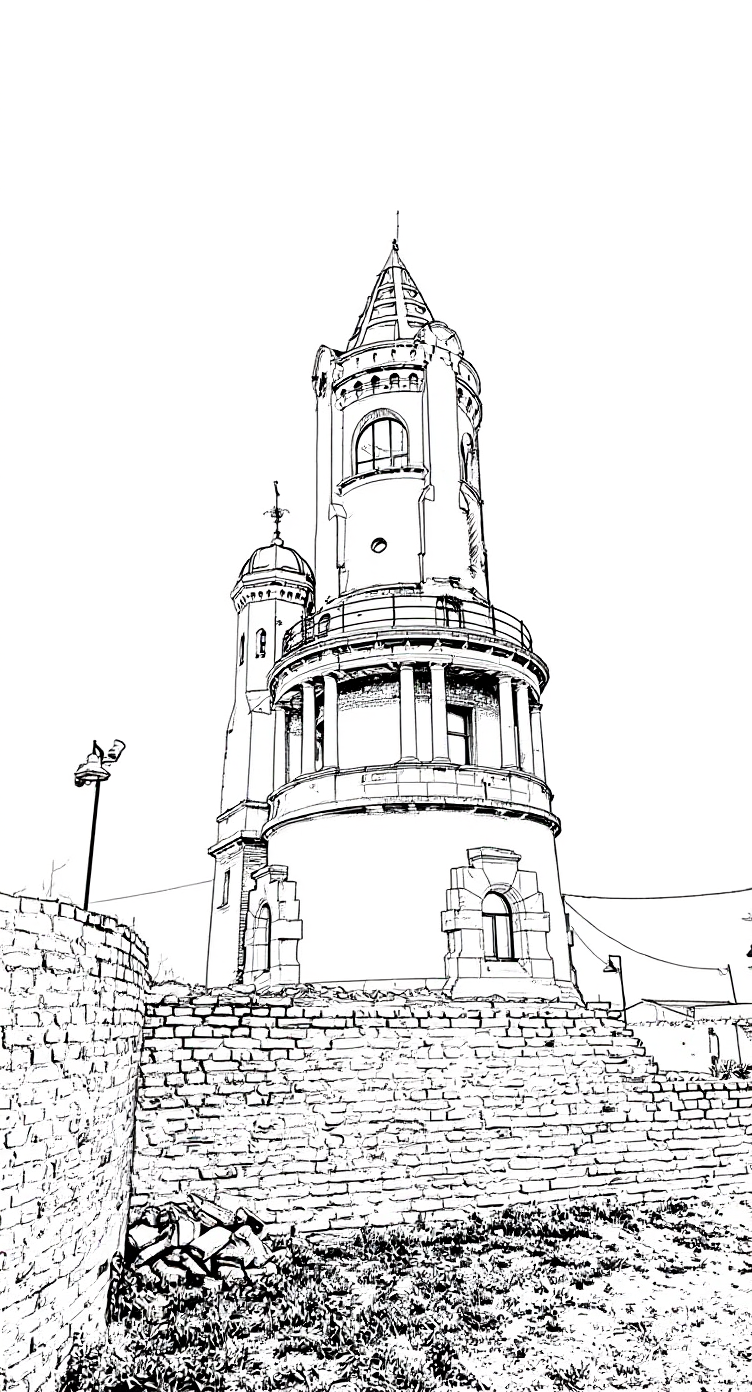
Moebius comic black and white 0.3 style render
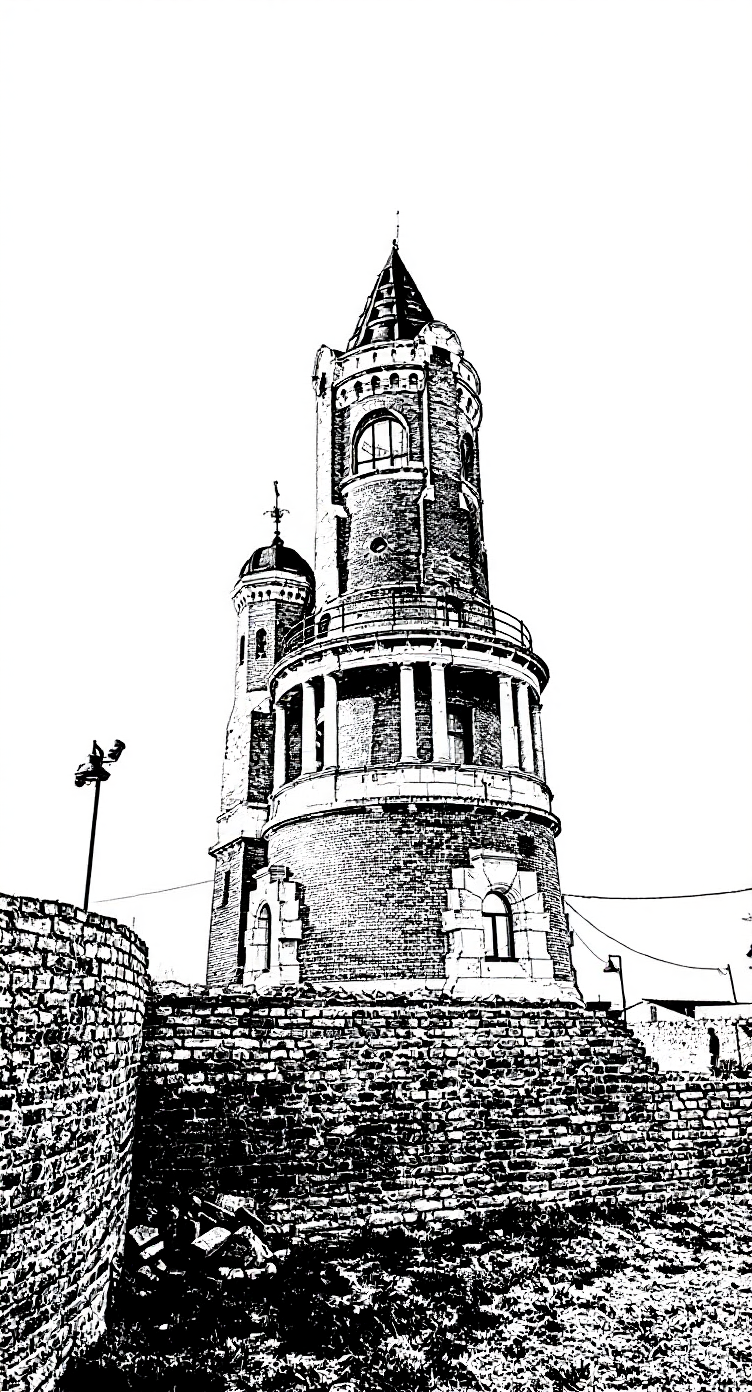
thin brush black and white style render
pencil style render
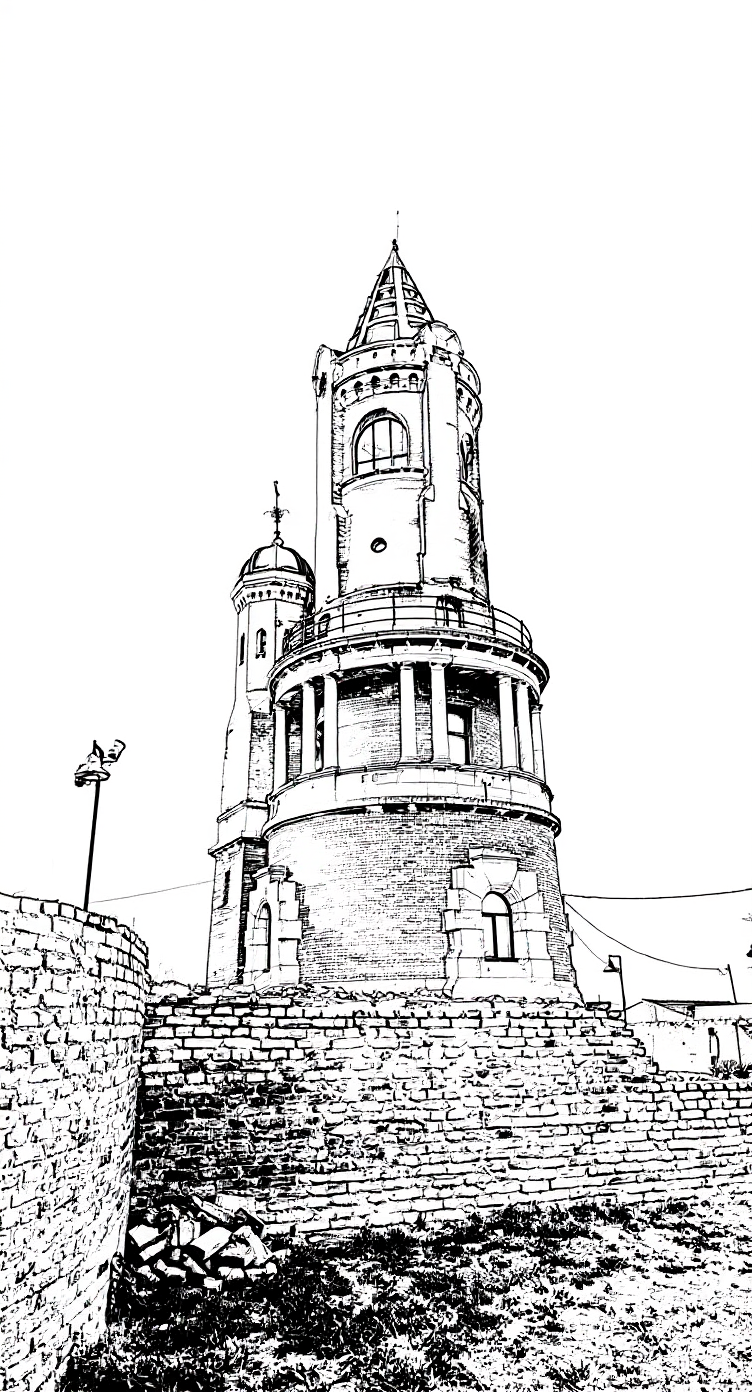
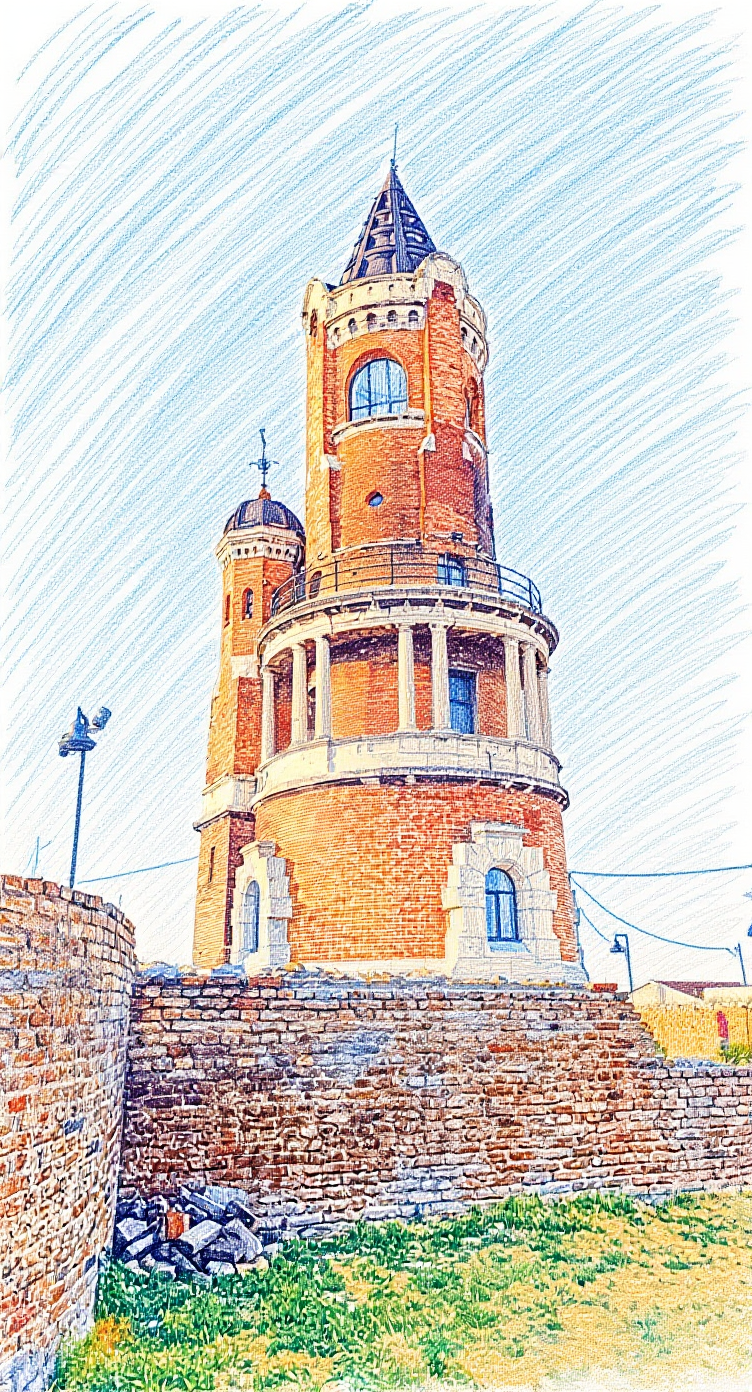
(Base photo @Ambroise Lescop 2025)