Basics
Building a new workflow from scratch in ComfyUI involves understanding the basic components and how they connect. The core of a ComfyUI workflow is a collection of nodes, each performing a specific function. These nodes are linked together by « edges » or « wires » to create a complete process for generating or modifying images.
Here’s a general breakdown of the process:
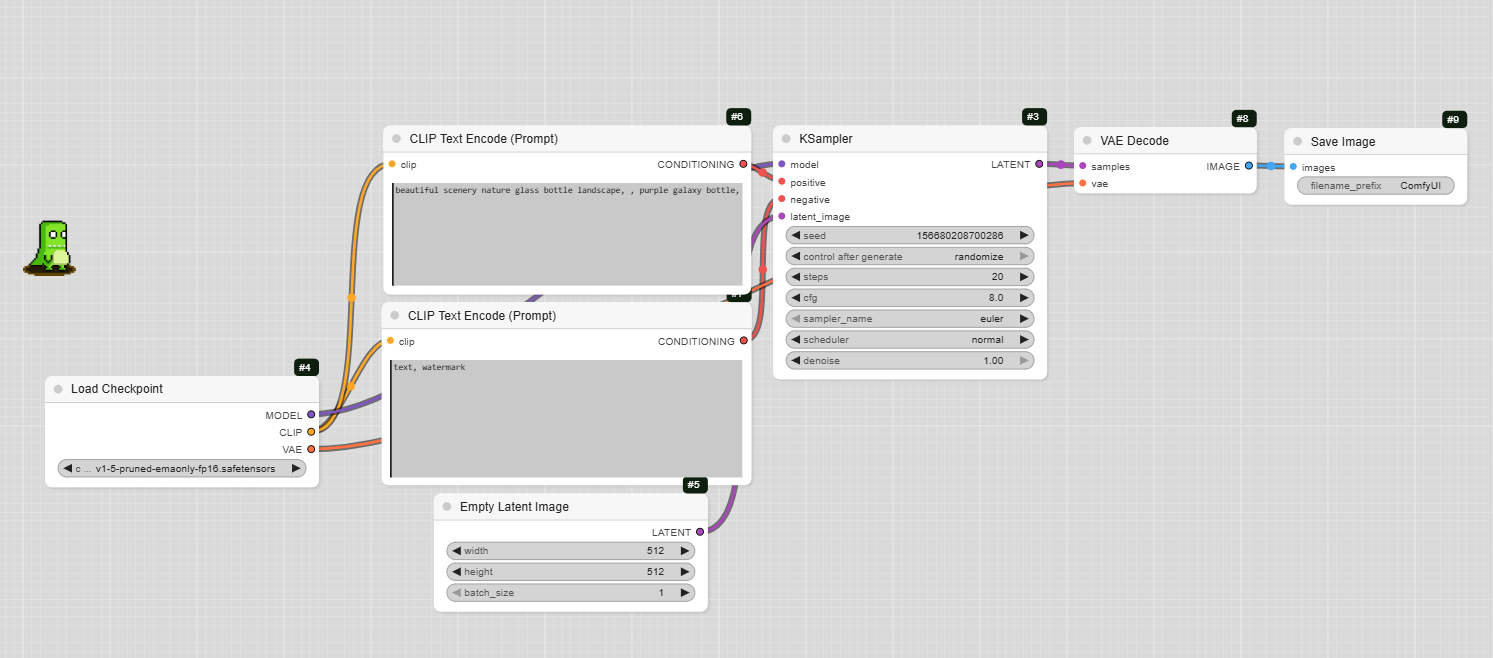
- Start with the basics: Every workflow begins with fundamental nodes like Load Checkpoint, CLIP Text Encode (Prompt), and KSampler. These are the building blocks for generating a simple text-to-image workflow.
- Connect the nodes: Use the edges to connect the outputs of one node to the inputs of another. For example, the MODEL output of Load Checkpoint connects to the model input of KSampler.
- Add prompts: Use the CLIP Text Encode nodes for both your positive and negative prompts. The CONDITIONING output of the positive prompt node goes to the positive input of the KSampler, and the negative prompt to the negative input.
- Create the latent image: The Empty Latent Image node defines the size and batch count of your image. Its LATENT output connects to the latent_image input of the KSampler.
- Decode and save: After the KSampler generates the latent image, you need a VAE Decode node to convert it into a viewable image. Finally, a Save Image node will save the final result to your computer.