Task
This tutorial guides you through the provided workflow to integrate new content into an existing image using an inpainting model.
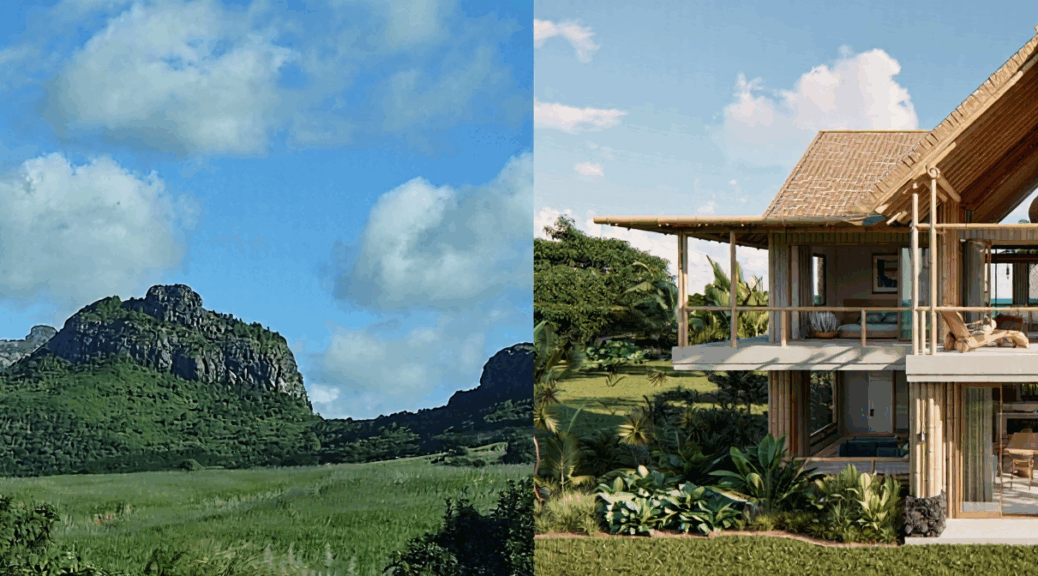
(guess where is the AI content!!)
Inpainting is the process of intelligently filling in or replacing a masked area of an image with new content. It’s a powerful technique that goes beyond simple cropping or pasting, as the AI generates new pixels that seamlessly blend with the surrounding unmasked area.
- How it Works: In a ComfyUI workflow, inpainting is typically done by providing a model with three key inputs: the original image, a mask that defines the area to be edited, and a prompt that describes the new content. The model then uses this information to generate a new image where the masked area is filled in according to your prompt, while the unmasked parts remain unchanged.
- Why Use It: Inpainting is a versatile tool for various use cases:
- Fixing Mistakes: You can remove or fix unwanted elements, such as a photobomber in a picture or an object you don’t like.
- Adding New Content: You can introduce new objects, people, or architectural features into an existing image.
- Changing a Subject’s Appearance: You can alter a person’s clothes, hairstyle, or expression while keeping the rest of the image consistent.
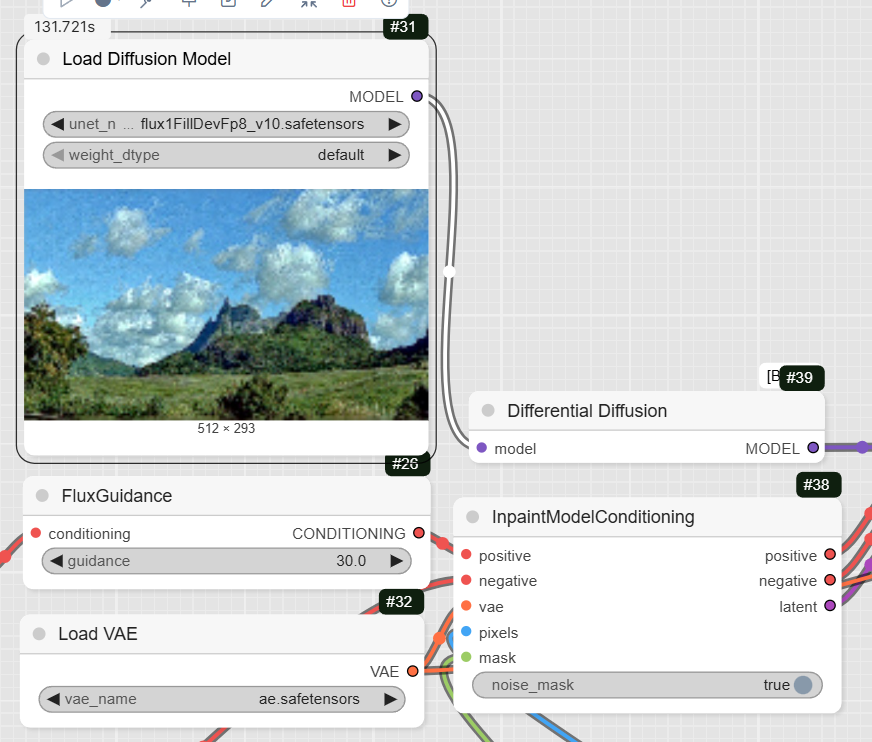
Step 1: Load the Models
First, you need to load all the necessary models for the workflow.
- UNETLoader: This node loads the diffusion model, flux1-fill-dev.safetensors, which is specifically designed for inpainting tasks.
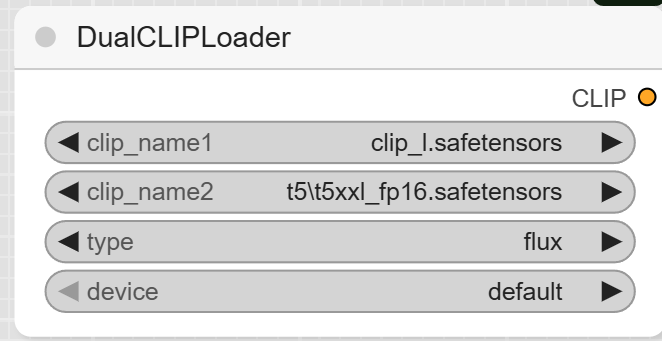
- DualCLIPLoader: This loads the text encoders, clip_l.safetensors and t5xxl_fp16.safetensors.
- VAELoader: This node loads the ae.safetensors VAE model.
Step 2: Upload Your Image and Mask
This workflow requires both an image and a mask to define the area you want to edit.
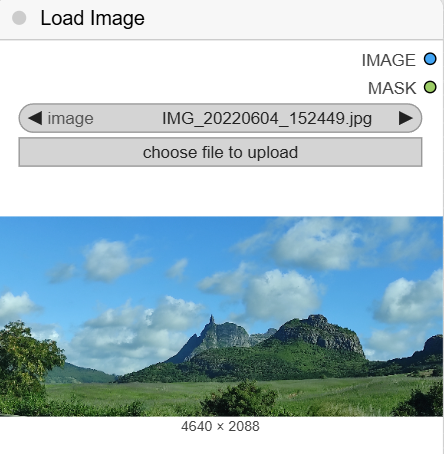
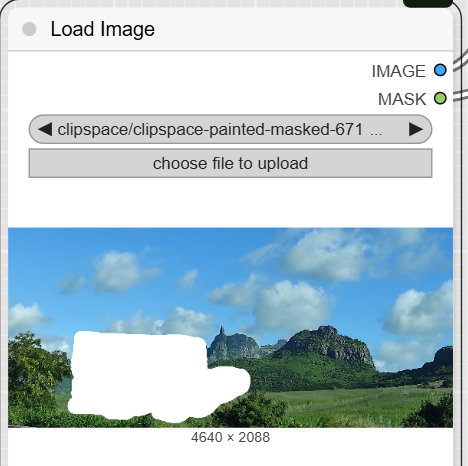
- LoadImage: Use this node to upload the image you want to edit. When you do, it will also generate a corresponding mask, typically done by painting over the area to be inpainted in a dedicated editor. The node has two outputs: IMAGE and MASK.
Masking (RBC) Open in Maskeditor
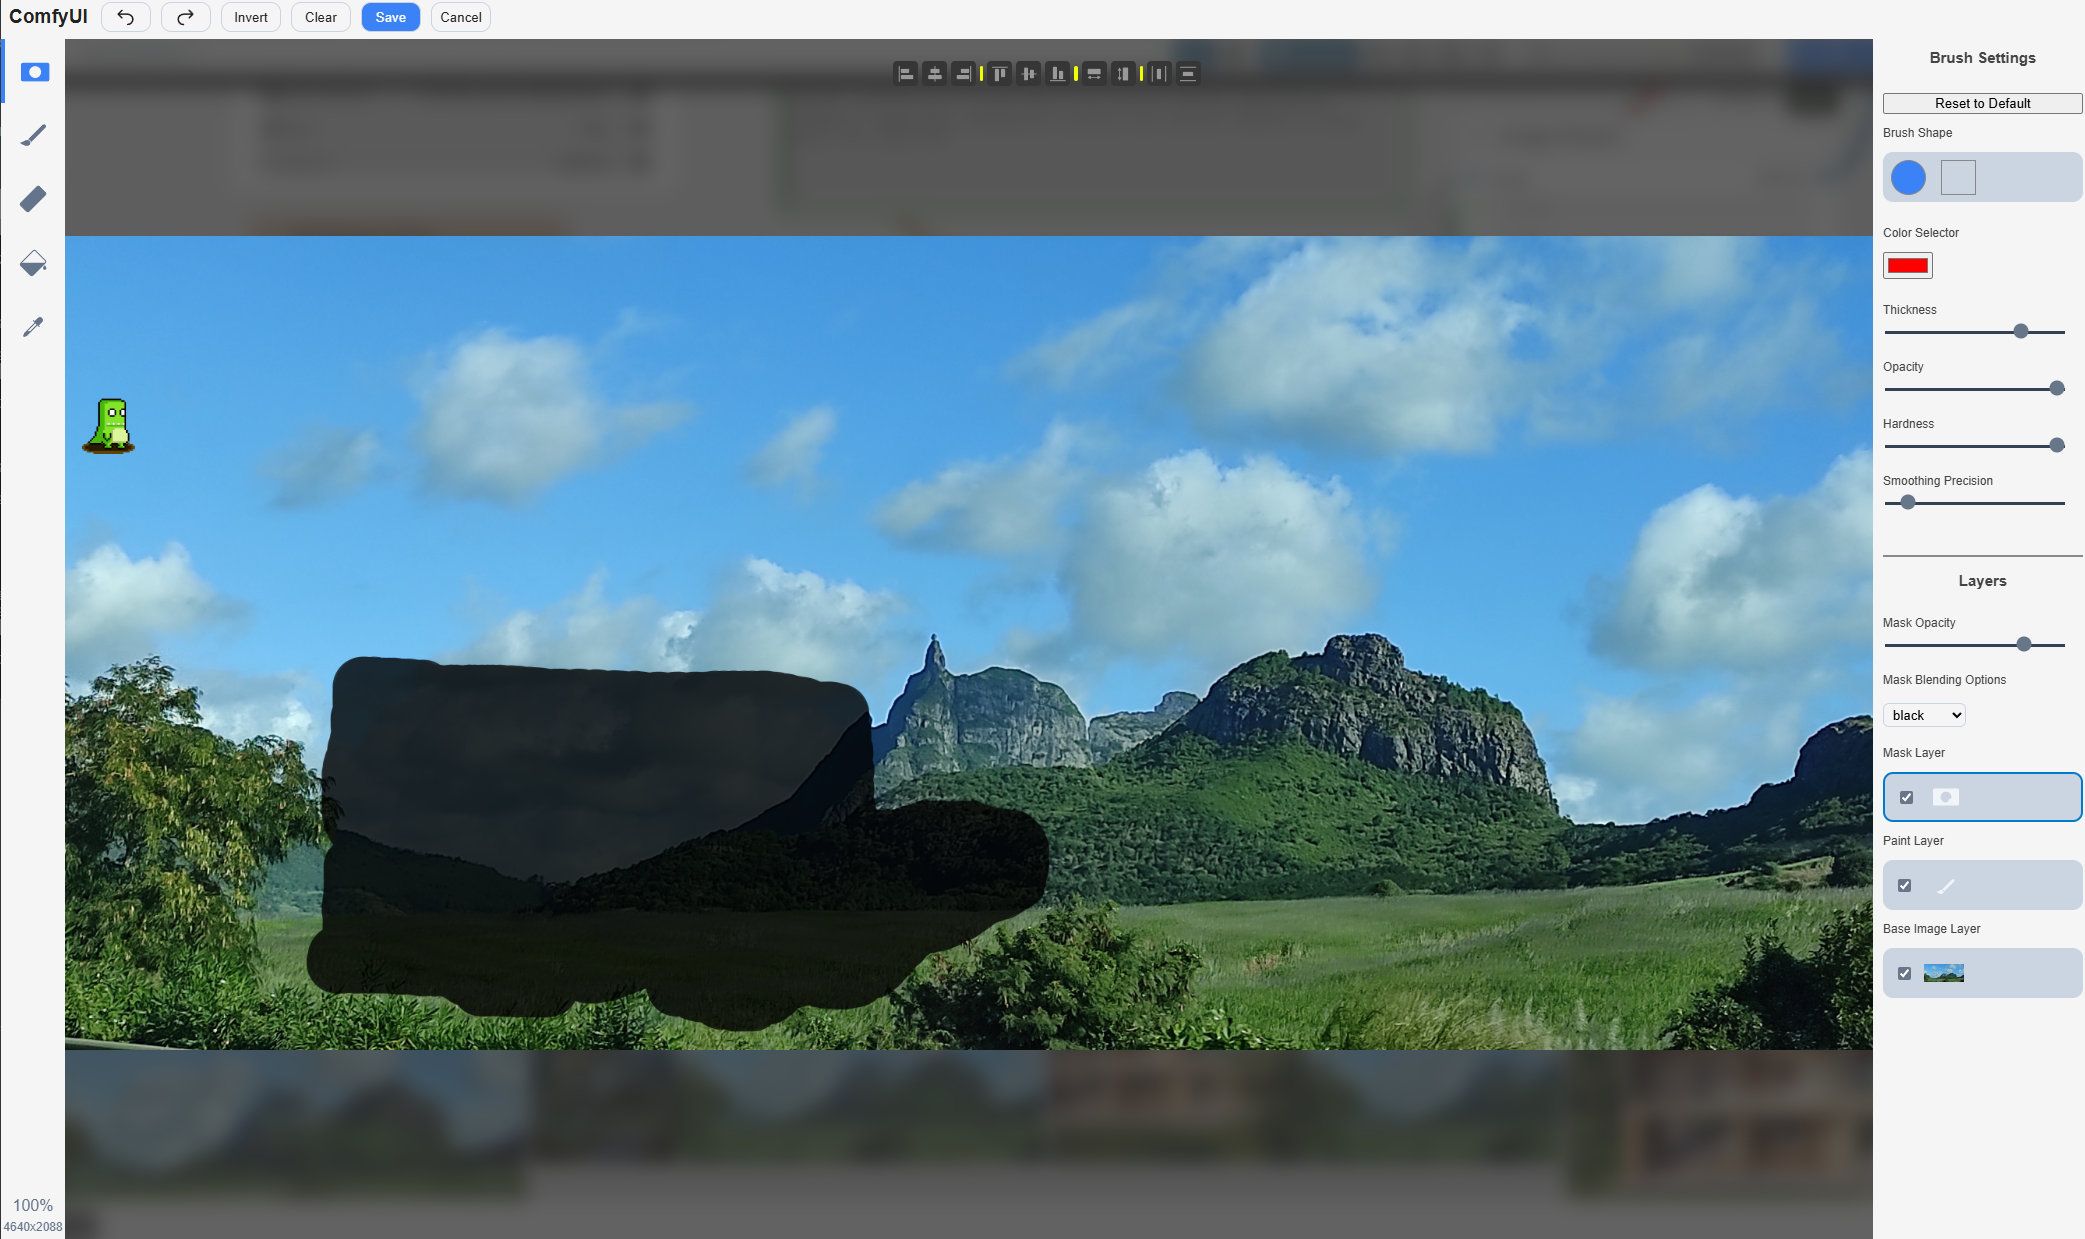
Save
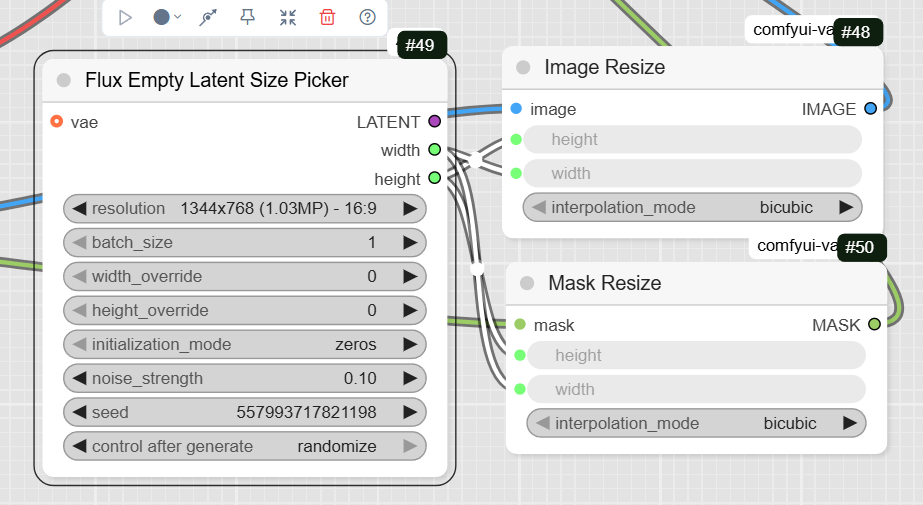
- JWImageResize: This node resizes your original image to the correct dimensions for the model.
- JWMaskResize: This node resizes the mask to match the dimensions of the resized image.
- FluxEmptyLatentSizePicker: This node, while not directly connected to the image inputs in this workflow, defines the width and height for the resized image and mask nodes.
Step 3: Define Your Prompts
The prompts tell the AI what to generate within the masked area.
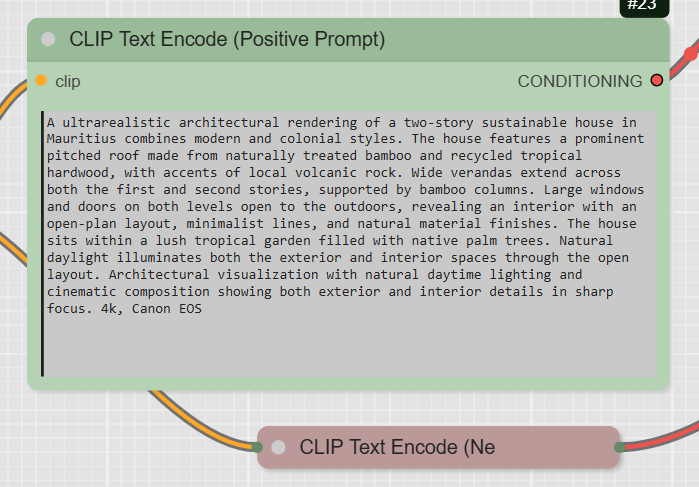
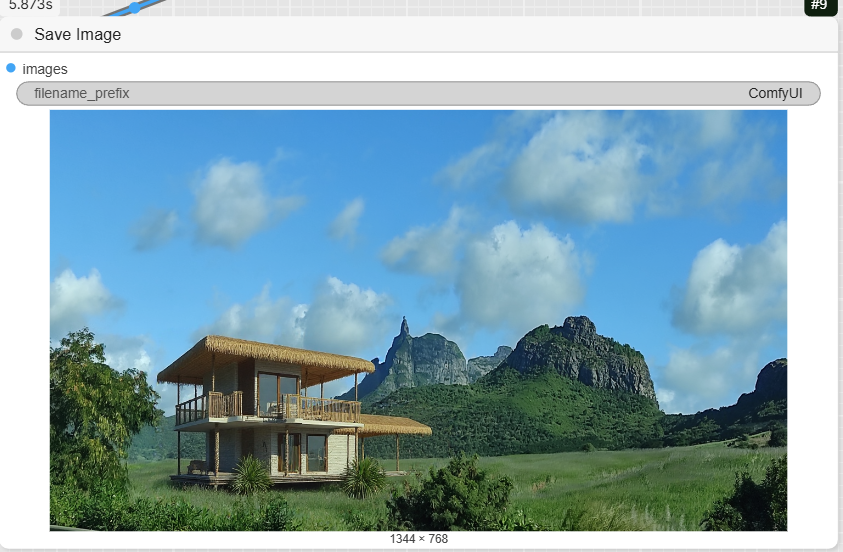
- CLIPTextEncode (Positive Prompt): Write a detailed description of the content you want to generate. The example prompt describes a two-story sustainable house in Mauritius, along with details about its architecture, materials, and lighting.
- CLIPTextEncode (Negative Prompt): Use this optional node to specify anything you want to avoid in the generated image. The example workflow has an empty negative prompt.
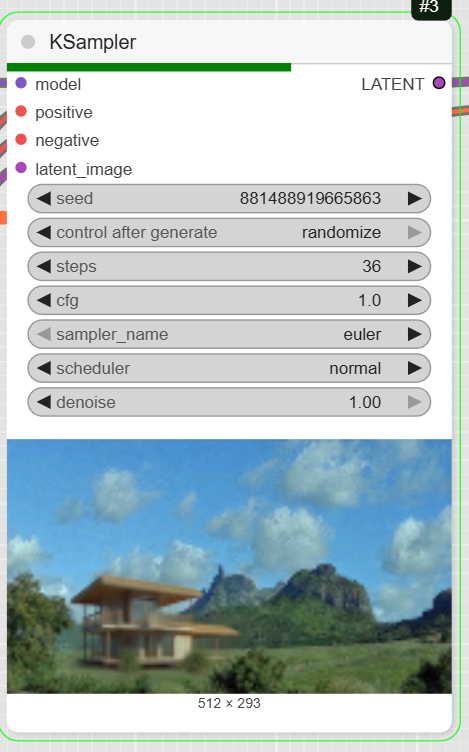
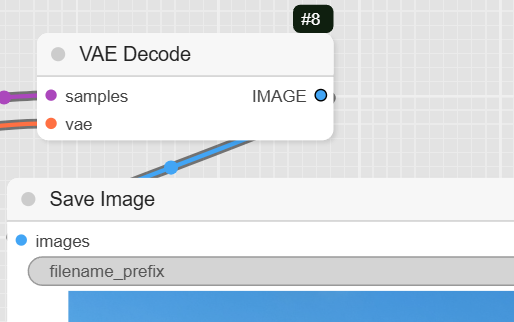
Step 4: Sample and Decode
This is the final step where the image is generated.
- DifferentialDiffusion: This node prepares the model for the inpainting task.
- FluxGuidance: This node takes the conditioning from your positive prompt and applies guidance. The example workflow sets the guidance to 30.
- InpaintModelConditioning: This is the key inpainting node. It takes your positive and negative prompts, the resized image, and the mask, and prepares a new latent image for the sampler.
- KSampler: This is the main diffusion sampler. It uses the prepared data to generate the new latent image. The example has steps set to 36 and cfg to 1.
- VAEDecode: This node converts the latent image back into a viewable image.
- SaveImage: The final node saves the completed image to your computer.
Alternative: Kontext inpaint
Kontext allows to impaint with a specific node : Kontext Inpainting Conditioning. Results are for now a bit under what can be expected.
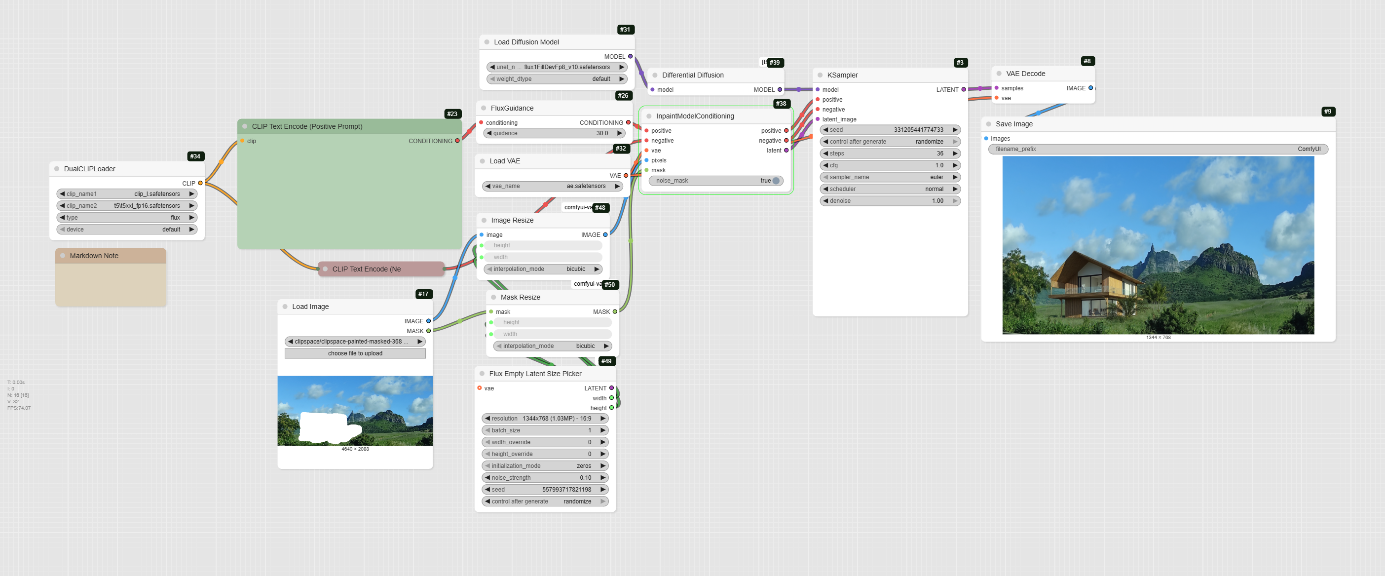
Inpainting with Flux Kontext
This workflow demonstrates how to use the Flux Kontext model to fill a masked area of an image with new content based on a text prompt.
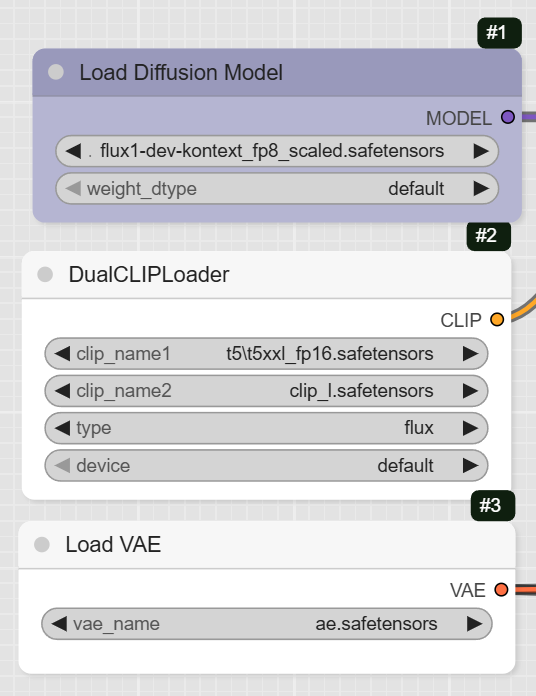
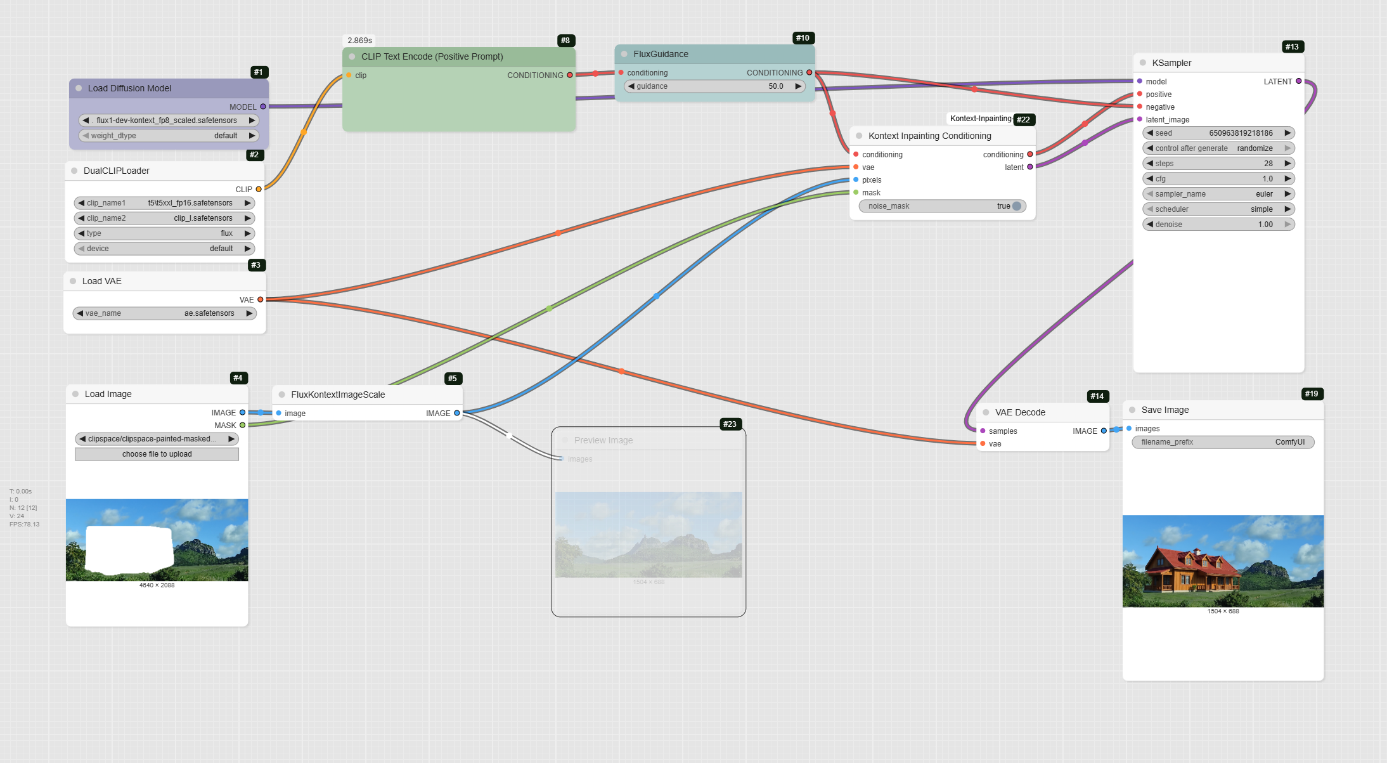
Step 1: Load the Models
The first step is to load the models required for the workflow.
- UNETLoader: This node loads the core diffusion model, flux1-dev-kontext_fp8_scaled.safetensors.
- DualCLIPLoader: This node loads the clip_l.safetensors and t5xxl_fp16.safetensors text encoders, which help interpret your prompts.
- VAELoader: This node loads the ae.safetensors VAE model.
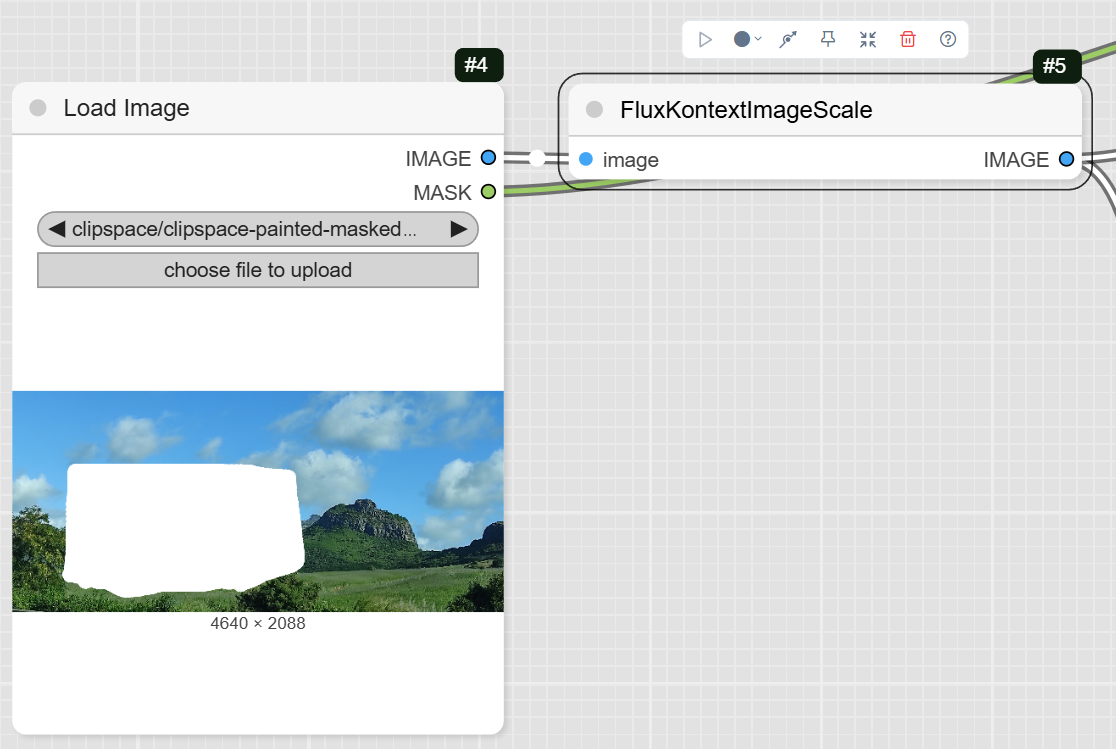
Step 2: Upload Your Image and Mask
This workflow requires an image with a painted mask to define the area for inpainting.
- LoadImage: Use this node to upload your image and its corresponding mask. The node has two outputs: IMAGE for the original picture and MASK for the painted area.
- FluxKontextImageScale: This node scales your original image to the appropriate size for the model before it is passed to the inpainting node.
- PreviewImage: This node allows you to preview the scaled image before it is processed.
Step 3: Define Your Prompts
The prompts tell the AI what content to generate within the masked region.
- CLIPTextEncode (Positive Prompt): This node is where you write the prompt that describes the new content you want to generate. The example prompt is « traditionnal mauritian tropical wooden house with varangue ».
- CLIPTextEncode (Negative Prompt): This optional node is used to specify any elements you want to exclude from the generated image. The example workflow has an empty negative prompt.
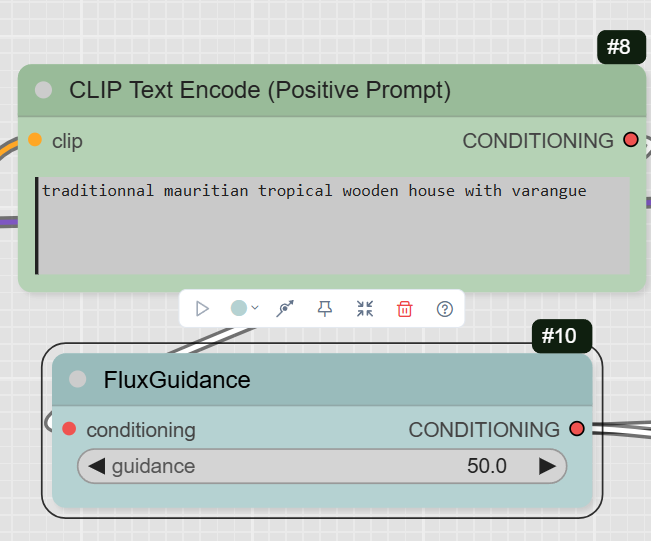
Step 4: Sampling and Decoding
This is the final stage where the inpainting takes place and the result is generated.
- FluxGuidance: This node takes the positive prompt and applies guidance, which controls how much the AI follows your prompt. The example has the guidance set to 50. (to be tested depending on subjects. Base is 2.5)
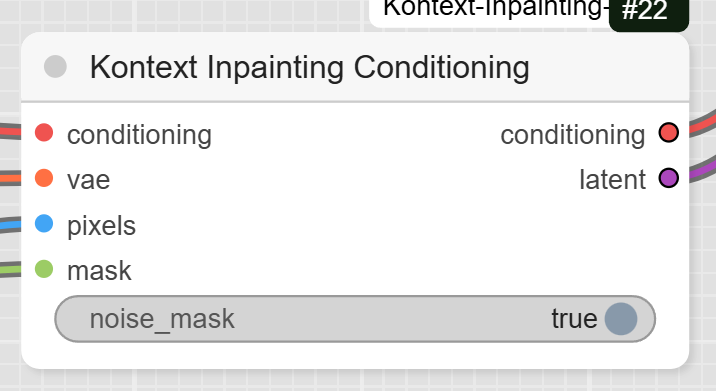
- Kontext Inpainting Conditioning: This is the core inpainting node. It takes your image, mask, VAE, and the conditioned prompt, and prepares the data for the sampler.
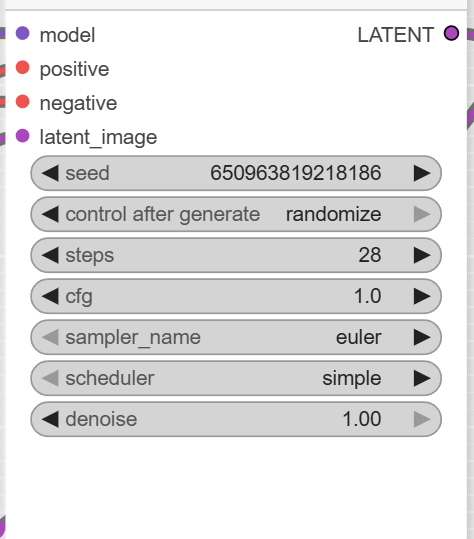
- KSampler: This is the main diffusion sampler that uses the prepared data to fill the masked area. The workflow sets the steps to 28 and the cfg to 1.
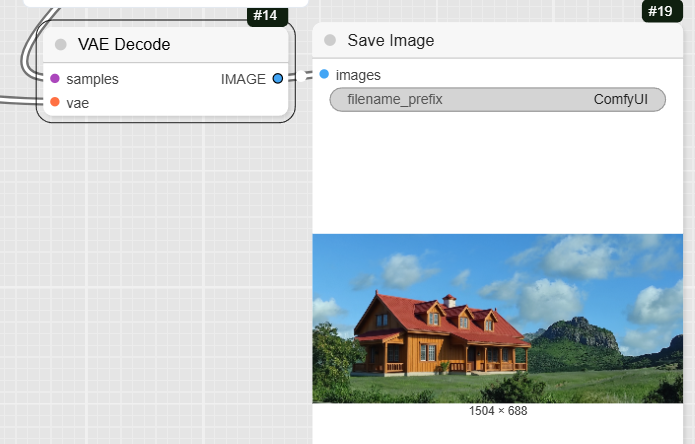
- VAEDecode: After the KSampler is finished, this node converts the final latent image back into a viewable image.
- SaveImage: The final node saves the completed image to your computer.
Pro and con using Kontext inpainting
It works well for small changes.
Pros:
- Contextual Understanding: The model is designed to understand detailed instructions and maintain consistency, which is crucial for seamlessly integrating new content into an existing image.
- High Control: The workflow and prompt techniques emphasize being specific and explicit about what to preserve, giving you precise control over the final result.
- Dedicated Node: The workflow uses a specific Kontext Inpainting Conditioning node, which is optimized for inpainting tasks.
- Iterative Workflow: It supports multi-round editing, allowing you to easily build upon a previous result and explore different creative directions.
Cons:
- High VRAM Requirement: The Flux Kontext model can be very demanding on hardware. The fp8_scaled version requires about 20GB of VRAM, while the original model requires about 32GB.
- Prompt Complexity: The model works best with very specific and detailed prompts, which might be a challenge for users who prefer simpler commands.